Tuesday, March 15, 2011

Sunny Side Up

Last night, I took some of my cuts of meat out of the freezer to prepare for the next few days of meals. I was a little disappointed when I came home tonight to find that none of them had defrosted enough. I really don't like defrosting meat in the microwave because it tends to start cooking as it defrosts, and then it doesn't cook evenly. Instead, I looked to my trusty Breakfast for Dinner option. This time around, I opted for Sunny-Side-Up Eggs on Mustard-Creamed Spinach with Crispy Crumbs. This recipe is from Bon Appetit and while the recipe says it serves 2, it only calls for 2 eggs. I doubled that portion since one fried egg and some spinach is probably not the most substantial dinner - and I set to work!

Mise en place
What we have here:

1/2 cup coarse fresh breadcrumbs
5 teaspoons Dijon mustard, divided
2 teaspoons plus 1 tablespoon olive oil
1/2 teaspoon mustard seeds
1 9-ounce package of fresh spinach leaves
3 tablespoons half-and-half
1 teaspoon chopped fresh thyme
4 large eggs
thyme sprigs

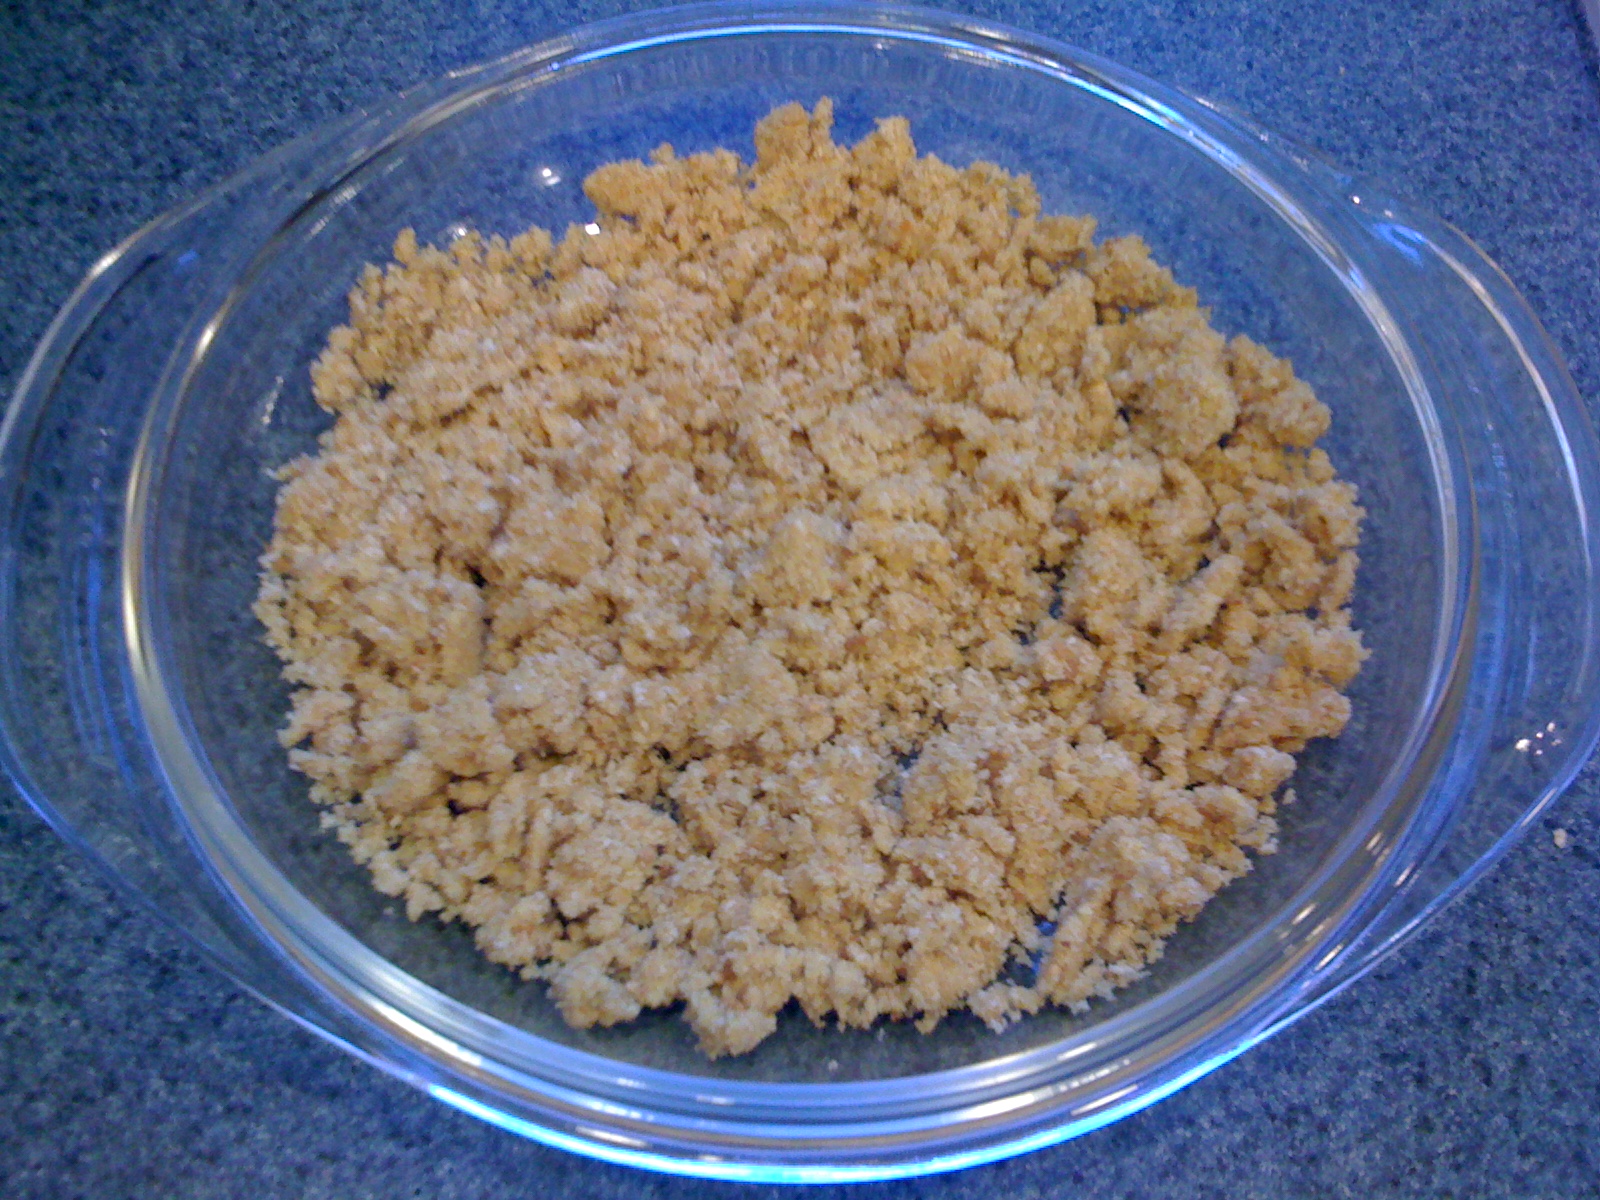
Just like yesterday, I had to go with the dried thyme instead of fresh - I really have NO idea where my thyme went! So the first step here is to preheat the oven to 400 degrees Fahrenheit. While you are waiting for the oven to heat, mix 2 teaspoons of the mustard, 2 teaspoons of the oil and the mustard seeds with the breadcrumbs in a bowl. They will get kinda lumpy and stuck together, at which point, transfer them to a baking sheet. I used a pyrex dish instead because my baking sheets are being bogarted by some seedlings that my husband has started and laid out to get sun in front of our large window. We'll have veggies this summer, but right now, I have no baking sheets. You want to bake this for 6-8 minutes in the oven.


Meanwhile, fill a large, deep skillet with water enough to cover the bottom, and pour in your spinach. Toss the spinach over high heat, for about 2 minutes, or until it all wilts down. It looks like you've got a lot of spinach until you get some heat on it!


See?


Once the spinach is all wilted, you want to transfer it to a sieve set over a bowl, and press out most of the water. Transfer the spinach to a saucepan, and pour in the half-and-half, 3 teaspoons of the mustard, and the thyme. Stir this over medium heat until it thickens and then season it with some black pepper. The recipe says 3 minutes, but it didn't take that long for me...


Once that was done, I put some of my fresh Italian Parmesan Herb bread in the toaster, while I fried my eggs. Heat the remaining oil in the skillet you used for the spinach (wiped down, of course) and once the oil is warm, crack your eggs right into the pot. Fry them until the whites are sturdy and white but the yolk shakes a little...unless of course you don't like runny eggs - you can cover your pan for a minute or two to get the heat through the top of the whites (and the yolks if you want). The steam cooks them evenly without having to flip the egg and risk breaking that yummy yolk!

Still needs a minute or two!
Well, that was easy and quick, huh? I plated the spinach and topped it with 2 of the fried eggs. I then sprinkled the breadcrumb concoction on top and served with a side of Parmesan Herb toast!
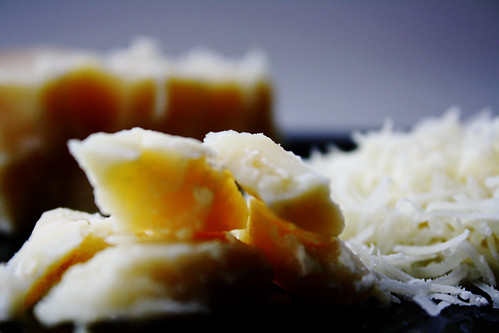
My yolk broke!
It all paired together nicely and it made for a comforting Tuesday night dinner. I still haven't caught up with that hour of sleep we lost this weekend I think, because I'm exhausted! Thank goodness for quick meals! :)

Monday, March 14, 2011

A Little Birdie Told Me...

Tonight, my quails are defrosted and ready to go, so it's time to make Quail with a Spiced Honey Dressing, from Gordon Ramsay's In The Heat of the Kitchen. We're going to use an interesting poached-grilled technique in this recipe, which I've never tried before! The quails will be served on a bed of sauteed potatoes and arugula leaves. I'm looking forward to this!

First thing to do is our mise en place:


The quails are trussed with toothpicks through their legs, to secure them for cooking...ya know, so they don't flail around in there! :) Now, my first step is to get 4 cups of chicken broth boiling with a few thyme sprigs thrown in. I seem to have used all of my fresh thyme, so I threw in some dried stuff instead...it's not ideal, but it works in this case.

It'd look prettier if I had those fresh thyme sprigs!
While I was waiting for the broth to boil, I put some sliced potatoes in a cast iron pan, with some olive oil as well as some salt and pepper. It takes some time to saute potatoes until browned so it's best to start them right away. This recipe doesn't take very long, so putting the potatoes on was one of my first priorities.


Once the broth was boiling, I added the trussed quails to the pot. You only want to cook them for a couple of minutes once the broth is simmering again. After that couple of minutes was up, I pulled them out of the pot with some tongs and patted them dry with some paper towels.


Now that the poaching part of the process is done, it's time to grill them! I put some cooking spray all over a grill pan and placed it on the heat to get warm. While it was heating up, I stuffed each quail with a rosemary sprig and some strips of sliced lime zest. I seasoned each quail with salt and pepper and brushed them with some olive oil.

Now, that's a compromising position!
Meanwhile, I've whisked together a sauce of honey, soy sauce, coarse grain mustard, dijon mustard (I replaced the Dijon mustard with a delicious Champagne Shallot Mustard from Stonewall Kitchen) and roasted sesame oil. I placed the stuffed, poached quails in the grill pan and proceeded to turn them quite often for the next 10 minutes (I think I could have done with a minute or two less, to be honest).


Once the quails were done grilling, I transferred them to a dish. I poured my sauce over and tossed them in the dressing until they were nicely coated. At this point, I let them marinate for about 5 minutes.


After that 5 minutes was up, I plated the potatoes and sprinkled some arugula leaves on top. They started to wilt with the heat of the potatoes, and I used a pair of tongs to place the quails on top. I then drizzled some of the extra sauce on top! Check that out!


All in all, that's about 20 minute of hands-on cooking time. Not bad for a weeknight meal!

Sunday, March 13, 2011

A Day Full of Homemade Goodness

Today, I spent quite a bit of time in my kitchen. After "springing forward" in time this morning, I decided it would also be a good idea to start some spring-cleaning, and the kitchen and the bathroom are always the most time-consuming, so I try and attack them first. I did the bathroom yesterday, so today called for a good kitchen-scrubbin'! And scrub I did - it's so sparkly and clean now!

While I was cleaning, I poured the ingredients into my Breadman TR2700 for a loaf of Italian Parmesan Herb bread, too. Multi-tasking at its finest! The loaf came out wonderfully - fluffy, herby and delicious!

After the hours spent in the kitchen during the day today, I had to venture back in to make dinner, and as I looked at the things left on my current menu, I decided to make some gnocchi tonight. The recipe that I'm making, Lemon Gnocchi with Spinach and Peas, actually calls for store-bought gnocchi, which would make this one of the quickest recipes ever, I think...so if you are looking for a quick, week-night meal, this would be it! However, if you've been reading this blog, you'd already have guessed that I don't take the easy way out...so I'm making some fresh gnocchi tonight while my husband is at his hockey game.

First things first, you need to boil about 2 1/2 pounds of potatoes. When you boil potatoes, you want to put them in an empty pot, large enough for the potatoes to lay in a single layer on the bottom, and deep enough that water will be able to cover the potatoes and then some. Once the potatoes are in the pot, then fill it with water, covering the potatoes. Add some salt and stir around a bit. Now you can place the pot on the stove and bring the water to a boil. Once it arrives at a rolling boil, turn the temperature down a little bit, so the water stays at a simmer, and cook the potatoes for 30 - 40 minutes, or until they are easily pierced with a fork.


Once the potatoes are cooked, drain them and peel them while still hot. I use a towel or pot holder to protect my sensitive finger skin from burning! :) Once they are peeled, you'll want to run the potatoes through a ricer immediately. I don't own a ricer...yet...so I decided to use the small-holed side of a grater to get a similar effect. It didn't work as well as I'd hoped, since the potatoes just kind of fell apart in my hands, but I got the majority of the potatoes grated before using a masher to finish the job...and I might have burned off a few fingerprints...not sure though.


You have to allow the potatoes to cool completely before moving on to the next step in the process. Once cooled, sprinkle the potatoes with 1 3/4 cups of all-purpose flour and 2 teaspoons of salt. Top all that with one large beaten egg.


Knead the mixture until it turns into a smooth but not elastic dough. Dust the concoction with flour if it becomes sticky, but don't overwork the dough.


At this point, divide the dough into 8 equal pieces and roll each portion into a rope, about 24-inches long. Cut each rope into 1/2-inch pieces.


As you cut the pieces, roll each little pillow against the tines of a small fork to make ridges and then arrange them on a baking sheet covered in parchment paper and lightly floured.


When you go to cook your homemade gnocchi, bring a pot of salted water to a boil and add a few handfuls at a time. Cook them until they have floated to the top, about 2 - 3 minutes, and transfer them directly to whatever sauce you are using. You can also freeze the gnocchi by placing it in the freezer on baking sheets until firm; then transfer them to freezer bags and freeze for up to 1 month. Thaw them at room temperature for about 30 minutes before cooking them.


Mmm, this is delicious, and once the gnocchi is made, this recipe takes about 7 minutes, total. If that's not a quick dinner, I don't know what is.

Saturday, March 12, 2011

Bul-Goh-Gi!

This morning, while my husband made us some breakfast, I put together the marinade for our dinner, Lamb Bulgogi with Asian Pear Dipping Sauce, another Korean favorite of ours. Since the lamb needed to marinate for at least 4 hours before cooking, I decided to put everything together before we left the house to enjoy the warmer weather.

Because the only prep work required for this recipe is throwing some ingredients in a bowl, I didn't do a mise en place photo this time around. Please forgive me this indiscretion! :) For the marinade, you'll need:

4 green onions, coarsely chopped
3 tablespoons sugar
3 garlic cloves, coarsely chopped
1 2-inch piece fresh ginger, peeled, cut into thin rounds
2/3 cup soy sauce
2/3 cup mirin (sweet Japanese rice wine)
1/3 cup Asian sesame oil
2 tablespoons toasted sesame seeds
1 teaspoon freshly ground black pepper
1 boned butterflied leg of lamb, trimmed of excess fat (about 5 1/2 pounds)
(I used a leg of lamb that weighed less, since it was only two of us eating)

Now, I know that looks like a lot of ingredients for a marinade but this is pretty simple. Just throw the green onions, sugar, garlic cloves, and ginger into a food processor and blast 'em until finely chopped. You might have to use a spoon or spatula to push down the sides a few times. Once its all chopped up, transfer this mixture to a bowl and add the soy sauce, mirin, sesame oil, sesame seeds and black pepper. Whisk this all together and pour half of it into a container long enough for the lamb to lay flat. Add the lamb to this mixture and flip it around a little bit to coat. Then pour the second half of the marinade over the top. Cover with saran wrap and refrigerate for 4 hours up to one day, which means you can do this one night, let it marinade over night for a week night dinner too!


Okay, so let's fast forward a bunch of hours to dinner-time! I pulled this out of the fridge and got ready to start the rest of the prep work. My husband helped me out tonight by manning the grill outside while I got the rest of dinner together. As he left our apartment for the downstairs patio, I put the sticky rice in my rice cooker, and hit the "cook" button. I then turned my attention to the Asian Pear Dipping Sauce, which proved to be just as easy as the marinade, with almost as many ingredients. You'll need:

1 cup chopped, peeled, cored Asian Pear (about 1/2 large)
2 green onions, chopped
1/2 cup soy sauce
1/2 cup mirin (sweet Japanese rice wine)
3 tablespoons sugar
3 tablespoons Asian sesame oil
2 tablespoons sesame seeds, toasted

For the sauce, add the pear and green onions to a food processor and pulse until it turns into a smooth puree. Once that happens, add the soy sauce, mirin, and sugar, and pulse until the sugar is incorporated. Add the sesame oil and pulse again until the oil blends with the mixture. Once the sauce was finished, I put some Korean appetizers into bowls (marinated, pickled cucumbers and a daikon, carrot slaw - both purchased at H-Mart). I also put some Korean red pepper paste into a bowl.


When I knew that the lamb was almost done, and the rice cooker had clicked to let me know the rice was ready to go, I separated the leaves from a head of butter lettuce (for making little wraps) and cut up some jalapenos and garlic cloves to grill for garnish, along with some green onions. We threw those on the grill in a little basket (I didn't have the skewers called for in the recipe) towards the end of the lamb's cooking. (If you decide to go with the same size lamb leg that the recipe calls for, then cook it for about 20 minutes per side, but if you go for a smaller size, you'll have to experiment. We put it on for 10 minutes each side, and it wasn't cooked through - so we cooked it another 10 minutes...we probably could have gone a few minutes less, for a pinker center)


Once the lamb was done, I sliced it all up, and plated it along with the charred green onions, roasted garlic cloves and grilled jalapeno halves. Each of our plates got a scoop of sticky rice and we were ready to eat!


Now, bulgogi can be eaten any way you would like, but my favorite way, and the way they serve it in Korean BBQ restaurants is as follows: Take a lettuce cup and add a little bit of rice. On top of the rice, put a slice or two of meat and top with some red pepper paste. At this point, you can add some of that garlic, or a jalapeno, or a charred scallion - whatever your little heart desires. Roll it all up like a little Korean taco, dip it in that Asian Pear Dipping Sauce and take a nice big bite! Add some of those Korean appetizers to your plate for a nice side to your bulgogi.


Yummy! :)

Thursday, March 10, 2011

Mumbai Chopstix

There is a wonderful two-week time span, twice a year, which is known to the natives as Boston Restaurant Week. During this magical time, restaurants all over the city, as well as the surrounding suburbs, offer prix fixe menus at a deeply discounted rate. It gives everyone a chance to sample the tasty treats of a restaurant that you might not normally frequent. This could be a cuisine you've never tried before, or an establishment that would usually be beyond your budget. Either way, it's my favorite time of year! I usually try to cram in as many lunches and dinners as I can, with reservations booked weeks in advance. However, this time around, it kind of snuck up on me and I don't have many reservations lined up at all. Yesterday, we made a last minute plan with a few of my husband's co-workers to try an Indian-Chinese fusion restaurant on Newbury Street, called Mumbai Chopstix.


For our appetizer course, we were allowed to choose two from a list of many delicious options. I decided to go with the Indian Street Cart "Tum Yum" soup and Lachew Cauliflower. The soup is an Indian version of a traditionally Asian soup, which included chickpeas and fried noodles. The spices were fantastic and it was a very comforting sort of soup - something I would eat when I was cold and achy and wanted something to warm my insides. It was perfect for this dreary, rainy evening! I don't normally order things with cauliflower but this just sounded so interesting. These fried cauliflower dumplings are seasoned with chili and garlic and they were very reminiscent of a tempura dish you'd find in any Asian restaurant, but that chili flavor really brought the Indian flair out! Other orders that showed up on our table included Drums of Heaven (pictured below), chili paneer and chili fish.


For our entrees, we had a choice of both a main dish, as well as a side noodle dish. The choice was a tough one, but I decided to go with the Ginger Lamb as well as Chili Garlic Noodles. The lamb was stir-fried with green beans in a Mumbai-style ginger sauce. Again here, the spices were so reminiscent of a traditional Indian meal, yet, the stir-fry style brought home the Chinese influences, and made for such an interesting dish. The noodles reminded me very much of lo mein, which I don't normally order when I go to a Chinese restaurant. However, the spices and flavors coating the noodles made it a much more intriguing dish then I would have expected. Those chilis - they do wonders!


I can't wait to eat my leftovers for lunch tomorrow after my yoga class! :) Now, for dessert! I don't usually make it to dessert when dining out, because I love the meal so much, but dessert is part of the deal so I saved some room. We didn't have a choice here, there was only one option...but I'm not complaining. We each received a martini glass full of a chocolate mousse cake with a date pancake. A few strawberries scattered the mousse and it was all garnished with some whipped cream. The date pancake really added a very ethnic touch to an otherwise mundane dessert, and took the dish to another level. I wish there had been more date pancake and less chocolate mousse...because it was a very nice palate cleanser after a beautifully spiced meal!


All in all, I really enjoyed my meal at Mumbai Chopstix. Every step of the way, I was met with interesting combinations of flavors, and they really made my palate think about what it was tasting. I love a meal that makes me think, and the concept of Indian-Chinese fusion is a fantastic one...two of my favorite cuisines, intertwined! I love it when a plan comes together!

Wednesday, March 9, 2011

Now That's-a Spicy Italian Sauce!

A while back, I wrote a post about The Advantages of a Homemade Bolognese, and when I wrote it, my intent was to intermittently touch on different sauces that you can use in your menu planning for easy and quick meals. For some reason, I had arrabbiata sauce stuck in my head today, so I thought I would share this spicy sauce with you in a post!

RedChiliFlakesFLICKR-02
From Flickr - by AntTree

Traditionally, this sauce is served with penne, as the tubular shape is great for picking up the chunks of tomatoes in the sauce! It's a very simple sauce of only four, sometimes five ingredients. The original version includes garlic, tomatoes, red chili flakes and olive oil. Some people add basil to this mix but the majority of Italian chefs won't do this. When the dish is served, it is usually sprinkled with some parsley, and in my case, Parmigiano Reggiano.

Big Cheese
From Flickr - by kellinasf

The great thing about this sauce is that you have control over how spicy you want it. The red chili flakes are HOT, so if you don't like a ton of spice, use a little bit...and if you love the heat, pile it on! My tip to you is start off slow, and keep tasting your sauce as it simmers! You can always add, but you can never take away!

Tuesday, March 8, 2011

The Art of Patience

Tonight, I needed to use the majority of my basil bunch, since it really only lasts a few days in the fridge. I decided to make the Risotto with Fresh Mozzarella, Grape Tomatoes, and Basil, a recipe that I've made before. I don't duplicate recipes a lot (there's so many out there, why make one more than once!?) but my husband really likes this one, and he specifically requested it for the current menu. Risotto is a great dish because you can do so many things with it. If you have arborio rice and chicken broth, you've got the dish, and anything you throw in to it makes the meal your own!

This specific recipe comes from Cooking Light Magazine. The yield is 6 servings and get this...it's only 378 calories a serving! This really is a very comforting dish, but also has a wonderful freshness to it. And it's simple, really! The only thing you'll need is patience...risotto is a very good exercise in the art of patience. Let's dig into this one and I'll show you what I mean!

First and foremost, of course, is our mise en place. For this meal, you'll need:

3 tablespoons balsamic vinegar
4 1/2 cups fat-free, less-sodium chicken broth
2 tablespoons extra virgin olive oil
2 cups chopped leek
1 1/2 cups Arborio rice or other medium-grain rice
1/3 cup dry white wine
1/4 cup half-and-half
1 teaspoon salt
1/4 teaspoon freshly ground black pepper
1 cup halved grape tomatoes
1/4 cup chopped fresh basil
5 ounces fresh mozzarella cheese, finely diced


It didn't take that long to pull this together since I really only had to cut the leeks, mozzarella, basil and tomatoes. Everything else just called for a bit of measuring. First, I placed the balsamic vinegar in a small saucepan and brought it to a boil over a medium heat. The vinegar needs to simmer and reduce until it's syrupy and thick, about 1 tablespoon in measurement. This should take about 4 minutes. Once it's done, I would pour it out into another bowl so it doesn't just cool and stick to the sides of the pot. I had to heat the syrup in the microwave before serving since it had thickened quite a bit as it cooled. If that happens, that's okay, but it would work just as well to make this the last step, rather than the first.


While the balsamic vinegar was reducing, I also placed my chicken broth in a pot to bring to a simmer. You don't want the broth to boil, but you do want to keep it warm. The reason for the warm broth is that it doesn't shock the rice as you add it to the pot because it's at the same temperature as the pot you are adding it to.


Okay, now for the main event! Heat 1 tablespoon of the olive oil in a large saucepan (or in my case, Dutch oven) over medium-high heat. Once the oil is heated, add the leeks to the pan, and saute them for 3 minutes. Mmm, I love leeks!


Next, I added the rice, and cooked for another 2 minutes, stirring constantly. Then, I stirred in the wine and cooked for an additional minute, waiting for the liquid to be absorbed by the rice. 


And now, here comes the patience. You need to continue stirring throughout this process so don't even think about walking away from the pot! Add a cup of the heated chicken broth to the pot of leeks and rice and stir constantly, allowing the broth to be absorbed by the rice. When the liquid has been absorbed, add another 1/2 cup of the broth at a time, allowing it all to be absorbed before adding more...and don't forget to keep stirring! (If you don't keep stirring, the rice gets stuck to the bottom of the pot, burns, gets clumpy and doesn't cook evenly...have I convinced you now?)


Keep stirring!


Heehee, okay, I know you've got it. Once all of the broth has been absorbed, 1/2 cup at a time, into the rice, it's time to finish it all off. The rice should be tender or very close to it at this point, so pour in the half-and-half, salt and pepper and allow to cook for another 2 minutes.


Remove the risotto from the heat and add the grape tomatoes, basil and mozzarella.


Place about 1 cup of risotto on each shallow bowl or plate and then drizzle with a little olive oil and a little bit of that balsamic vinegar syrup that we made earlier. Yummy!! Check out all that gooey mozzarella goodness and the fresh grape tomatoes, and the flecks of basil! So fresh, so delicious, so comforting!