Showing posts with label potatoes. Show all posts

Sunday, July 17, 2011

My New (Old) Potato Ricer

While we were in Vermont this weekend, we decided to visit the Farmer's Diner for breakfast. This is a great establishment that uses locally sourced ingredients to make delicious meals for its patrons. I love going here when we're in the area, but on top of the delicious food and fresh, local ingredients, they also allowed us to bring Oia (the puppy) on to the patio while we ate!

Farmers Diner
from Flickr - by kaszeta
In the same complex as the diner, there is a huge antique fair that is always full of interesting finds. I love to wander the stalls and see what kinds of fun kitchen oddities I can find! Today was no exception, but they were having an outdoor flea market as well! As I browsed the tables for anything that struck my fancy, I happened upon an old potato ricer. This gadget will usually run you $20 and up, and that is the main reason why I didn't own one. Gnocchi is best made using a potato ricer because of the fineness that can be achieved in the consistency of the cooked potato. Until now, I've just used a fork or a masher to make my gnocchi "dough."

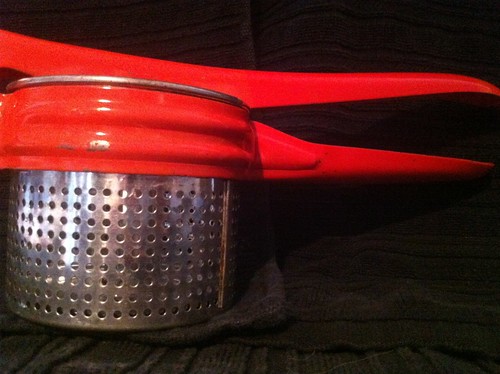
IMG_0825


I couldn't resist the deal I found at the flea market, though. This is an old model of a potato ricer. It's a little clunky, but with the bright red metal handle, and the sturdiness of the gadget, I was really excited to see a price tag of $7. As I approached the gentleman behind the table, I said "Is this an old-school potato ricer? It's fantastic!" His response: "It sure is, $5!" Wow, I didn't even have to argue over the price, he just lowered it for me! I was going to give him $7, but hey...I'm not a girl to pass up a deal, so I pulled out a $5 bill and handed it over...and came home with my brand new (pretty old) potato ricer! It's so cute, isn't it!? While I was at Whole Foods earlier, I also grabbed some potatoes, so be on the lookout later this week for some fresh gnocchi! YUM!

Friday, April 15, 2011

A Stuffed Leg of Lamb

First, let me apologize for not writing last night! I made a delicious meal for some wonderful friends, but we were enjoying each other's company so much that I lost track of time...and before I knew it, it was bedtime! I took pictures as I cooked, and I'm ready to tell you all about it today!

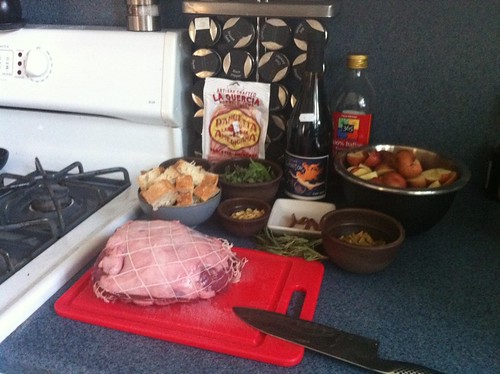
For the last recipe on the current menu, and the last meal of my journey to Jamie's Italy, I made a leg of lamb, stuffed with olives, bread, pinenuts and herbs. I took my time with this since we were planning on eating a bit later in the evening, and I had an adorable little puppy curled around my ankles! :) I gathered some garlic, mixed fresh herbs (parsley, mint, thyme and oregano) pancetta, anchovy fillets, rustic bread, pinenuts, green olives, salt and pepper, a leg of lamb, rosemary, olive oil, potatoes (and some turnips I had in the fridge as well), a sprig of bay leaves and a bottle of pinot noir.

IMG_0518

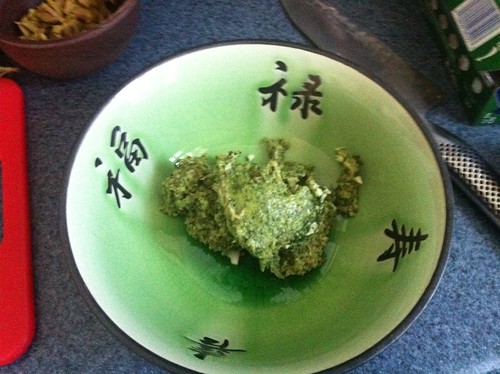
I put a couple of garlic cloves in a food processor to chop them up and then, as they were whirling around in there, I added my mixed greens. Once that was blended, I added pancetta slices and 3 anchovy fillets to the mix. Once that was all blended, I scraped all that into a bowl.

IMG_0519

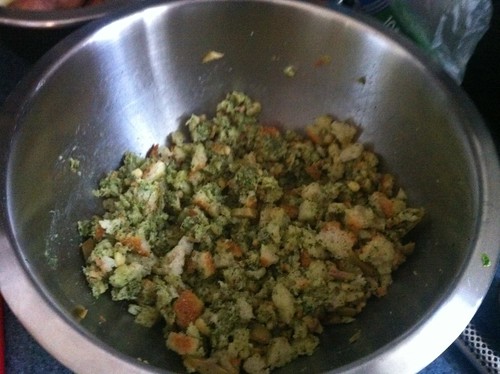
I added my cubes of rustic bread to the food processor next and chopped them until they were breadcrumbs, with some larger chunks mixed in there. I poured that into a bowl with the herb mixture, sliced green olives, and a handful of pinenuts.

IMG_0520

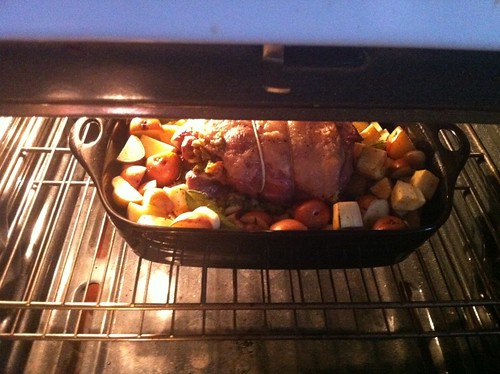
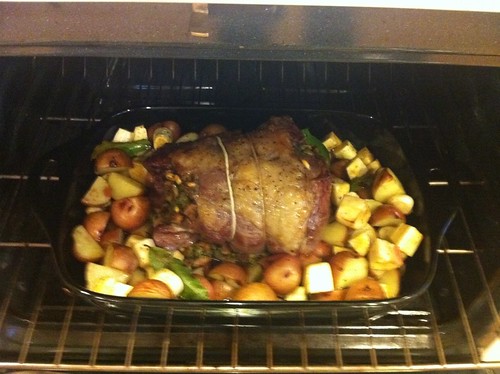
And there we have it folks - the stuffing! Next, I went to preparing the lamb leg. The recipe calls for a cut of lamb that has the H-Bone and thigh bone tunnel-boned removed. I just went to the grocery store and got a boneless leg of lamb instead, and used some kitchen twine to tie the leg together once I stuffed it. I opened up the leg and then rolled it back around the stuffing. I tied it all together and tucked some rosemary sprigs underneath by the stuffing. I rubbed the outside of the lamb with olive oil, and some salt and pepper. I also tossed some quartered potatoes, and turnips with olive oil, salt, pepper, bay leaves and the rest of the garlic cloves. Once the potatoes and turnips were in the roasting pan, I pushed them to the sides to make room in the center for the lamb, and placed it in a 400 degree oven for an hour and a half.

IMG_0522

According to Jamie, Italians do not eat their lamb rare or pink in the middle like we do, so this will be cooked through, but I promise it is delicious! About a half an hour into the cooking time, douse the dish with a good couple of glugs of red wine. You'll want to do that about every half hour or so, to baste the lamb and add more cooking liquid to the dish.

IMG_0523

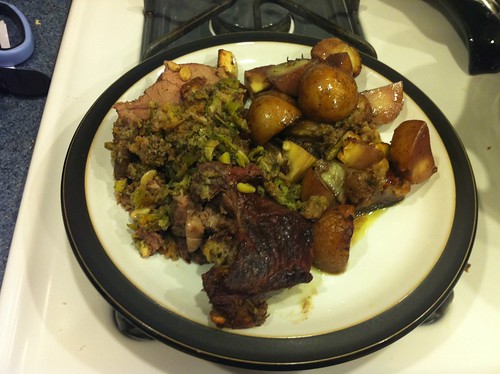
Once the timer went off, I pulled my roasting pan out of the oven and lifted the lamb to a cutting board to rest for 15 minutes. When it was time to plate, I cut off the twine, and then thinly sliced the lamb and stuffing. I spooned out some potatoes and turnips and then placed a couple of slices of the lamb on each plate!

IMG_0524

Pour yourself a glass of the same Pinot you used to baste the lamb and you've got yourself a meal!

Monday, March 14, 2011

A Little Birdie Told Me...

Tonight, my quails are defrosted and ready to go, so it's time to make Quail with a Spiced Honey Dressing, from Gordon Ramsay's In The Heat of the Kitchen. We're going to use an interesting poached-grilled technique in this recipe, which I've never tried before! The quails will be served on a bed of sauteed potatoes and arugula leaves. I'm looking forward to this!

First thing to do is our mise en place:


The quails are trussed with toothpicks through their legs, to secure them for cooking...ya know, so they don't flail around in there! :) Now, my first step is to get 4 cups of chicken broth boiling with a few thyme sprigs thrown in. I seem to have used all of my fresh thyme, so I threw in some dried stuff instead...it's not ideal, but it works in this case.

It'd look prettier if I had those fresh thyme sprigs!
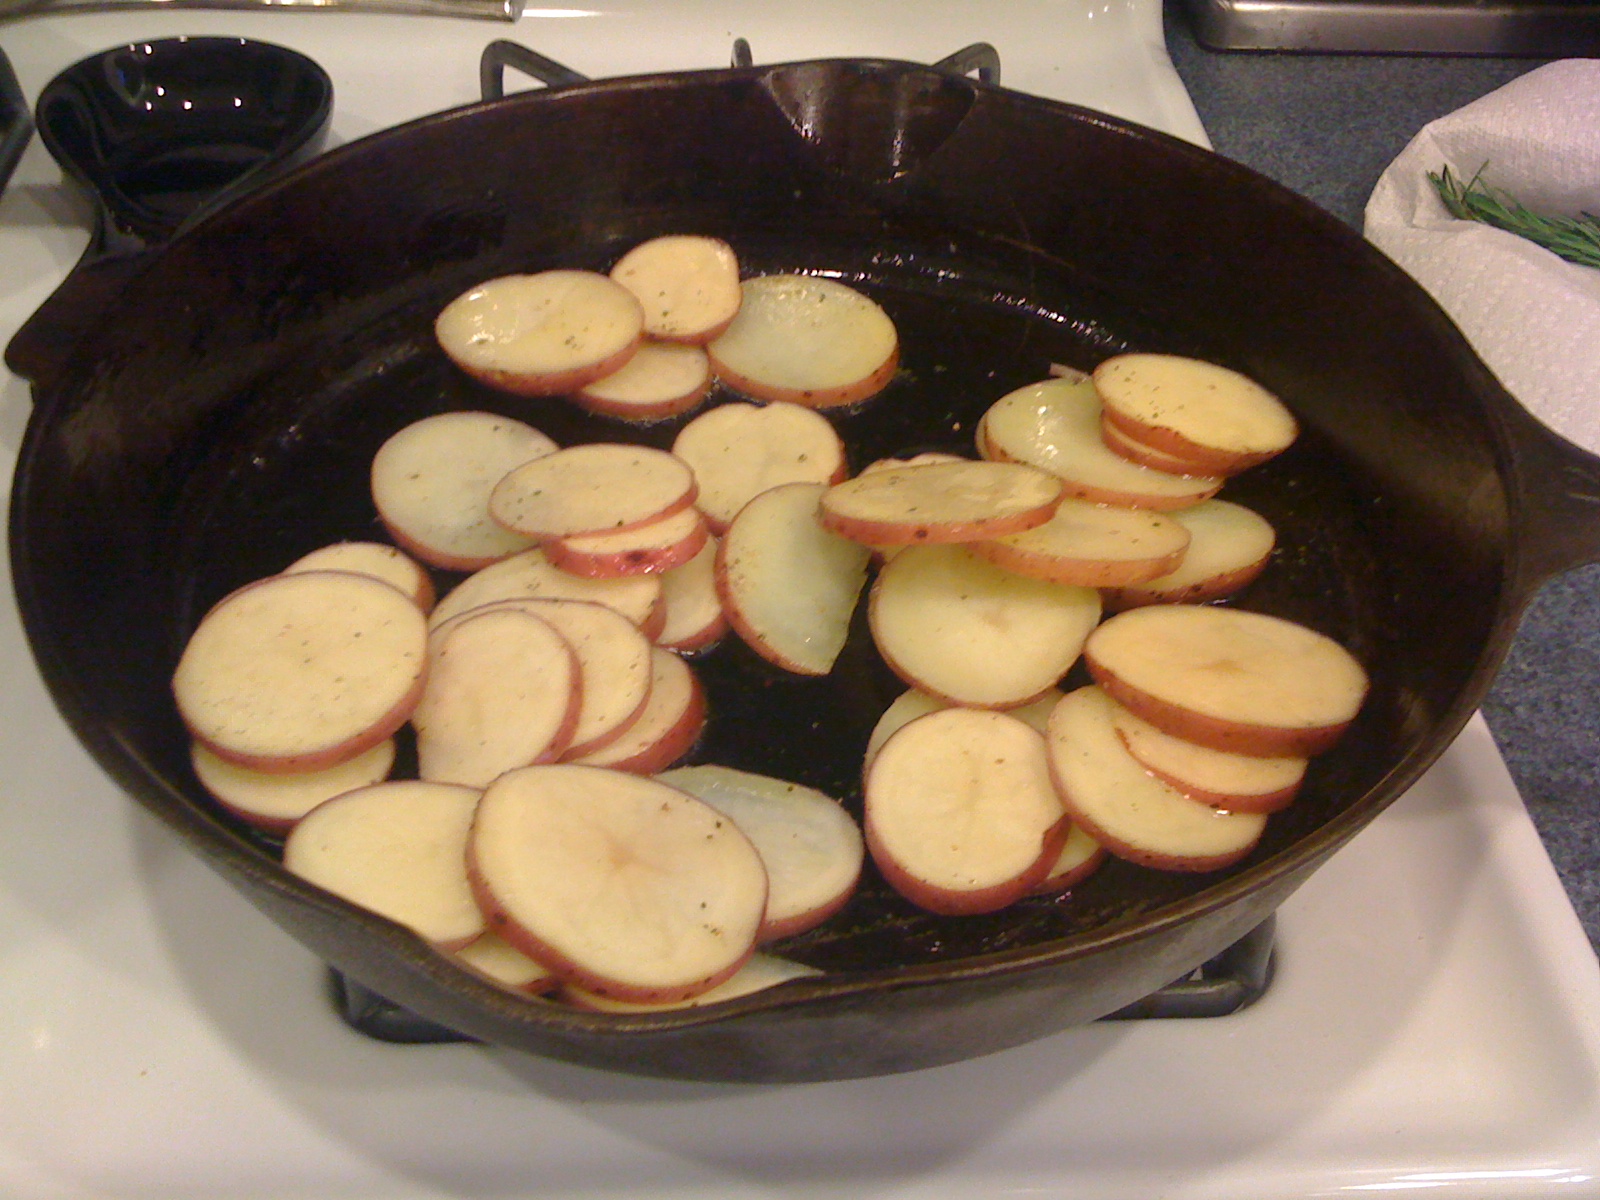
While I was waiting for the broth to boil, I put some sliced potatoes in a cast iron pan, with some olive oil as well as some salt and pepper. It takes some time to saute potatoes until browned so it's best to start them right away. This recipe doesn't take very long, so putting the potatoes on was one of my first priorities.


Once the broth was boiling, I added the trussed quails to the pot. You only want to cook them for a couple of minutes once the broth is simmering again. After that couple of minutes was up, I pulled them out of the pot with some tongs and patted them dry with some paper towels.


Now that the poaching part of the process is done, it's time to grill them! I put some cooking spray all over a grill pan and placed it on the heat to get warm. While it was heating up, I stuffed each quail with a rosemary sprig and some strips of sliced lime zest. I seasoned each quail with salt and pepper and brushed them with some olive oil.

Now, that's a compromising position!
Meanwhile, I've whisked together a sauce of honey, soy sauce, coarse grain mustard, dijon mustard (I replaced the Dijon mustard with a delicious Champagne Shallot Mustard from Stonewall Kitchen) and roasted sesame oil. I placed the stuffed, poached quails in the grill pan and proceeded to turn them quite often for the next 10 minutes (I think I could have done with a minute or two less, to be honest).


Once the quails were done grilling, I transferred them to a dish. I poured my sauce over and tossed them in the dressing until they were nicely coated. At this point, I let them marinate for about 5 minutes.


After that 5 minutes was up, I plated the potatoes and sprinkled some arugula leaves on top. They started to wilt with the heat of the potatoes, and I used a pair of tongs to place the quails on top. I then drizzled some of the extra sauce on top! Check that out!


All in all, that's about 20 minute of hands-on cooking time. Not bad for a weeknight meal!

Sunday, March 13, 2011

A Day Full of Homemade Goodness

Today, I spent quite a bit of time in my kitchen. After "springing forward" in time this morning, I decided it would also be a good idea to start some spring-cleaning, and the kitchen and the bathroom are always the most time-consuming, so I try and attack them first. I did the bathroom yesterday, so today called for a good kitchen-scrubbin'! And scrub I did - it's so sparkly and clean now!

While I was cleaning, I poured the ingredients into my Breadman TR2700 for a loaf of Italian Parmesan Herb bread, too. Multi-tasking at its finest! The loaf came out wonderfully - fluffy, herby and delicious!

After the hours spent in the kitchen during the day today, I had to venture back in to make dinner, and as I looked at the things left on my current menu, I decided to make some gnocchi tonight. The recipe that I'm making, Lemon Gnocchi with Spinach and Peas, actually calls for store-bought gnocchi, which would make this one of the quickest recipes ever, I think...so if you are looking for a quick, week-night meal, this would be it! However, if you've been reading this blog, you'd already have guessed that I don't take the easy way out...so I'm making some fresh gnocchi tonight while my husband is at his hockey game.

First things first, you need to boil about 2 1/2 pounds of potatoes. When you boil potatoes, you want to put them in an empty pot, large enough for the potatoes to lay in a single layer on the bottom, and deep enough that water will be able to cover the potatoes and then some. Once the potatoes are in the pot, then fill it with water, covering the potatoes. Add some salt and stir around a bit. Now you can place the pot on the stove and bring the water to a boil. Once it arrives at a rolling boil, turn the temperature down a little bit, so the water stays at a simmer, and cook the potatoes for 30 - 40 minutes, or until they are easily pierced with a fork.


Once the potatoes are cooked, drain them and peel them while still hot. I use a towel or pot holder to protect my sensitive finger skin from burning! :) Once they are peeled, you'll want to run the potatoes through a ricer immediately. I don't own a ricer...yet...so I decided to use the small-holed side of a grater to get a similar effect. It didn't work as well as I'd hoped, since the potatoes just kind of fell apart in my hands, but I got the majority of the potatoes grated before using a masher to finish the job...and I might have burned off a few fingerprints...not sure though.


You have to allow the potatoes to cool completely before moving on to the next step in the process. Once cooled, sprinkle the potatoes with 1 3/4 cups of all-purpose flour and 2 teaspoons of salt. Top all that with one large beaten egg.


Knead the mixture until it turns into a smooth but not elastic dough. Dust the concoction with flour if it becomes sticky, but don't overwork the dough.


At this point, divide the dough into 8 equal pieces and roll each portion into a rope, about 24-inches long. Cut each rope into 1/2-inch pieces.


As you cut the pieces, roll each little pillow against the tines of a small fork to make ridges and then arrange them on a baking sheet covered in parchment paper and lightly floured.


When you go to cook your homemade gnocchi, bring a pot of salted water to a boil and add a few handfuls at a time. Cook them until they have floated to the top, about 2 - 3 minutes, and transfer them directly to whatever sauce you are using. You can also freeze the gnocchi by placing it in the freezer on baking sheets until firm; then transfer them to freezer bags and freeze for up to 1 month. Thaw them at room temperature for about 30 minutes before cooking them.


Mmm, this is delicious, and once the gnocchi is made, this recipe takes about 7 minutes, total. If that's not a quick dinner, I don't know what is.