Showing posts with label lamb. Show all posts

Wednesday, October 19, 2011

An Impatient Evening

Let me tell you a story about what happens when a girl takes on too much on a Tuesday night! I came home from work yesterday and immediately left again for the local Whole Foods. With my list in hand, I entered the store and began to collect my items. Along the way, I ran into a friend, had trouble finding an ingredient, and got side-tracked by the Ben and Jerry's in the freezer aisle. Needless to say, I got home later than expected.

I knew the lamb was going to take awhile to cook...but I took the time to read all three recipes listed for this meal anyway. This meal comes from Heart of the Artichoke and Other Kitchen Journeys. The "appetizer" of Savory Baked Eggs in Filo dish looks amazing, but unfortunately, my filo dough was fresh from the freezer section of the grocery store, so there was no way it would thaw in time to use it appropriately! Maybe I can make it for breakfast this weekend or something!


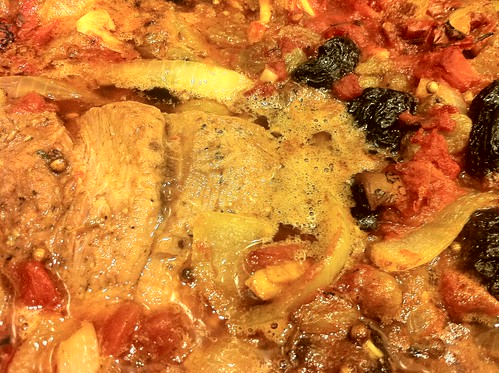
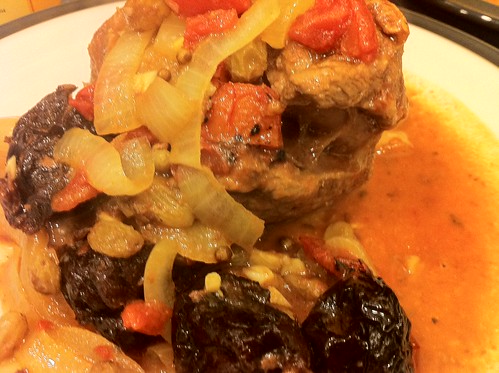
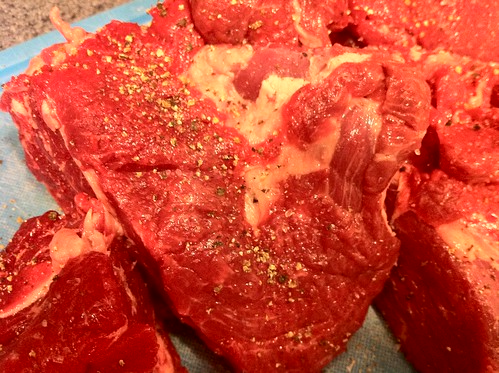
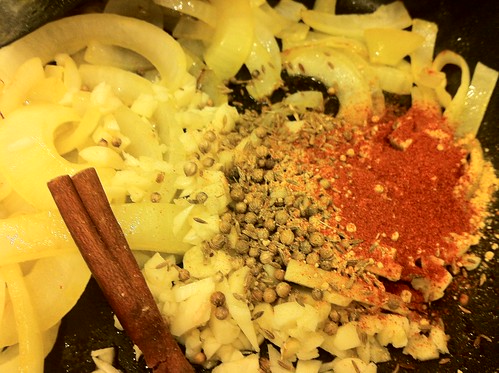
Moving on to the main course of Fragrant Lamb with Prunes and Almonds, I prepped my lamb according to the instructions. I added some thickly sliced onion to a pan with some butter and saffron, and allowed it to stew for the next five minutes. While that was cooking, I gathered the spices that would be added to the pan next! A cinnamon stick, some coriander and cumin seeds, chopped garlic, slivered fresh ginger, some powdered ginger, and a bunch of cayenne pepper! After all of that was incorporated into the onions, I threw some golden raisins and pitted prunes into the mix. I placed the lamb in an oven-safe dish and covered it with the onion mixture. I finally added a cup of tomato puree and poured a bunch of chicken broth on top, covering everything in the pan with the liquid. 


Into the oven it went. Covered with foil...but for how long? I used half the amount of meat so I cut the time in half, assuming that an hour would be long enough. Nope, it wasn't! I upped the temperature from 325 to 350 and gave it another 15 minutes. Was it done yet? Nope...my husband and I were both getting impatient! It was now 8pm, and we were hungry! I raised the temperature by another 25 degrees and gave it another 15 minutes, leaving it uncovered this time, to get a nice browning on the meat. Ok, now we're getting somewhere.


I could have probably let this dish cook for another 1/2 hour, allowing it to reach the fork-tender consistency that the recipe boasts, but the lamb was cooked through, and it already tasted really good (or was I just THAT hungry?). Instead, I removed it from the oven and distributed it to plates for serving. It was a spicy, homey, rustic stew and it was delicious! We may have had to use a knife to cut our lamb, but the heartiness of this dish shone through. I definitely got a feel for the Moroccan cuisine that this recipe was styled after! (I forgot the almond garnish too...eek!)


While we were waiting impatiently for our meal to be completed, I could have focused my energy on the dessert: Blood Oranges and Pomegranate in Orange Flower Water, but the store had no blood oranges. I contemplated replacing the ingredient with regular oranges but the flavor profiles of these two fruits are different, and I didn't think it would make the same impact using plain, old navel oranges. Instead, we finished our meal with ice cream, and that was just fine by us!
Friday, April 15, 2011

A Stuffed Leg of Lamb

First, let me apologize for not writing last night! I made a delicious meal for some wonderful friends, but we were enjoying each other's company so much that I lost track of time...and before I knew it, it was bedtime! I took pictures as I cooked, and I'm ready to tell you all about it today!

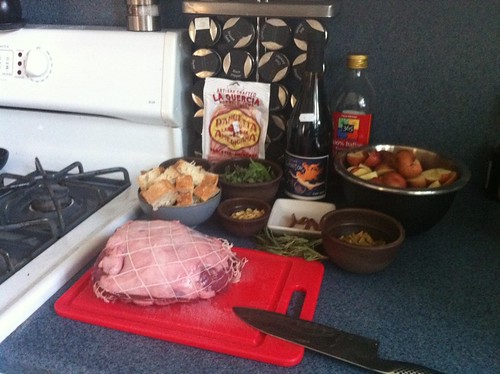
For the last recipe on the current menu, and the last meal of my journey to Jamie's Italy, I made a leg of lamb, stuffed with olives, bread, pinenuts and herbs. I took my time with this since we were planning on eating a bit later in the evening, and I had an adorable little puppy curled around my ankles! :) I gathered some garlic, mixed fresh herbs (parsley, mint, thyme and oregano) pancetta, anchovy fillets, rustic bread, pinenuts, green olives, salt and pepper, a leg of lamb, rosemary, olive oil, potatoes (and some turnips I had in the fridge as well), a sprig of bay leaves and a bottle of pinot noir.

IMG_0518

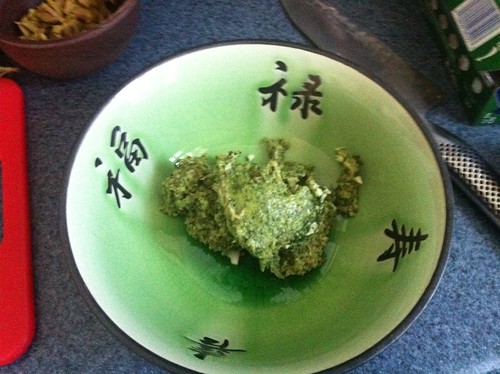
I put a couple of garlic cloves in a food processor to chop them up and then, as they were whirling around in there, I added my mixed greens. Once that was blended, I added pancetta slices and 3 anchovy fillets to the mix. Once that was all blended, I scraped all that into a bowl.

IMG_0519

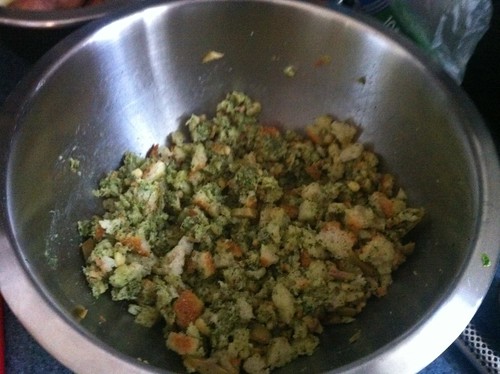
I added my cubes of rustic bread to the food processor next and chopped them until they were breadcrumbs, with some larger chunks mixed in there. I poured that into a bowl with the herb mixture, sliced green olives, and a handful of pinenuts.

IMG_0520

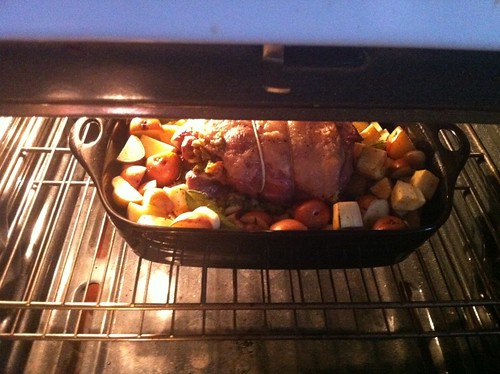
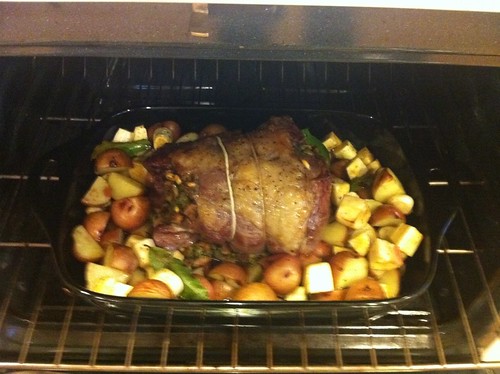
And there we have it folks - the stuffing! Next, I went to preparing the lamb leg. The recipe calls for a cut of lamb that has the H-Bone and thigh bone tunnel-boned removed. I just went to the grocery store and got a boneless leg of lamb instead, and used some kitchen twine to tie the leg together once I stuffed it. I opened up the leg and then rolled it back around the stuffing. I tied it all together and tucked some rosemary sprigs underneath by the stuffing. I rubbed the outside of the lamb with olive oil, and some salt and pepper. I also tossed some quartered potatoes, and turnips with olive oil, salt, pepper, bay leaves and the rest of the garlic cloves. Once the potatoes and turnips were in the roasting pan, I pushed them to the sides to make room in the center for the lamb, and placed it in a 400 degree oven for an hour and a half.

IMG_0522

According to Jamie, Italians do not eat their lamb rare or pink in the middle like we do, so this will be cooked through, but I promise it is delicious! About a half an hour into the cooking time, douse the dish with a good couple of glugs of red wine. You'll want to do that about every half hour or so, to baste the lamb and add more cooking liquid to the dish.

IMG_0523

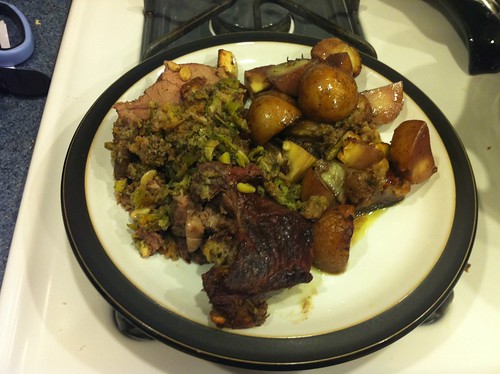
Once the timer went off, I pulled my roasting pan out of the oven and lifted the lamb to a cutting board to rest for 15 minutes. When it was time to plate, I cut off the twine, and then thinly sliced the lamb and stuffing. I spooned out some potatoes and turnips and then placed a couple of slices of the lamb on each plate!

IMG_0524

Pour yourself a glass of the same Pinot you used to baste the lamb and you've got yourself a meal!

Saturday, March 12, 2011

Bul-Goh-Gi!

This morning, while my husband made us some breakfast, I put together the marinade for our dinner, Lamb Bulgogi with Asian Pear Dipping Sauce, another Korean favorite of ours. Since the lamb needed to marinate for at least 4 hours before cooking, I decided to put everything together before we left the house to enjoy the warmer weather.

Because the only prep work required for this recipe is throwing some ingredients in a bowl, I didn't do a mise en place photo this time around. Please forgive me this indiscretion! :) For the marinade, you'll need:

4 green onions, coarsely chopped
3 tablespoons sugar
3 garlic cloves, coarsely chopped
1 2-inch piece fresh ginger, peeled, cut into thin rounds
2/3 cup soy sauce
2/3 cup mirin (sweet Japanese rice wine)
1/3 cup Asian sesame oil
2 tablespoons toasted sesame seeds
1 teaspoon freshly ground black pepper
1 boned butterflied leg of lamb, trimmed of excess fat (about 5 1/2 pounds)
(I used a leg of lamb that weighed less, since it was only two of us eating)

Now, I know that looks like a lot of ingredients for a marinade but this is pretty simple. Just throw the green onions, sugar, garlic cloves, and ginger into a food processor and blast 'em until finely chopped. You might have to use a spoon or spatula to push down the sides a few times. Once its all chopped up, transfer this mixture to a bowl and add the soy sauce, mirin, sesame oil, sesame seeds and black pepper. Whisk this all together and pour half of it into a container long enough for the lamb to lay flat. Add the lamb to this mixture and flip it around a little bit to coat. Then pour the second half of the marinade over the top. Cover with saran wrap and refrigerate for 4 hours up to one day, which means you can do this one night, let it marinade over night for a week night dinner too!


Okay, so let's fast forward a bunch of hours to dinner-time! I pulled this out of the fridge and got ready to start the rest of the prep work. My husband helped me out tonight by manning the grill outside while I got the rest of dinner together. As he left our apartment for the downstairs patio, I put the sticky rice in my rice cooker, and hit the "cook" button. I then turned my attention to the Asian Pear Dipping Sauce, which proved to be just as easy as the marinade, with almost as many ingredients. You'll need:

1 cup chopped, peeled, cored Asian Pear (about 1/2 large)
2 green onions, chopped
1/2 cup soy sauce
1/2 cup mirin (sweet Japanese rice wine)
3 tablespoons sugar
3 tablespoons Asian sesame oil
2 tablespoons sesame seeds, toasted

For the sauce, add the pear and green onions to a food processor and pulse until it turns into a smooth puree. Once that happens, add the soy sauce, mirin, and sugar, and pulse until the sugar is incorporated. Add the sesame oil and pulse again until the oil blends with the mixture. Once the sauce was finished, I put some Korean appetizers into bowls (marinated, pickled cucumbers and a daikon, carrot slaw - both purchased at H-Mart). I also put some Korean red pepper paste into a bowl.


When I knew that the lamb was almost done, and the rice cooker had clicked to let me know the rice was ready to go, I separated the leaves from a head of butter lettuce (for making little wraps) and cut up some jalapenos and garlic cloves to grill for garnish, along with some green onions. We threw those on the grill in a little basket (I didn't have the skewers called for in the recipe) towards the end of the lamb's cooking. (If you decide to go with the same size lamb leg that the recipe calls for, then cook it for about 20 minutes per side, but if you go for a smaller size, you'll have to experiment. We put it on for 10 minutes each side, and it wasn't cooked through - so we cooked it another 10 minutes...we probably could have gone a few minutes less, for a pinker center)


Once the lamb was done, I sliced it all up, and plated it along with the charred green onions, roasted garlic cloves and grilled jalapeno halves. Each of our plates got a scoop of sticky rice and we were ready to eat!


Now, bulgogi can be eaten any way you would like, but my favorite way, and the way they serve it in Korean BBQ restaurants is as follows: Take a lettuce cup and add a little bit of rice. On top of the rice, put a slice or two of meat and top with some red pepper paste. At this point, you can add some of that garlic, or a jalapeno, or a charred scallion - whatever your little heart desires. Roll it all up like a little Korean taco, dip it in that Asian Pear Dipping Sauce and take a nice big bite! Add some of those Korean appetizers to your plate for a nice side to your bulgogi.


Yummy! :)

Thursday, February 17, 2011

Radhika's Kebab Sausage with Tomato Jam

Tonight, I'm making sausages! Well, it's a loosely based version of a sausage, as there's nothing being stuffed into any sort of skin, but still...Quickfire Challenge here I come! (For all you Top Chef fans, you know exactly what I'm talking about, but for everyone else - it's from the Quickfire Cookbook, which includes recipes created during challenges on the show, Top Chef.)

This specific challenge was to create a signature hot dog. Radhika, from Season 5, made these great Kebab Sausages, and here we are, making them ourselves! You can find the recipe here. This recipe also calls for a bunch of accoutrements for the sausages. I'm sure these sausages would be wonderful on a roll, like the recipe describes, but I decided to serve them over a delicious, parsnip puree instead! A little heartier, and more ... dinner-like! :)

The first thing I did was make the sausage mixture. For this, I mixed 1 pound of ground lamb, 1/2 a pound of ground pork, and 1/2 a pound of ground beef with a tablespoon of minced garlic, 2 tablespoons of Tandoori Masala, kosher salt and ground black pepper. Once the mixture was blended, I put half of it into a food processor until it was finely ground. Then I mixed the finely ground portion back into the rest of bowl, and mixed some more. I then formed the mixture into the shape of logs, sort of like bratwurst.


Once that was done, I turned the oven to 350 degrees to preheat while I made the sides. I chopped a red onion into slices, and put them in a pan with a little canola oil to cook down for about 20 minutes. These browned onions sweeten as they cook and make a lovely topping for the sausages. In another bowl, I put a cucumber (peeled, seeded and diced), cilantro, white wine vinegar, capers and a little salt and pepper to taste. I set this aside to macerate for 20 minutes. In a third bowl, I made a tomato jam, which consists of mayonnaise, tomato paste, cumin and a little bit of heavy cream. I only used enough cream to thin the concoction, rather than the amount that the recipe depicts.


I browned the sausages on all sides in a skillet and then added them to a baking sheet I had waiting in the preheated oven, and then cooked them for another 10 minutes.


Once they were done, I plated the parsnip puree and piled two of the kebab sausages on each plate. I served the sides separately, allowing us each to choose our toppings appropriately. Once I added my toppings, I took a picture so you could see the finished product!


Voila! And this just goes to show, you don't even need a special tool to make your own sausages. They tasted a bit meat-loafy when cooked, and the sides were the perfect accompaniment to the flavors in the sausage. I really liked my pairing of the parsnip puree. I think it added something that a sandwich roll couldn't have contributed to the dish!

Wednesday, January 5, 2011

The Menu - The Focal Point of your At-Home Culinary Journey

When it comes to planning my meals, I make a menu, and it comes in handy for numerous reasons. First of all, never again will you ask the question, "What do you want for dinner tonight?," only to be answered by "I don't know." Yea - I know, you ALL know what I'm talking about!

Second, it makes going to the grocery store a helluva lot easier, don't you think? A list of things you'll need to make meals for numerous days in a row - it's a brilliant concept, right? More on that in a later post, I promise!

You can plan a menu by day, or by type of food, or by country of origin, you can do it anyway you like...but here's how I do it: I make a list of different main ingredients and I pick ONE recipe for each of those main ingredients. You can't get bored if you're only eating chicken once every 2 weeks! My categories are as follows: Fish, Shellfish, Chicken, Beef, Pork, Lamb/Veal, Soup/Sandwich, Risotto, Pasta and Breakfast for Dinner. My husband especially likes that last one...

This little tip will help you plan ahead for your meals. You can prep things ahead of time if you know you are going to be home late one night. Marinating something overnight, and then just throwing it in the oven when you get home is the easiest way to get a great, home-cooked meal without all the fuss!

I normally just spell it all out on a piece of paper, which I then check off when I make one of the meals. Sometimes the menu lasts longer than other times, just based on things that come up - did we meet someone out somewhere for dinner? Did we both feel like sushi one night? Did I just SERIOUSLY not feel like cooking - because that happens once and awhile...and that's okay!

Whichever way you plan your menu, I promise you will find that it helps you immensely in the long run. It's much less stress to just know what you have to cook when you get home - and sometimes, even get excited about it! :)

I'd love to hear your feedback - if you try my tips and think they are good...or even if you hate them...leave me a comment and let me know! It will definitely help me figure out what road to take this blog on!