Showing posts with label sticky rice. Show all posts

Monday, December 12, 2011

Part One : Chapter Two : Menus and Recipes (A Lesson Learned)

I haven't been grocery shopping in a long time. I keep finding things to use in both my freezer, and my pantry, but we're really scraping the bottom of the fridge, that's a fact. I think the ravioli dish from the other night used the rest of any ingredients I had left in the fridge, and now we're running on vapors. Last night, I defrosted a package of chicken legs, emptied a bag of sticky rice, and used half a bag of leftover haricots verts to make a really nice Japanese meal of teriyaki chicken (along with the rice and haricots verts).


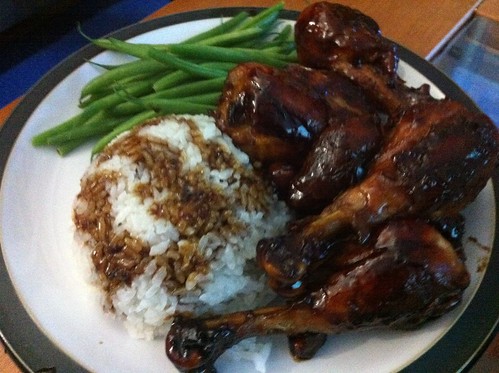
Doesn't that look good!? It really was, and I didn't have to go to the store for a single ingredient! Tonight, I defrosted a couple of steaks. With those steaks (from Omaha Steaks), I received some frozen stuffed loaded baked potatoes. I'm not one to purchase something like that because I'd much rather make it myself, from scratch, but they came with the package, and we had two left, so I threw those in the oven, and also blanched the other half of that bag of haricots verts. Another dinner without a need for a trip to the market!

I took some frozen sauce (of some sort - I really should start labeling) out of the freezer, along with a few chicken breasts for tomorrow's meal, too. I'm determined to use everything, before I go out and buy more. It may be a sort of winter cleaning - I've definitely been on that sort of kick lately. All this using leftovers brings me to today's lesson at "culinary school."


In Menus and Recipes, I expected to learn about planning dishes, and adapting them to a professional kitchen format, and I certainly did learn about that. However, who would have thought the the majority of this chapter would be math equations!? I am not a math person, I've never BEEN a math person, and I never intended to BE a math person, but surprisingly, the equations learned in this chapter actually made a bit of sense to me. I had to read them a few times, and the examples definitely helped, but I think I am starting to understand how a restaurant or catering company can calculate prices based on portions and weights. I won't bore you with every equation I learned (unless of course, you'd like to know more - comment on this post and let me know - I can always write another post) but I would like to talk about one that I found especially interesting.

The calculation for usable trim equation helps determine how much money will be saved and put to use if the trimmings from one mise en place ingredient is used in another place in the kitchen. For instance, when a carrot is peeled, trimmed and diced, there are leftovers - the peelings, any scraps that don't fit the shape and size of the dice needed, etc. Well, is that just thrown out? In my kitchen, until now, most likely. What I didn't think about until now is that these trimmings are valuable product to a restaurant kitchen, and can be used in another place, to save money and time. The trimmings of a carrot can be used in a stock, since all the ingredients used to flavor that stock are strained out before use. What's the difference whether you use scraps of carrots, or a whole new carrot, when no one's going to be eating it anyway. Another example, which can be much pricier than a carrot, is meat. When meat is trimmed in order to get a great cut to serve, what happens to those trimmings? Well, they could be used in place of ground meat in certain situations, and could also be used to flavor a stock.

Example:
$0.106 (As purchased cost of carrots per ounce)
= $0.119 (value of usable carrot trim for soup per ounce)

0.89 (Yield percent for chopped carrots)

I'm determined to apply a version of this idea in my own kitchen. If I peel a carrot, I'm going to save those peelings for stock. Looking ahead in the book, I'm going to be making quite a few stocks and soups in the near future, so it'll be good to start stockpiling. I would like to minimize waste and maximize output, even in a kitchen that only feeds the two of us (and all my friends, most of the time!) When I make menus, I will try to maximize the use of each ingredient that I have to purchase, spreading it among a few different recipes on the same menu. If I can do it in my own kitchen, I can certainly do it in a professional kitchen of my own one day... 

Some day!

Saturday, March 12, 2011

Bul-Goh-Gi!

This morning, while my husband made us some breakfast, I put together the marinade for our dinner, Lamb Bulgogi with Asian Pear Dipping Sauce, another Korean favorite of ours. Since the lamb needed to marinate for at least 4 hours before cooking, I decided to put everything together before we left the house to enjoy the warmer weather.

Because the only prep work required for this recipe is throwing some ingredients in a bowl, I didn't do a mise en place photo this time around. Please forgive me this indiscretion! :) For the marinade, you'll need:

4 green onions, coarsely chopped
3 tablespoons sugar
3 garlic cloves, coarsely chopped
1 2-inch piece fresh ginger, peeled, cut into thin rounds
2/3 cup soy sauce
2/3 cup mirin (sweet Japanese rice wine)
1/3 cup Asian sesame oil
2 tablespoons toasted sesame seeds
1 teaspoon freshly ground black pepper
1 boned butterflied leg of lamb, trimmed of excess fat (about 5 1/2 pounds)
(I used a leg of lamb that weighed less, since it was only two of us eating)

Now, I know that looks like a lot of ingredients for a marinade but this is pretty simple. Just throw the green onions, sugar, garlic cloves, and ginger into a food processor and blast 'em until finely chopped. You might have to use a spoon or spatula to push down the sides a few times. Once its all chopped up, transfer this mixture to a bowl and add the soy sauce, mirin, sesame oil, sesame seeds and black pepper. Whisk this all together and pour half of it into a container long enough for the lamb to lay flat. Add the lamb to this mixture and flip it around a little bit to coat. Then pour the second half of the marinade over the top. Cover with saran wrap and refrigerate for 4 hours up to one day, which means you can do this one night, let it marinade over night for a week night dinner too!


Okay, so let's fast forward a bunch of hours to dinner-time! I pulled this out of the fridge and got ready to start the rest of the prep work. My husband helped me out tonight by manning the grill outside while I got the rest of dinner together. As he left our apartment for the downstairs patio, I put the sticky rice in my rice cooker, and hit the "cook" button. I then turned my attention to the Asian Pear Dipping Sauce, which proved to be just as easy as the marinade, with almost as many ingredients. You'll need:

1 cup chopped, peeled, cored Asian Pear (about 1/2 large)
2 green onions, chopped
1/2 cup soy sauce
1/2 cup mirin (sweet Japanese rice wine)
3 tablespoons sugar
3 tablespoons Asian sesame oil
2 tablespoons sesame seeds, toasted

For the sauce, add the pear and green onions to a food processor and pulse until it turns into a smooth puree. Once that happens, add the soy sauce, mirin, and sugar, and pulse until the sugar is incorporated. Add the sesame oil and pulse again until the oil blends with the mixture. Once the sauce was finished, I put some Korean appetizers into bowls (marinated, pickled cucumbers and a daikon, carrot slaw - both purchased at H-Mart). I also put some Korean red pepper paste into a bowl.


When I knew that the lamb was almost done, and the rice cooker had clicked to let me know the rice was ready to go, I separated the leaves from a head of butter lettuce (for making little wraps) and cut up some jalapenos and garlic cloves to grill for garnish, along with some green onions. We threw those on the grill in a little basket (I didn't have the skewers called for in the recipe) towards the end of the lamb's cooking. (If you decide to go with the same size lamb leg that the recipe calls for, then cook it for about 20 minutes per side, but if you go for a smaller size, you'll have to experiment. We put it on for 10 minutes each side, and it wasn't cooked through - so we cooked it another 10 minutes...we probably could have gone a few minutes less, for a pinker center)


Once the lamb was done, I sliced it all up, and plated it along with the charred green onions, roasted garlic cloves and grilled jalapeno halves. Each of our plates got a scoop of sticky rice and we were ready to eat!


Now, bulgogi can be eaten any way you would like, but my favorite way, and the way they serve it in Korean BBQ restaurants is as follows: Take a lettuce cup and add a little bit of rice. On top of the rice, put a slice or two of meat and top with some red pepper paste. At this point, you can add some of that garlic, or a jalapeno, or a charred scallion - whatever your little heart desires. Roll it all up like a little Korean taco, dip it in that Asian Pear Dipping Sauce and take a nice big bite! Add some of those Korean appetizers to your plate for a nice side to your bulgogi.


Yummy! :)