Showing posts with label parsley. Show all posts

Monday, August 20, 2012

My Go-To Breakfast

Have you ever had guests come to visit, and been at a loss for what to make them for breakfast the next morning? This recipe will bring you out of that slump, I promise you that. It's delicious every time, it's easy, fast, and showcases your culinary expertise, even if you may think it's limited! This is something I found in the back section of my Food Network Favorites: Recipes from Our All-Star Chefs cookbook. I've used this book so much that all the pages have come away from the spine, and I'm about ready to hole-punch the pages and make a binder out of it!

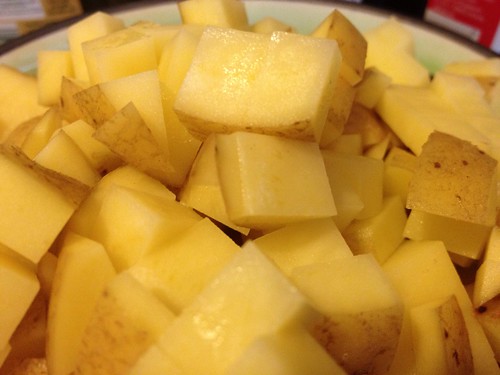
It's called Baked Eggs with Farmhouse Cheddar and Potatoes, it uses a minimal amount of ingredients, and is a one-pot wonder! Less dishes = happy hostess, right? The majority of the prep time is taken up dicing the potatoes into pretty little squares. The recipe calls for red-skinned potatoes, and that makes for a very pretty dish, but I usually use whatever I have on hand, and everyone has potatoes on hand. This time around, I had some Yukon Golds to use up! If the potatoes are larger, I usually do 1 - 1 1/2 potatoes per person, if they are small, then I go with the weight measurement of about 1 1/2 pounds. I was feeding three of us this weekend, so I used about 5 medium-sized potatoes, and I've got a good trick for dicing them into lovely little squares! Cut the potato into thick slices and then split it in half and stack them with flat side down. Now you can cross-cut, horizontally and vertically, making beautiful, mostly symmetrical squares when the pieces fall apart!

Untitled

Once the potatoes are prepped, you can start cooking, and then prep the rest of the ingredients while the potatoes cook. It's best to use a cast iron skillet for this recipe as it gives nice color to the potatoes, and can also transfer to the oven when you're ready to use it. I melted some butter into the pan first, and foremost.

Untitled

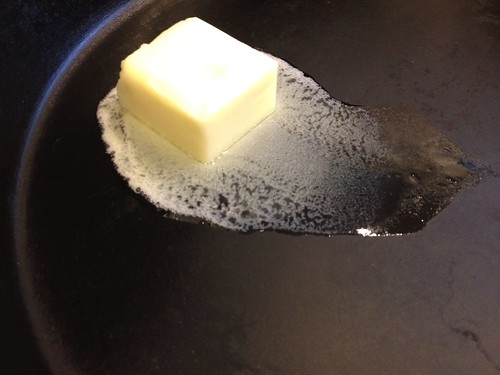
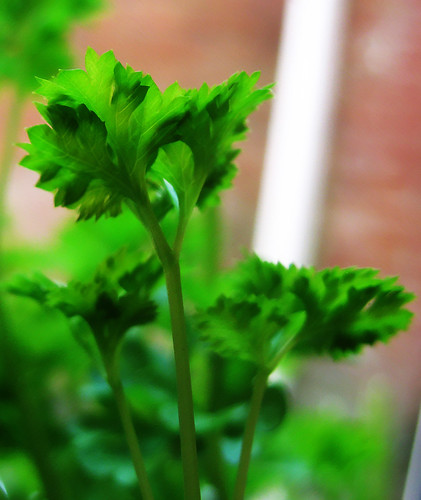
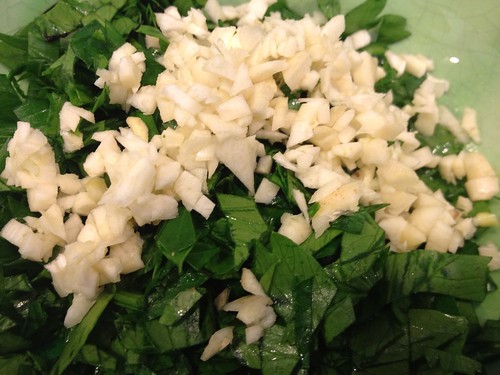
Once the butter had melted, and I had spread it around the pan, I added the potatoes and left them to sizzle and brown, while I turned my attention back to my cutting board, where I had a few more things to chop. I chopped some parsley and a couple of garlic cloves, amidst intermittent potato-stirring. 

Untitled

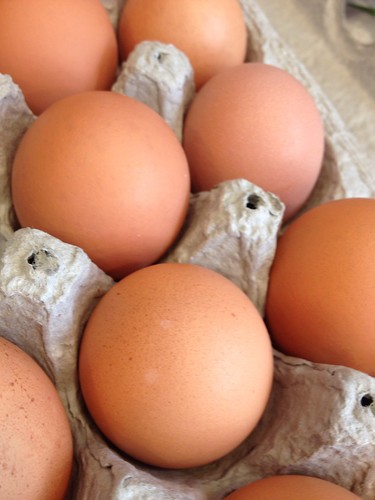
I got the eggs out of the fridge, in preparation for the next stage in the process:

Untitled

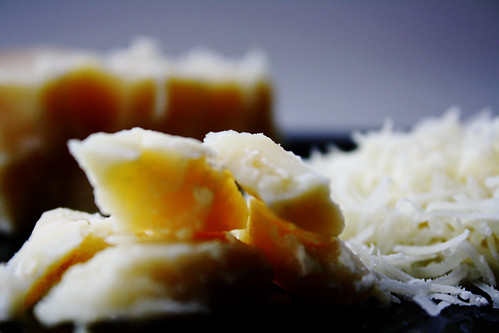
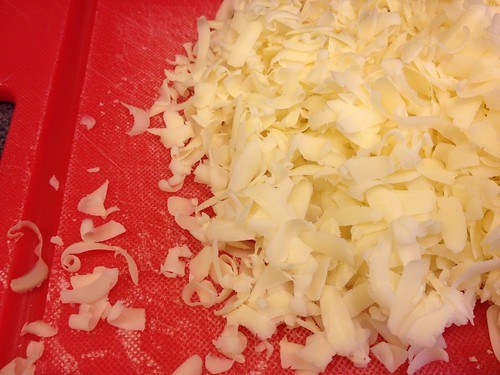
...and shredded some sharp cheddar for the last step in the process.

Untitled

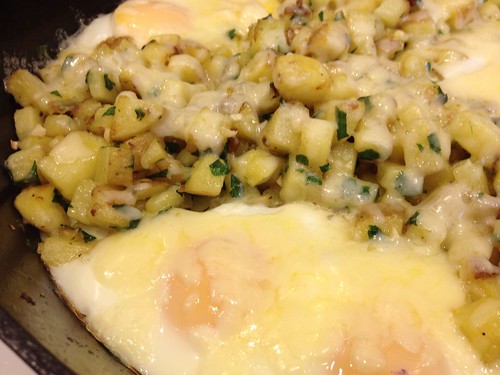
Now, let's check on those potatoes, shall we!? Once they were tender and cooked through, I stirred in the parsley and garlic, along with some salt and pepper and let everything meld together for another minute or two. Now, it's time to make the wells for the eggs. The amount of people you are feeding will determinehow many areas you need to clear. For three people, I made a kind of peace sign out of my cast iron skillet, with the potatoes. If you had four people, you could move things around a bit to accommodate that. More than four people, and I'd say it's time to use two pans. Once you have your wells made, you can break two eggs into each of them.

Untitled

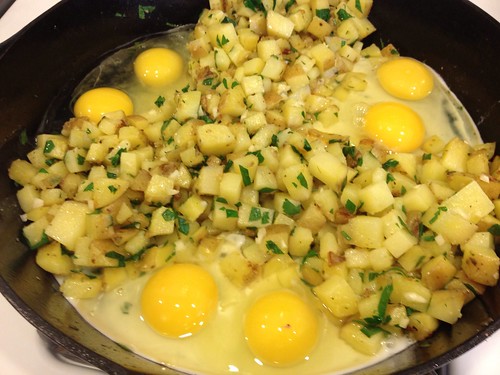
At this point, the whole thing gets to go in the oven to bake! The recipe quotes times but I usually eyeball it, and move on to the next step once the whites of the eggs are stiff. That's the part that NEEDS to be cooked through. This time, I think I left them in a minute too long, and the yolks got a little overdone, but usually, they stay a little runny and ooze out into the potatoes when you cut into the whole thing!

Untitled

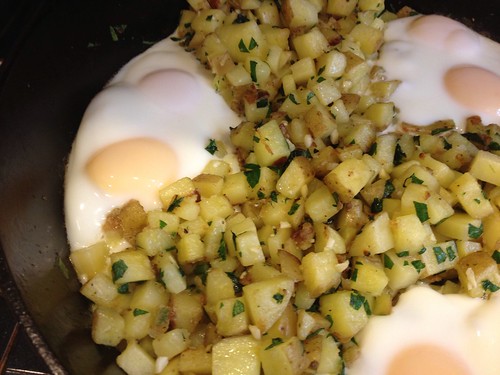
Once the whites are stiff, it's time for that last step! Sprinkle the shredded cheddar all over the top, and stick back in the oven for 2 or 3 minutes, giving it time to get ooey, gooey and cheesy! It's a crowd-pleaser...every time, I guarantee it!

Untitled

Sunday, December 4, 2011

Acorn Squash: 2 down, 7 to go!

IMG_1369

Last night, I used ingredients I had in my pantry and freezer to make a great stuffed acorn squash recipe that I happened upon while browsing the Internet. While it's a Martha Stewart recipe originally, it was reproduced on a blog, called The Bitten Word. I thought I'd give credit to the blog, as I appreciate when readers do for me, but also a nod to Martha, herself! I gathered the ingredients together in the order in which I'd be using them, so first things first: get the squash in the oven. I cut the two squashes in half, cleaned the insides of seeds and gook (yup, gook - that's what I called it!) and also sliced a bit off the bottoms in order to allow them to sit flat in my casserole dish.

IMG_1370

After preheating the oven to 400 degrees, I placed the squashes in a casserole dish, cut side down and allowed them to cook for 35 to 40 minutes. Meanwhile, I gathered the spices that would be used to season the ground beef that I cooked in a dutch oven on the stove. Some cinnamon, some nutmeg and some coarse salt added great Moroccan flavors to the meat.

IMG_1371

IMG_1373

While the beef browned, I minced 4 cloves of garlic, and diced an onion. Once the beef had been cooking for about 7 minutes, and no more pink was visible, I removed it from the pot, reserving as much liquid as possible. The onions were added to the pot for about 7 minutes, allowing them to cook until translucent. During the last 30 seconds, add the garlic and allow it to become fragrant.

IMG_1372

IMG_1374

At this point, I added the Bulgar wheat, and some more coarse salt to the pot, along with 2 cups of water, and brought it all to a boil. Once boiling, I brought the heat down to medium low, covered the pot, and allowed the mixture to simmer for 15 minutes. It should then be removed from the heat and allowed to rest for 5 minutes before fluffing with a fork. While this simmered, I gathered my last three ingredients - pine nuts, parsley, and some currants. The original recipe calls for golden raisins, but as a substitute, I used currants because I had those on hand.

IMG_1375

IMG_1376

Once I had fluffed the Bulgar wheat mixture with a fork, I added the above ingredients along with the ground beef, and some of the squash scooped out of the halves that have been cooking in the oven. Once everything is all mixed together, it's time to fill our acorn squash cups with filling. I scooped a few tablespoons of the mixture into each half, until they were all overflowing with stuffing.

IMG_1377

IMG_1378

After another 15 minutes or so in the oven, the squash should be ready to eat! Look for a bit of browning over the top of the stuffing. Be careful, the center is hotter than the top sometimes but this is a very hearty way to eat squash. It was very tasty. If I did it again, I would rub some nutmeg and cinnamon on the inside of the squash before cooking them, and add a bit more seasoning to the stuffing mixture. It was a bit on the bland side for my palate, but I would love to experiment with some extra spices to give it a bit more bite! The leftovers will make a great lunch for work, though!

IMG_1379

Monday, May 9, 2011

Crabcakes Benedict with Mango Cream Sauce

There are few things my husband likes more than crabcakes, so I thought it would be a special treat to add Crabcakes Benedict to the menu this time around. Crabcakes and Benedict...in the same sentence!? Could it get any better than that?

Yes it can ... because mango cream sauce is delicious!

This was a late night to start cooking because we had to take Oia (the puppy) to the vet for her shots...and breakfast for dinner is usually a quicker process than other recipes so this worked out well. I gathered my mise en place

Mango Cream Sauce:
4 tablespoons unsalted butter
2 tablespoons unbleached all-purpose flour
1 cup heavy cream, warmed to room temperature
1 large mango, peeled, pitted, and diced
1/4 cup finely chopped red bell pepper
1/4 cup minced fresh cilantro (I used parsley because "the man" doesn't like cilantro)
salt and freshly ground black pepper

Crabcakes Benedict:
12 large eggs (I used 6, and made the portions appropriate for two)
12 crabcakes (I made 4, using this recipe: click here.)
One 9-ounce bag corn tortilla chips, finely crushed
Olive oil
Salt and freshly ground black pepper
6 English Muffins (I used 2)
2 tablespoons unsalted butter
Chopped fresh flat-leaf parsley for garnish


IMG_0614

That came together quicker than you'd think. The first thing I did was make the mango cream sauce. In a saucepan, I melted my butter over medium heat. 


IMG_0615

Once the butter has melted completely, whisk in the 2 tablespoons of flour, until the mixture is smooth and fragrant...but does not change color. You don't want it to start browning.


IMG_0616

At this point, add the cream and whisk until the mixture is well combined.

IMG_0617

Add half of the mango, as well as the red pepper, cilantro (or parsley), salt and pepper to taste, and then bring the mixture to a simmer. You want the sauce to become thick, yet smooth. The recipe says to simmer for 8-10 minutes but mine was ready much sooner than that, in fact, I'll go far as saying that it was a little too thick. I'd maybe add a little less flour next time.

IMG_0618

Okay, let's keep the sauce warm while we do the rest of the work. I promise the rest goes pretty quickly. Whisk two eggs in a bowl with a little bit of water, and then brush both sides of each crabcake with the mixture. Coat each cake with the crushed up tortilla chips.

IMG_0619

Heat some oil or butter in a large skillet over medium heat, and once it's heated, add the cakes to the pan. If you decide to make a lot of them, you might need to do this in batches. Because I only made 4 crabcakes, it was fine to do them all at once. Cook them until golden brown on both sides, about 5 minutes per side. I placed them on a paper towel after removing them from the pan to absorb any excess grease that might be sitting on them.

IMG_0620

Once the crabcakes are done, whisk up your eggs (in my case, I used 6) and season them with salt and pepper. Wipe your skillet clean with a paper towel and add some new butter to the pan. Once it's melted, pour in your eggs and scramble them.

IMG_0622

Once all of your working pieces are finished, it's time to plate. Toast your English Muffins and put them on the plate. I gave us each two halves as a serving since it's dinner and not just an appetizer, and I topped each half with a crabcake. Pile some scrambled eggs on top of each crabcake and spoon some of the mango cream sauce on top. Sprinkle each half with the reserved diced mango, as well as some chopped parsley. 

IMG_0623

Dinner fit for the beach! Welcome, Spring, we've been looking forward to your visit!

Monday, March 28, 2011

Buon Appetito!

Tonight, I made some fresh spaghetti for a lovely dish from Jamie's Italy, Spaghetti alla Carbonara di Salsiccia. Well, the recipe calls for linguine...but I wanted to use my pasta press instead of the rollers, so that's what I did! :) This also gives me a perfect opportunity to talk to you about carbonara sauce, since it's one of my favorites! It is an egg-based sauce that usually incorporates Parmigiano or Pecorino cheese, as well as some parsley and some sort of pork product, usually bacon or pancetta. It's totally simple, and is an extremely easy week-night meal. You tack on a bit more time if you make fresh pasta, but you know what I say - it's always worth it to make fresh pasta!

Tonight, I started by making my pasta dough so that it could rest while I got my mise en place together. I set it aside for the necessary 30 minutes.

IMG_0401

This is another recipe with very few ingredients so my mise en place was done very quickly. All you'll need is some extra virgin olive oil, some heavy cream, grated Parmesan, lemon zest, salt and pepper, some chopped parsley, chopped pancetta, 4 Italian sausages and 4 egg yolks.

IMG_0402

While my dough was still resting, I moved on to the first step of the recipe - making the little sausage meatballs. I slit the skin on the sausage and slipped the meat out so that I had a pile of loose sausage meat. I rolled little pieces into meatballs, about the size of large marbles. I picked the perfect surface to work on, huh?

IMG_0403


My dough was ready at this point to start running through my pasta press so I stuffed some in to start pressing while I started the next step. I put some olive oil in a large pan and heated it until the oil was warm. I poured my mini sausage meatballs into the pan and allowed them to fry on all sides until nice and golden.

IMG_0404

Once the sausage was golden on all sides, I poured in my chopped pancetta and allowed the mixture to continue cooking until the pancetta started to become crispy and golden as well.

IMG_0405

Meanwhile, my pasta dough had been fully turned into spaghetti noodles so I put a pot of salted water on to boil. While I was waiting for my "watched pot," I mixed the egg yolks, heavy cream, half of the parmesan, the lemon zest and the parsley together with a whisk. It turns into a lovely bright yellow mixture.

IMG_0406

Once the pasta is finished cooking (8-12 minutes for boxed pasta; 3-4 minutes for fresh pasta), drain it in a colander, reserving just a little bit of the cooking liquid in case you need to thin your sauce a bit. Pour a little olive oil into the bottom of the pot that you cooked the pasta in, and then pour the pasta back in from the colander. At this point, pour the sausage and pancetta mixture into the pasta (try and avoid pouring the grease from the pan in if you can) and then pour the egg mixture on top. Quickly toss your pasta with some tongs so that the carbonara sauce coats all the noodles but doesn't scramble. The heat from the pasta will cook the egg gently so that it turns into a rich, gooey coating for the spaghetti. Be careful to continue tossing until all the noodles are well coated and there is no extra sauce cooking on the bottom of the pan...you'll have scrambled eggs if you're not watching what you are doing!

IMG_0407

Once you've plated the pasta, sprinkle it with some of the leftover grated Parmesan. You can serve with a side salad, or a steamed veggie. Tonight, I chose to use Broccoflower. It just looked so bright and spring-y at the grocery store - I had to buy some!

IMG_0408

That was DE-LISH-OUS!

Wednesday, March 9, 2011

Now That's-a Spicy Italian Sauce!

A while back, I wrote a post about The Advantages of a Homemade Bolognese, and when I wrote it, my intent was to intermittently touch on different sauces that you can use in your menu planning for easy and quick meals. For some reason, I had arrabbiata sauce stuck in my head today, so I thought I would share this spicy sauce with you in a post!

RedChiliFlakesFLICKR-02
From Flickr - by AntTree

Traditionally, this sauce is served with penne, as the tubular shape is great for picking up the chunks of tomatoes in the sauce! It's a very simple sauce of only four, sometimes five ingredients. The original version includes garlic, tomatoes, red chili flakes and olive oil. Some people add basil to this mix but the majority of Italian chefs won't do this. When the dish is served, it is usually sprinkled with some parsley, and in my case, Parmigiano Reggiano.

Big Cheese
From Flickr - by kellinasf

The great thing about this sauce is that you have control over how spicy you want it. The red chili flakes are HOT, so if you don't like a ton of spice, use a little bit...and if you love the heat, pile it on! My tip to you is start off slow, and keep tasting your sauce as it simmers! You can always add, but you can never take away!

Tuesday, February 1, 2011

TOP 5 : Fresh Herbs That Work in Almost Every Situation

There are a lot of herbs and spices out there, and sometimes, it can be overwhelming to look at a recipe and see all sorts of ingredients you don't have, or better yet, haven't heard OF! However, I want to provide you with a list of five fresh herbs that you can save you in a pinch.

Parsley
Parsley

1. Parsley : I buy parsley every time I do a big grocery shopping. It keeps well for a long time in the fridge, it's cheap, and it makes for the best garnish. I chop parsley in copious amounts, and use it generously. Did you know that parsley can also freshen your breath after a meal? That's why you usually find it in large sprigs on a dinner plate! I prefer the flat-leaf variety as it can be more widely used. Parsley can even be made into a pesto (usually made with basil). Check out the recipe for Fettuccine with Walnut-Parsley Pesto.

2. Basil : Basil is a perfect addition to any Italian meal, goes great with tomatoes and mozzarella, as well as sprinkled on top of pasta dishes. It also adds a lovely flavor to marinara sauce. Basil tends to go bad quickly, so if you buy it, use it! However, I've found that I can lengthen the life of basil by buying a plant, keeping it in the window, and watering it generously. The plant will continue to grow, giving you new leaves every so often, and draw out the time between basil purchases. If you find yourself with a large bunch of basil, and no use, make a pesto sauce (with basil, this time) and save it for a quick weekday dinner, tossed with some penne. A great lunch time use for basil is my favorite sandwich : Proscuitto, Mozzarella, Tomato and Basil.

spaghetti alla checca
Mmm...Basil with Tomatoes and Mozzarella

3. Chervil : This one is a bit harder to find, but if I find it, I buy it, and in the summer months, I usually try to grow it in a pot on my windowsill. It's a very light herb that makes for a lovely garnish, and tastes great in salads as well. It is related to parsley, but much lighter in flavor, and plays an integral part in the French herb mixture, fines herbes. A recipe I love, and use all the time, uses many different herbs, mixed with greens, and a maple shallot dressing for an extremely flavorful salad. It can be found in Barbara Lynch's, Stir.

4. Chives : Chives also make for a wonderful garnish, and have quite a bit more bite than the other herbs listed here. As part of the onion family, they add a lovely zest to a dish, and I rarely make scrambled eggs without them. Because this is a year-round herb, it's always readily available, and if you are plating a dish that seems to be missing a pop of color, add chives - you can't go wrong.

Mixed Herb Bouquet
Mixed Herbs

5. Cilantro : Also known as coriander, as well as Chinese parsley, this herb is widely used in many cuisines. It's a very common garnish in asian cuisines, and it also plays a very important role in most salsas, guacamoles, and other Mexican sauces. I know, I'm sure some of you are saying that you don't like cilantro, it tastes like soap, etc...I admit that it is definitely an herb that you either love or hate. After reading an article about the strong feelings that people have towards cilantro, I found this: "Dr. Wysocki contends dislike of cilantro stems from its odor, not its taste. His hypothesis is that those who don't like it are unable to detect chemicals in the leaf that are pleasing to those who like the herb."  Hope that helps to explain your love or hate of this lovely herb!


Well, that's five! I hope that this post shed some light on the many herbs out there. I'll leave you with this: The best way to keep your herbs freshest the longest is to keep the stems in water. I put my herbs in a large vase or bowl, stems in water, covered with a plastic grocery bag. Then, when I need some herbs, I just pluck some off the bunch and put the rest back in the fridge. Another way to do it is to wash your herbs, and wrap them in a damp paper towel. Store them in ziploc bags in the refrigerator.

The snow is piling up out there, and I have a feeling I might have some extra time on my hands to do some cooking tomorrow. When you're stuck in the house, what better way to pass the time then with something you can enjoy when it's finished!

Until tomorrow...