Showing posts with label olive oil. Show all posts

Sunday, December 18, 2011

Healthy and Fresh

I finally got my act together and planned a menu for the upcoming week. It was a necessary evil, as I just found out we'll be having my in-laws in house for Christmas Eve, as well as Christmas Day, so I had to have a plan! While I was at it, I planned out the rest of the week as well. Be sure to click over to the Current Menu tab to check it out. With all the holiday plans and get-togethers, it's been hard to find time to eat a meal at home. I'm looking forward to a whole week's worth of them!

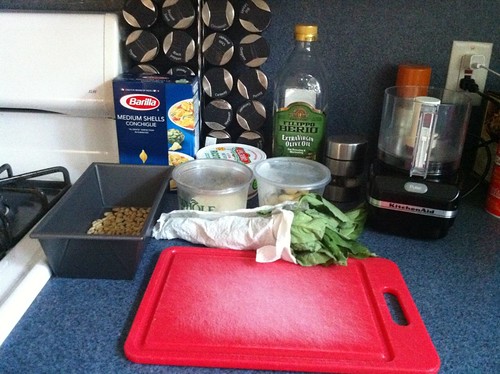
I really wanted something healthy, and full of fresh ingredients for tonight's dinner, but I had some chicken breasts in the fridge that I needed to use, so I built my meal around that. I opened Tender by Nigel Slater, knowing I'd find exactly what I was looking for, and in fact, I did.

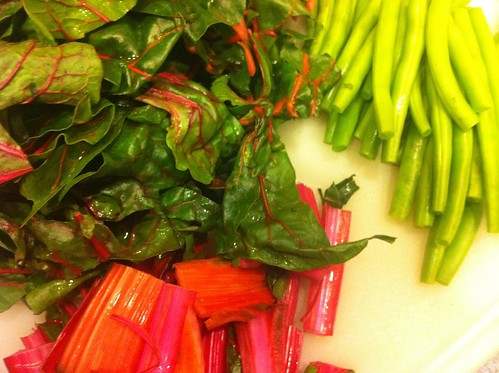
This simple recipe of warm chicken, served over a bed of swiss chard, green beans and tomatoes is as fresh as fresh can be! I didn't open a single jar, or bottle, aside from the olive oil...everything came from the produce department! My first order of business was to get a few pots of water boiling on the stove, and then I set to prepping my ingredients. I purchased rainbow chard, because it's just so pretty, and I separated the leaves from the stems, chopping both in anticipation of cooking. I also trimmed the green beans while the water was beginning to boil.


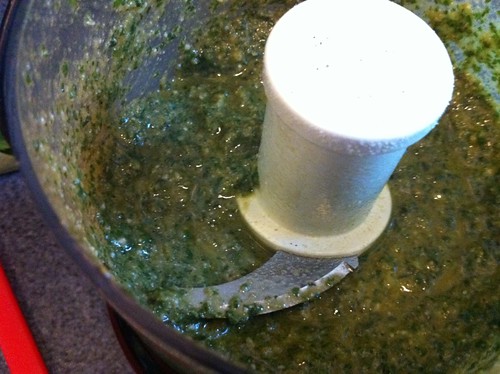
I finely minced a small shallot, and mixed that with some lemon juice, chopped mint, a pinch of salt and olive oil in a container with a top. I shook it all together until it was emulsified, and set it aside to dress the salad.


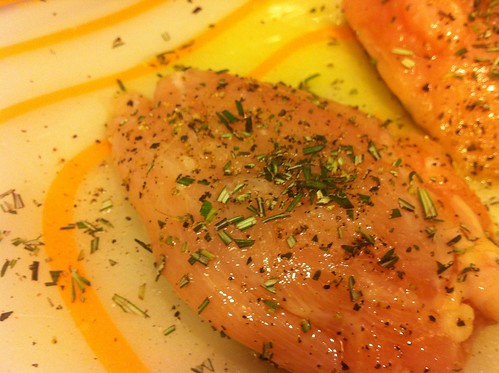
As the water in my two pots began to boil, I heated my grill pan and seasoned my chicken breasts. A little salt, a little pepper, and a little chopped rosemary goes a long way! I cooked the chicken quickly, until both sides were golden with wonderful-looking grill marks, but I left it a bit undercooked. Instead, I placed the meat on a plate, and covered it with a bowl to keep the heat in, allowing it to continue cooking as it rested. 


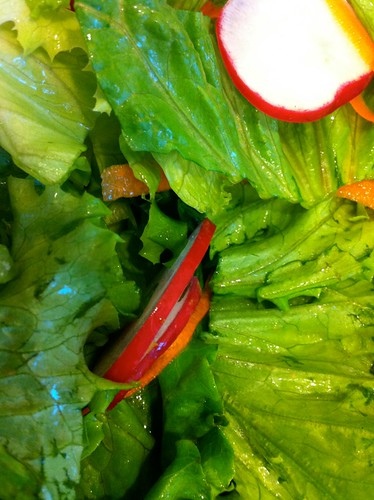
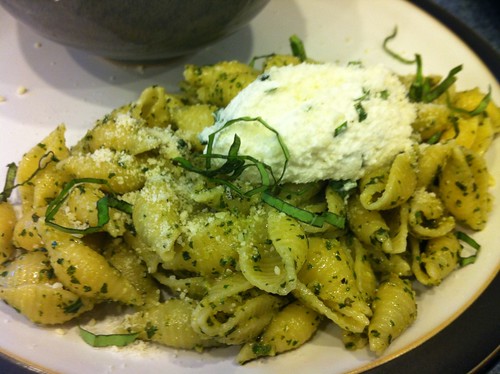
While the chicken rested, I cooked the green beans in one pot, and the chard stems in the other, for about 3 minutes. With 30 seconds left, I added the chard leaves to the pot while I drained the green beans. The beans and the chard (stems and leaves) got tossed in a bowl with the tomatoes, and the dressing I made earlier. At this point, I sliced the chicken breasts into about 4 slices each, and placed them atop the salads, with a bit more dressing. It made for a beautiful plate of healthy, fresh food. Sometimes, it's wonderful to sit down to a summery meal on a cold winter's day, and while I used more wintery vegetables, the resulting dish was bright, light and made me wish for spring!


Now that dinner is done, I can tuck into Chapter 3 of The Professional Chef, and write about that a bit later tonight. 

I also want to remind everyone that there's still time to win a case of Popchips! I've only got one entry so far, and you can't win if you don't enter! Be sure to scroll down to the prior post, entitled Share the Health! and comment in order have a chance at winning! The contest ends on Wednesday night, so be sure to comment ASAP!!

Monday, July 11, 2011

Pesto ... as Promised!

I opted to use the bunch of basil I received in my delivery first, because basil spoils quite quickly, and I didn't want it to go to waste. The best way to use a large amount of basil is to make pesto sauce. What's pesto sauce, you may ask...well, I'm about to show you. It is probably one of the easiest sauces to throw together!

Pesto goes great with any pasta, but I prefer it with a shape that has a larger surface area to catch the sauce. I decided to go with a box of medium shells that I had in my pantry (I told you I was going to start using stuff up!). You'll also need some grated Parmesan, pine nuts, salt and pepper, garlic and olive oil, in addition to the basil. I decided to add some ricotta to the top of my dish, as a garnish, as well, so I saved a few basil leaves to mix in with that as well.

IMG_0802


The first thing that you need to do to prepare your pesto sauce is toast the pine nuts. When I say toast, I mean, get some heat on them...they burn VERY quickly so throw them under the broiler for a minute or two tops, but keep a close eye on them. All you need is a little heat to bring out the flavor of the nut.

IMG_0803


In a food processor, chop up a clove of garlic (or a little less than a clove if you don't want it to be very garlicky) and the pine nuts until they are all chopped up. Add about 3 handfuls of basil and chop it all up. Add the Parmesan and then start pouring olive oil, little bits at a time until you have a thick, chunky consistency.

IMG_0804


While the shells were cooking, I took half a head of lettuce and mixed it with some shaved carrots, sliced radishes, and lemon-tarragon vinaigrette, as a side dish to the pasta. I also mixed a few tablespoons of ricotta with some salt, pepper, and basil ribbons.

IMG_0805


Once the pasta was drained, and put back in the pot, I added the pesto and tossed it all together. Reserve a little bit of the pasta water before draining, in case you need to thin your sauce a bit. In this case, I didn't need to, but depending on the consistency of your pesto, it could be an option for you, and the starchy water is the perfect antidote. I plated the salad alongside the pasta and added a nice quenelle (a dollop shaped with two tablespoons) of ricotta mixture to the top of each plate. I sprinkled it with Parmesan and a few extra basil ribbons. VOILA!

IMG_0806

Tuesday, March 29, 2011

Zuppa's on!

Tonight, I was in the kitchen for quite awhile, but it was well worth it! I made what Jamie Oliver calls "La Mia Ribollita Preferita," his favorite ribollita. This is a Tuscan soup whose name literally means "reboiled." According to Wikipedia, Italians used to make this soup by reheating leftover minestrone soup from a previous meal.

The cannellini beans, which I bought dried, needed to soak in a bowl of water overnight. Before I went to sleep yesterday, I placed my dried beans in a bowl, filled it with water and covered it with some saran wrap. When I got home from work today, the first thing I did was place those beans on the stove in a large pot with some water, a squished tomato, a bay leaf and a small, peeled potato. Dried beans need to cook for about an hour, whereas fresh ones only need about 25 minutes, so I knew I had an hour of simmering ahead of me.

IMG_0409

Then I got my mise en place together!

IMG_0410

While my beans were cooking, I finely chopped 2 red onions, 2 carrots, 3 stalks of celery and 3 garlic cloves. I placed them all in a pot with some olive oil, a pinch of ground fennel seeds and a little bit of dried red chili, and cooked them on a medium heat, for about 20 minutes. I allowed the mire poix to sweat, without browning. Meanwhile, I cubed some bread and thinly sliced a beautiful bunch of kale.

Once the 20 minutes had passed, I added a can of plum tomatoes and allowed it to simmer for a few more minutes. Once it had simmered, I added the beans from the other pot, after removing the tomato, bay leaf and potato. You want to reserve the cooking liquid to actually make the soup (but I found that if you don't have enough, it works to add some hot water from the sink as well - just make sure you season).

IMG_0417

Once the mixture came back to a boil, I added my sliced kale and it immediately started to wilt into the soup. Doesn't it look bright and delicious!?

IMG_0418

I softened some cubed semi-stale bread with some of the cooking liquid and then added that to the soup as well. I made this loaf of French Herb bread this weekend, so it wasn't exactly crunchy-stale but it worked for this situation. The bread really thickens up the soup and gives it this fantastic texture!

IMG_0419

I continued cooking the soup for another 30 minutes, adding a little more water to loosen it up a bit along the way. It was nice and thick, and the recipe called for 4 big glugs of extra virgin olive oil to top it all off. This gave the soup a lovely sheen and a great silky texture. So comforting on a cold day like this one!

IMG_0422

I served the soup with a great panzanella salad, but more on that tomorrow - I figured I'd split this evening's cooking into two posts for two reasons. One, I was racing around the kitchen this evening - these two recipes were pretty labor intensive, and two, tomorrow's my late night at the gym so we'll be eating leftovers for sure!

Buona notte il amichi miei!

Wednesday, March 9, 2011

Now That's-a Spicy Italian Sauce!

A while back, I wrote a post about The Advantages of a Homemade Bolognese, and when I wrote it, my intent was to intermittently touch on different sauces that you can use in your menu planning for easy and quick meals. For some reason, I had arrabbiata sauce stuck in my head today, so I thought I would share this spicy sauce with you in a post!

RedChiliFlakesFLICKR-02
From Flickr - by AntTree

Traditionally, this sauce is served with penne, as the tubular shape is great for picking up the chunks of tomatoes in the sauce! It's a very simple sauce of only four, sometimes five ingredients. The original version includes garlic, tomatoes, red chili flakes and olive oil. Some people add basil to this mix but the majority of Italian chefs won't do this. When the dish is served, it is usually sprinkled with some parsley, and in my case, Parmigiano Reggiano.

Big Cheese
From Flickr - by kellinasf

The great thing about this sauce is that you have control over how spicy you want it. The red chili flakes are HOT, so if you don't like a ton of spice, use a little bit...and if you love the heat, pile it on! My tip to you is start off slow, and keep tasting your sauce as it simmers! You can always add, but you can never take away!

Tuesday, March 8, 2011

The Art of Patience

Tonight, I needed to use the majority of my basil bunch, since it really only lasts a few days in the fridge. I decided to make the Risotto with Fresh Mozzarella, Grape Tomatoes, and Basil, a recipe that I've made before. I don't duplicate recipes a lot (there's so many out there, why make one more than once!?) but my husband really likes this one, and he specifically requested it for the current menu. Risotto is a great dish because you can do so many things with it. If you have arborio rice and chicken broth, you've got the dish, and anything you throw in to it makes the meal your own!

This specific recipe comes from Cooking Light Magazine. The yield is 6 servings and get this...it's only 378 calories a serving! This really is a very comforting dish, but also has a wonderful freshness to it. And it's simple, really! The only thing you'll need is patience...risotto is a very good exercise in the art of patience. Let's dig into this one and I'll show you what I mean!

First and foremost, of course, is our mise en place. For this meal, you'll need:

3 tablespoons balsamic vinegar
4 1/2 cups fat-free, less-sodium chicken broth
2 tablespoons extra virgin olive oil
2 cups chopped leek
1 1/2 cups Arborio rice or other medium-grain rice
1/3 cup dry white wine
1/4 cup half-and-half
1 teaspoon salt
1/4 teaspoon freshly ground black pepper
1 cup halved grape tomatoes
1/4 cup chopped fresh basil
5 ounces fresh mozzarella cheese, finely diced


It didn't take that long to pull this together since I really only had to cut the leeks, mozzarella, basil and tomatoes. Everything else just called for a bit of measuring. First, I placed the balsamic vinegar in a small saucepan and brought it to a boil over a medium heat. The vinegar needs to simmer and reduce until it's syrupy and thick, about 1 tablespoon in measurement. This should take about 4 minutes. Once it's done, I would pour it out into another bowl so it doesn't just cool and stick to the sides of the pot. I had to heat the syrup in the microwave before serving since it had thickened quite a bit as it cooled. If that happens, that's okay, but it would work just as well to make this the last step, rather than the first.


While the balsamic vinegar was reducing, I also placed my chicken broth in a pot to bring to a simmer. You don't want the broth to boil, but you do want to keep it warm. The reason for the warm broth is that it doesn't shock the rice as you add it to the pot because it's at the same temperature as the pot you are adding it to.


Okay, now for the main event! Heat 1 tablespoon of the olive oil in a large saucepan (or in my case, Dutch oven) over medium-high heat. Once the oil is heated, add the leeks to the pan, and saute them for 3 minutes. Mmm, I love leeks!


Next, I added the rice, and cooked for another 2 minutes, stirring constantly. Then, I stirred in the wine and cooked for an additional minute, waiting for the liquid to be absorbed by the rice. 


And now, here comes the patience. You need to continue stirring throughout this process so don't even think about walking away from the pot! Add a cup of the heated chicken broth to the pot of leeks and rice and stir constantly, allowing the broth to be absorbed by the rice. When the liquid has been absorbed, add another 1/2 cup of the broth at a time, allowing it all to be absorbed before adding more...and don't forget to keep stirring! (If you don't keep stirring, the rice gets stuck to the bottom of the pot, burns, gets clumpy and doesn't cook evenly...have I convinced you now?)


Keep stirring!


Heehee, okay, I know you've got it. Once all of the broth has been absorbed, 1/2 cup at a time, into the rice, it's time to finish it all off. The rice should be tender or very close to it at this point, so pour in the half-and-half, salt and pepper and allow to cook for another 2 minutes.


Remove the risotto from the heat and add the grape tomatoes, basil and mozzarella.


Place about 1 cup of risotto on each shallow bowl or plate and then drizzle with a little olive oil and a little bit of that balsamic vinegar syrup that we made earlier. Yummy!! Check out all that gooey mozzarella goodness and the fresh grape tomatoes, and the flecks of basil! So fresh, so delicious, so comforting!


Friday, January 14, 2011

Top 10 : Pantry Items You Should Always Have on Hand

Happy Friday, my culinary cuties! I would like to take a moment to thank everyone that's reading this blog. The response has been tremendous thus far, and I'm extremely excited to see where this takes me. It's so encouraging to see that there are so many readers, and that you are leaving comments and asking questions. Keep it coming, and I promise I will too!

olive oil

Today, I wanted to touch base on some ingredients that should ALWAYS be in your pantry. If I run out of one of these things, it immediately goes on my shopping list for next time.

1. Olive Oil is used in almost every recipe. If you don't have olive oil, don't start cooking.

2. Balsamic Vinegar can be used in a lot of ways. If you have this and olive oil, you've got salad dressing! Additionally, you can reduce balsamic vinegar to make a glaze for meats or vegetables.

3. Soy Sauce is a staple in any Asian-inspired meal. If you have stuff to throw in a stir-fry, you better have soy sauce. I recommend the low-sodium variety, as its a bit less salty, and also a little better for you.

4. Red/White Wine Vinegar is a handy condiment for salad dressings as well as marinades. Many recipes call for it and it's good to have on hand in the event of a last minute dinner choice.

5. Arborio Rice is what we use to make risotto, along with the chicken stock below. A dinner made of leftover veggies thrown into a risotto dish is an instant success. 

6. Chicken Stock is an essential part of soups, sauces, and as I just mentioned, risotto! Keep it on hand for all of the above! (Again, if you can find low-sodium varieties, I recommend them.)

7. Canned Tomatoes (diced, crushed, whole, and paste) are a must-have! I keep a few cans of each of these in the pantry at all times. They make great sauces for a quick pasta, as well as a wonderful base for stews and chilis. 

8. Flour ... what is there to say about flour. You can make cookies with it, you can bread chicken with it, you can fry stuff coated in it, along with eggs you've got fresh pasta...always have flour in your house.

9. Breadcrumbs (or Panko) have many uses. If you are making burgers, you need breadcrumbs to hold the meat together, if you are making chicken or pork, you can coat it in breadcrumbs before baking, broiling or sautéing it, and they also make a great topping for a baked pasta dish. Panko is a Japanese bread crumb that adds a little bit more of a crunch than generic breadcrumbs. I prefer them.

10. Kosher Salt is a wonderful way to season your food. It's a bit less harsh than table salt and because it comes in a large box, is easier to measure amounts with as well. If you find that you're not getting the whole seasoning aspect of cooking, and want to follow a recipe TO-THE-LETTER, this is a good way to measure your salt before putting it into a dish.

Salt & Pepper

This should get you started on building a pantry full of usable ingredients. I'll try and provide more of these top-ten type lists to give you hints into what you should be buying when you go to the grocery store. If you have a stocked pantry, you'll actually end up spending less each week at the grocery store because half of the ingredients will already be in your possession. That prepared feeling you'll get is priceless!