Showing posts with label tomatoes. Show all posts

Monday, May 28, 2012

A Peppery Piperade

Phew, it's been almost a month since my last post - it's a jungle out there! Not only have I been very busy at work, but I've had to deal with a couple of medical issues, as well as planning a vacation for my husband, my puppy and myself! While I work on a compilation post of all the wonderful foods I encountered on our road trip to the great state of Virginia, I thought I'd get back into the swing of things with a simple, but time-consuming, dish that works great if you need leftovers for another night of the week! Because today is a holiday, and I have ONE more vacation day tomorrow, I planned a menu for the week that included a couple of large quantity meals that will feed us through the days that are going to be busy later in the week! The recipe for Chicken Basquaise comes from a cookbook that I got from my neighbor as a lovely birthday present. The book is called Around My French Table by Dorie Greenspan and I've based this week's menu around recipes from this book.

Basquaise, or "in the Basque style," usually means that the dish will have a ragout of peppers, onions, tomatoes and punch of spice. For this dish, I had to start off by making a piperade, which is another name for the aforementioned ragout. I prepped my mise en place first, and then started the cooking process. There's a lot of small batches of cooking times, that add up to quite a bit of hands-on time in the kitchen, but I decided to throw a pot on the stove to make some chicken stock, and also started a loaf of bread in the bread maker while I was waiting for each step. All the laundry from vacation even got accomplished while I was running around. It was a pretty productive afternoon.

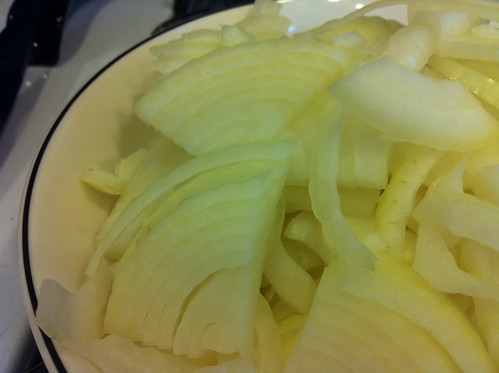
The first step is to sweat some sliced Vidalia onions with some olive oil for about 10 minutes. You want them softened, but not colored.

Untitled

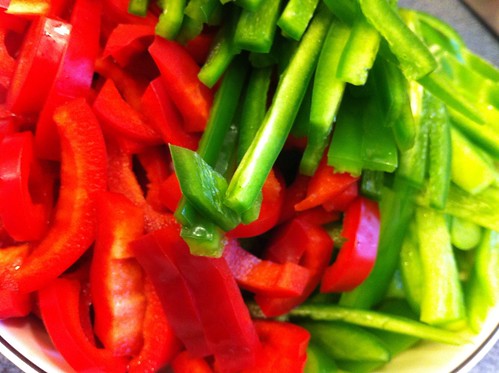
Once the timer beeped, I added sliced green peppers, red peppers, and jalapenos. I added another tablespoon of oil to the onions and peppers, and then covered the mixture, allowing it to cook for the next 20 minutes, getting all soft and delicious in there. I could have peeled the peppers if I wanted to, but the rustic-ness of a few pepper skins was a more attractive option than slowly charring pepper after pepper over an open flame until I was able to peel them.

Untitled

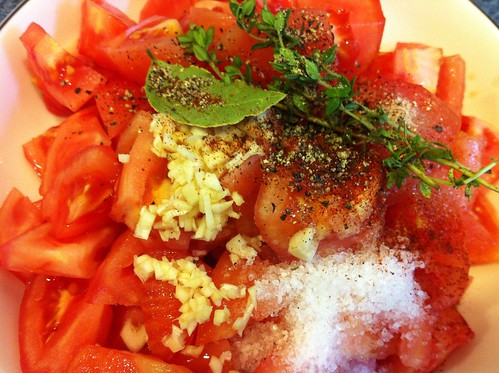
Twenty minutes passed, another load of laundry folded, a loaf of bread baking, and it was time to add some peeled and chopped tomatoes, sea salt, sugar, garlic, black pepper, thyme sprigs, bay leaf and some ground chipotle pepper to the mix. The recipe called for something called piment d'Espelette, which is a dried concoction of spicy chiles which is available in specialty stores for a pretty penny. Because it was possible to substitute a spice I already had, I went with that option to save a little money. I would have splurged had I thought I would use the ingredient on a regular basis, but I had a feeling it might just sit in the pantry for a year...so I didn't spend the money.

Untitled

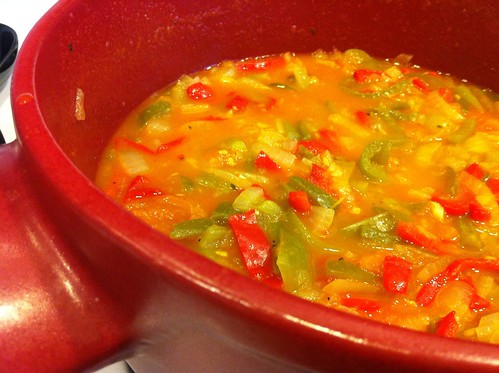
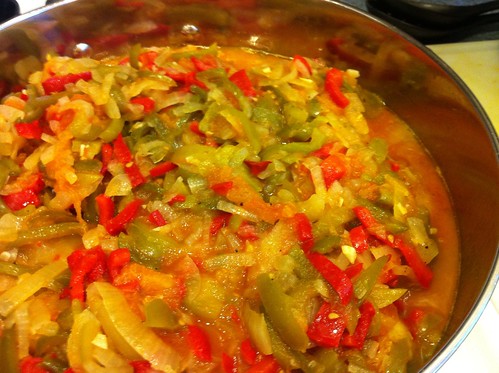
For 10 more minutes, the piperade simmered, covered, and then for another 15 minutes, uncovered. I made sure to stir the mixture every few minutes. Once the piperade was completed, I reserved about two cups of it for eggs tomorrow morning. A cool thing about this cookbook is that there are small suggestions on the sides of the pages, called Bonne Idees (good ideas), where they suggest other ways to use leftovers, and Piperade and Eggs sounds like a really good idea, so I will report back on that!

Untitled

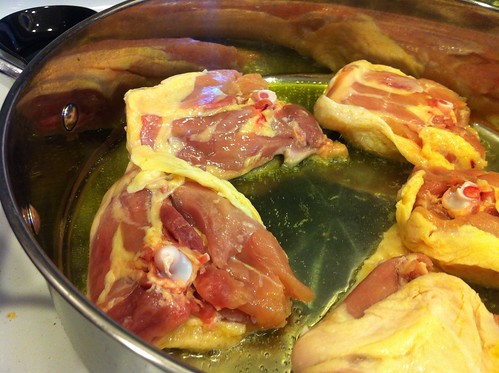
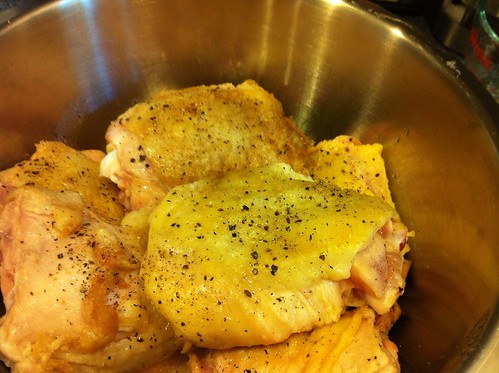
Now I could prepare my chicken thighs. I patted them until they were dry, using a paper towel, and then added them to heated oil (in batches), skin side down. After about 5 minutes, I flipped them and cooked them for another 3 minutes before transferring them to a bowl and seasoning them with salt and pepper. I repeated the process until all of my chicken thighs had been browned.

Untitled

Untitled

Once all the chicken had been par-cooked, I poured the oil out of the pan, and replaced it with some white wine, scraping up the brown bits and crunchy skin pieces that had been left in the pan, as the wine reduced. I returned the chicken to the pan, and covered it with the piperade. After bringing it to a boil, I reduced the pot to a simmer, and allowed it all to cook together for another 40 minutes. When I told you I was in the kitchen for awhile today, I meant it! At least this 40-minute interval gave me time to enjoy a chapter of my book on my new Kindle Fire, an awesome birthday gift from my husband.

Untitled

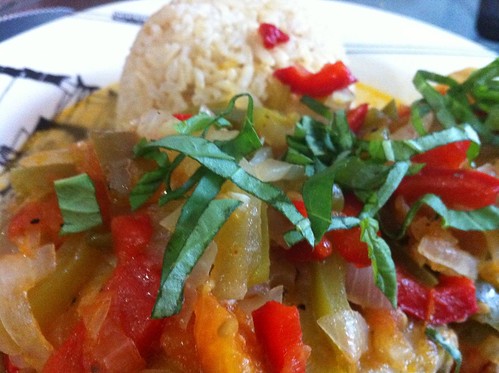
While the chicken cooked, I also made some brown rice in my rice cooker. They ended up finishing up around the same time, and I plated the meal. This was a really great dish, cozy and comforting but also refreshing and light. We ate four of the eight thighs in the pan, leaving us dinner for Wednesday night, since we will most likely be getting home late, after Yappy Hour (yup, we can bring the dog and enjoy drinks outside while she plays). This was definitely worth the time, and we've even got something interesting for breakfast tomorrow as well!

Untitled

I'm back! :)
Tuesday, April 24, 2012

Classic Cooking

Sometimes a classic is a classic for a reason. That old movie never really gets old, and that song that you've listened to over and over since you were 4 is still your favorite, but what about recipes? There are a lot of recipes that are mentioned, with the connotations of being old-fashioned, or out-dated. They get shoved to the back of our repertoires, and are glanced over on menus, but don't you think recipes can be classics for a reason, too?

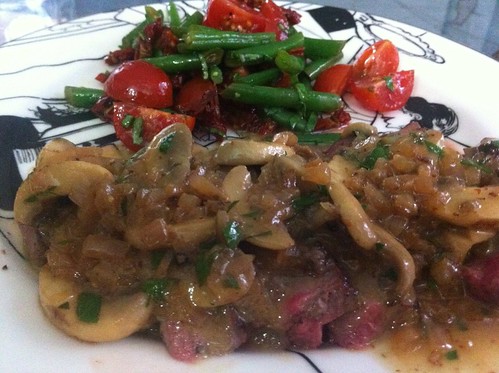
Last night, I made Steak Diane. Yea, old school, right!? I mean, it's an entree that's been on every old-fashioned steakhouse's menu since the 50's, or earlier! It's got it's OWN Wikipedia page, for goodness sake! Well, I don't think I'd ever tried it before, either eaten or cooked, because of it's old-fashioned connotations. Yes, I am one of those always looking for the newest thing out there, the most outrageous techniques and the craziest ingredients. That's just how I roll!

Untitled

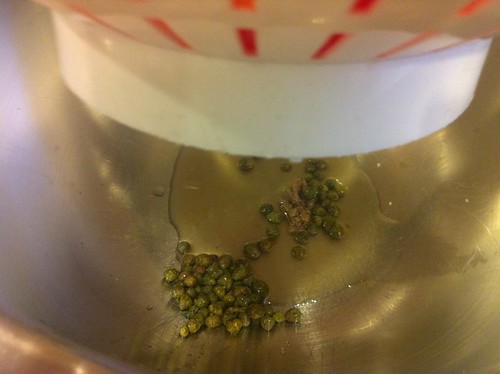
So, while planning my menu this weekend, I happened upon a recent rendition of the recipe, printed from one of my email newsletters from Tasting Table. I gathered my ingredients, mostly on-hand before the weekly shopping, and got to work. This promised to be a quick dinner, so I looked forward to a bit of Monday evening relaxation after the job was done! There's very little prepwork to be done for this and sometimes that's refreshing. The only knifework necessary involved slicing some crimini mushrooms (my favorite kind of mushroom) and finely chopping some shallots. Done and done. I gathered the rest of the ingredients (Worcestershire sauce, Brandy, butter, parsley, lemon juice, mustard, and green peppercorns) and seasoned my steaks with salt and pepper.

This recipe definitely goes quickly, and it's totally simple to prepare, as well! The steaks cooked on either side for about 3 minutes each, and then were removed from the pan to rest, while I made the sauce. This was a delicious meal! The steak was a little undercooked when I finally sliced it, but what I loved the most was that as I poured the velvety sauce over the slices of meat, they were brought to the perfect doneness by the heat of the sauce. This recipe is written very well, and quite self-explanatory. Anyone could make this classic dish a meal to remember!

Untitled

I decided to pair the heavy entree with a light side dish: Tomato and Haricot Verts Salad. Like our main course, this was a very simple recipe to prepare! I simply had to slice some haricots verts and tomatoes, blanch the beans, and then mix it all up with some sundried tomato slices, balsamic vinegar, olive oil, chopped basil and salt and pepper. What a lovely summer salad! We know what I'll be serving at every party this summer brings my way! It was easy, pleasing to a crowd and would even travel well because it's delicious at room temperature!

Tuesday, May 24, 2011

Cold Soup?

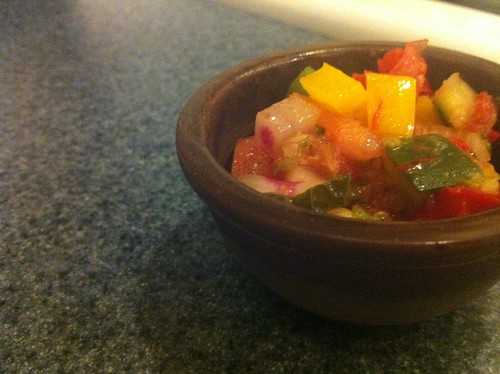
So, we're working our way through the leftovers from the bridal shower, attempting to yet again clean the fridge out before going grocery shopping. I was so busy on Saturday that I didn't get to enjoy half of the things I worked so hard to make! Tonight, I had a nice big bowl of the Chunky Gazpacho with Piquillo-Scallion Relish, and oh boy, I was inspired to write!

IMG_0659


Gazpacho is one of my favorite things about summer. According to Wikipedia, gazpacho is a cold Spanish tomato-based raw vegetable soup. That's right, you heard correctly - raw. There is no cooking necessary here, and that's why it's a great summertime meal. No added heat, fresh, crunchy veggies in a cool tomato base...sounds refreshing, doesn't it?

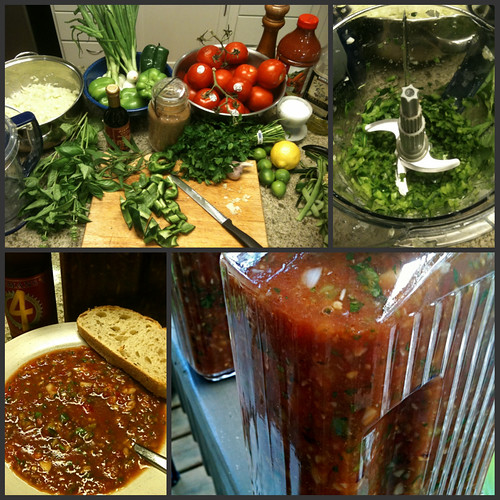
There are many gazpacho recipes out there, and I urge you to try many of them before settling on your favorite...but this one, from the Stonewall Kitchen Favorites cookbook, well, it's pretty darn good! Lots of tomatoes, crunchy peppers in all colors, cool cucumbers and the bite of red onion make for a burst of flavor with each spoonful!

Gazpacho
from Flickr - by Melissa Prado Little
(I don't think I could've found a better picture to depict the process)

The way I describe it, I guess it sounds like more of a salad then a soup, but let me explain. Once you've cut up all of your fresh veggies, and they are all combined with some lime juice and whatever else your specific recipe calls for, you blend about half the mixture in a food processor, until it's a juicy puree. This is what turns it from a salad, to a chunky soup. Don't get me wrong, you'll still be chewing each bite, and experiencing that nice crunch of cool cucumber and peppers! Who'd have thought you'd want to eat soup during the summer!

Be on the lookout for gazpacho on menus in your area! If you find an exceptionally good one, be sure to share it with all of us here on Mise En Place (A good place to start). I don't want to speak for all of us, but I love hearing about restaurants, and menu items that hold a special place in one's heart! Can't wait to hear your stories!

There's a new menu in the works as well - coming very soon! If you have requests, get them in ASAP!

Friday, May 13, 2011

My 100th Post!

At first, I thought I needed to wait until something spectacularly culinary happened to me before writing this post. After some more pondering, I decided that each of my posts was inspired by something special, and so why should this one be any different. But Blogger was under construction...thus my 2-day absence from the blogosphere. For that, dear readers, I am sorry! I want to thank each and every one of you for your continued support, your comments and your readership. Everytime I check my stats, I'm astounded at the collection of countries that are showing up there. I've spread across the world, and that is so cool! When I started this blog, I wasn't sure where it would go, or what I would find, but I now know that I truly enjoy writing, I love cooking more every day, and I want to keep doing this for a long time. So, I'm here to stay, guys and dolls, so get comfy, and read on for yet another culinary adventure.

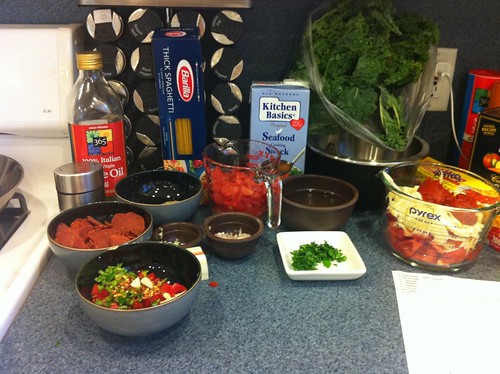
I decided to dedicate my 100th post to the readers by cooking a reader's suggestion from my current menu. Laurie had requested a Portuguese dish, but wasn't sure of the name of it. She mentioned that it had shrimp, pasta and lots of tomatoes...and so I did a little research, and came up with what I think is a good representation of her request. I ended up with Emeril's Portuguese Shrimp and Pasta. This recipe called for quite the process so I set to work in the kitchen, gathering my mise en place.

3 tablespoons olive oil
1 pound large shrimp, peeled, deveined
2 teaspoons Essence
1/4 chorizo, thinly sliced (I used turkey pepperoni because I was out of chorizo)
1/4 cup minced shallots
2 teaspoons minced garlic
1 1/2 cups peeled, seeded, and finely chopped tomatoes (I didn't peel them)
1 cup dry white wine
3 cups Fennel Tomato Broth (ingredients to follow)
1/2 pound kale, blanced and roughly chopped
1 teaspoon salt
2 tablespoons butter, at room temperature
1 pound homemade, or dry pasta, cooked al dente
1 tablespoon chopped parsley leaves
1/4 cup piri piri (ingredients to follow

Fennel Tomato Broth:
1 quart shrimp or seafood stock
2 cups roughly chopped tomatoes
1/2 bulb fennel, thinly sliced
2 teaspoons tomato paste
1 teaspoon fennel seeds

Piri Piri:
1 cup olive oil
2 fresh poblano peppers, stemmed and seeded
3/4 cup chopped red bell pepper
1 teaspoon crushed red pepper flakes
1 tablespoon thinly sliced garlic
1 teaspoon salt
1 cup fresh kale

IMG_0625


Yes, that was a lot of prep, I agree! Now, the first thing you've all probably noticed and questioned is that there's boxed pasta on my counter. I know, and you know, that I usually shun boxed pasta in exchange for fresh. However, I had to buy and open a box of thick spaghetti to put noodles in the Spring Minestrone that I made a few weeks ago. Rather than wasting the almost full box of spaghetti, I decided to save myself a little bit of time and use it for this recipe. I'm very happy that I did because the rest of this meal was quite labor intensive, and if I had made pasta on top of it, I'd still be in the kitchen!

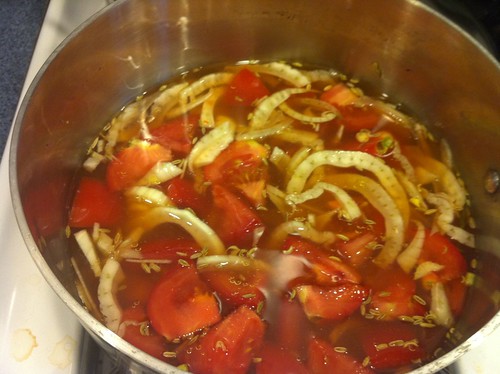
First things first, get your Tomato Fennel Broth on the stove since it needs to simmer for about an hour. I'm not sure I actually let mine simmer that long, because I was pretty hungry and impatient tonight, but I just left it to cook the whole time I was preparing everything else. Place the seafood stock, chopped tomatoes, sliced fennel, tomato paste and fennel seeds in a saucepan and bring it all to a boil...and then reduce it to a simmer for about an hour. Once it's done, you'll need to strain it through a fine mesh sieve...according to the instructions. However, I didn't do this. Originally, it was an accident, but it was a good one, because I've always preferred a chunky sauce!

IMG_0627


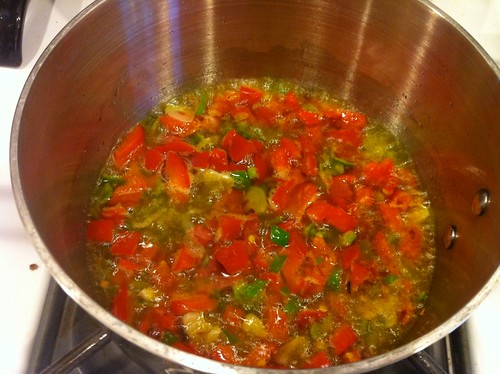
Next, I made my piri piri, since it was able to be set aside once completed. I gathered the olive oil, poblano peppers, red bell pepper, red pepper flakes, garlic, salt and kale. I put everything but the kale into a smaller saucepan and brought it to a boil, and allowed it to cook for the next 15 minutes.

IMG_0626


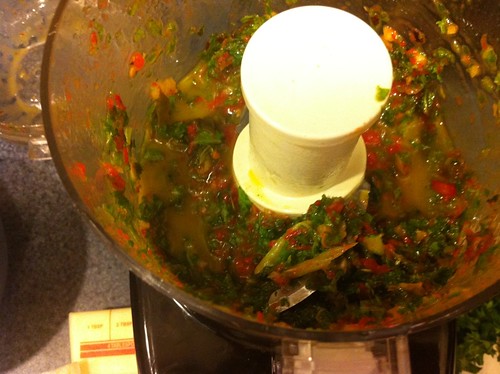
At this point, I poured the mixture into a small food processor and blended it with the fresh kale. The Piri Piri was then set aside to wait for plating.

IMG_0635


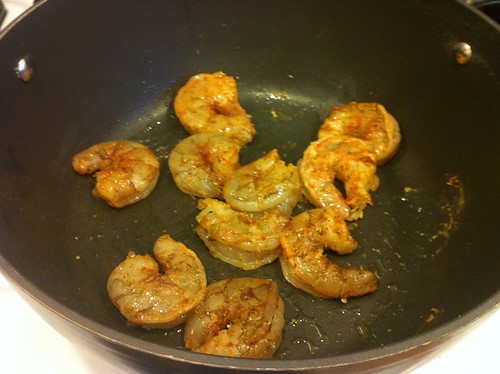
Okay, and now, on to the main event! In a large pot, I added a few tablespoons of olive oil and my jumbo shrimp, which I had dusted in the Emeril's essence.

IMG_0629


Look how big those shrimp are! Gorgeous! After about a minute of tossing those around, I removed them from the pot and added the chorizo (I used turkey pepperoni - not the same, at all, but still a little bite, and...it was in my fridge!)

IMG_0630


Once the chorizo (or turkey pepperoni) had cooked and heated through for about 5 minutes, I added the garlic and shallots and allowed those to cook for another minute.

IMG_0631


After the minute or so is up, add the diced tomatoes to the mix and turn the heat to high.

IMG_0632


Once the sizzle has died down a bit, pour in your white wine and deglaze the pan, allowing the wine to almost completely evaporate.

IMG_0633


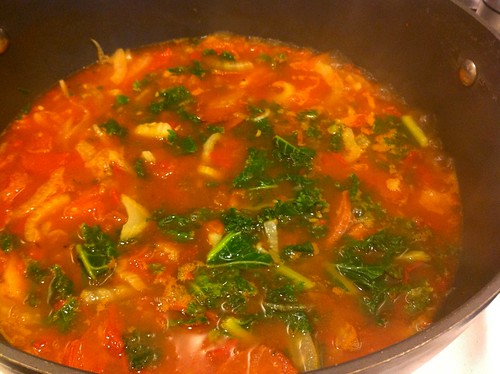
Next, pour in your Tomato Fennel Broth. I, by accident, poured it in without first straining it, but that was actually a nice mistake to have made. I enjoyed the large chunks of fennel and tomato in my sauce. If you prefer a soupier consistency, remember to strain the broth before adding it to the main pot. At this point, also throw in that blanched, chopped kale. Leave this to cook for about 7 or 8 minutes, allowing it to reduce by half.

IMG_0634


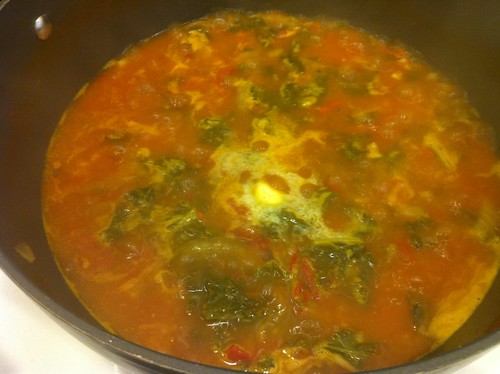
Add the salt and the butter and kind of swirl it around until it all melts into the liquid.

IMG_0636


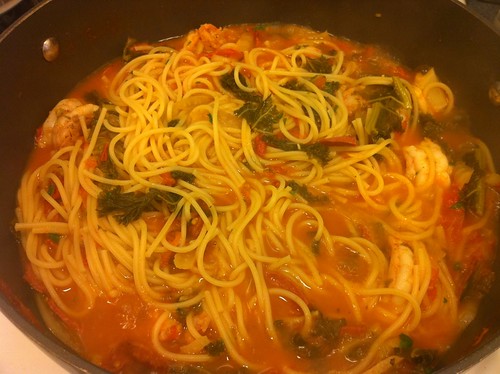
Once the butter has been incorporated, add the shrimp, pasta and chopped parsley, and allow to cook for another minute or two. Be sure that the shrimp are cooked through.

IMG_0637


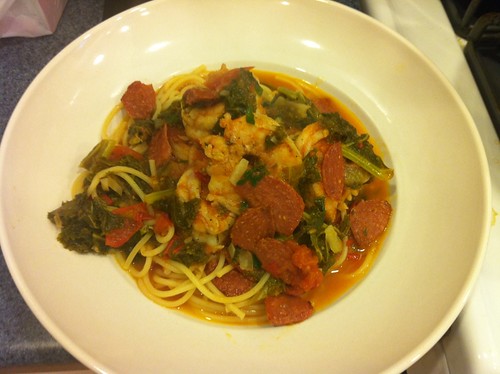
It's finally time to plate. Get some nice shallow pasta bowls and scoop some pasta into each one. Top with a few of the jumbo shrimp and a few ladlefuls of sauce, chorizo and tomatoes. Drizzle the piri piri on top for a little kick!

IMG_0638


Bom Apetite! (Portuguese for Bon appetit!)

Another call for requests: The current menu only has one more thing to make, so I'm getting ready to make a new list. If anyone has requests, comment on the post, or send me an email and I'll be sure to incorporate it into an upcoming menu!

Thanks again, readers - I'm really enjoying this, and I hope you are too! Happy 100th post to all of us!

Wednesday, March 30, 2011

Panzanella

As promised, I'm going to tell you all about making panzanella salad today. Panzanella is a traditional Florentine salad, based on two ingredients: tomatoes and bread. "Bread!?" you say! I know, bread in a salad is a pretty foreign concept, but trust me on this one. This makes for a lovely summer salad, and is pretty simple to prepare for a BBQ or gathering. I know it's not summer yet (trust me, I know!) but I needed something refreshing and cool to complement the ribollita that I wrote about yesterday.

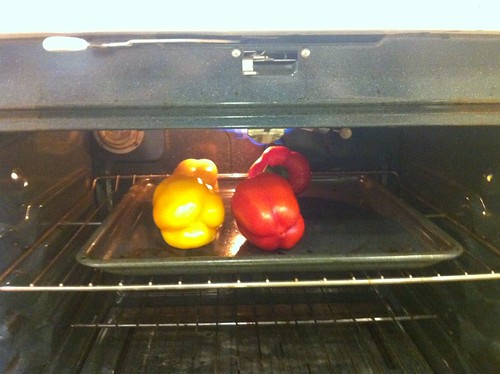
For Jamie Oliver's version of panzanella, I needed to roast 4 red and yellow peppers. So, the first thing I did was preheat the broiler and place the peppers in to blacken the skin. You want to keep an eye on them and turn them a few times so they get blackened equally on all sides.

IMG_0412

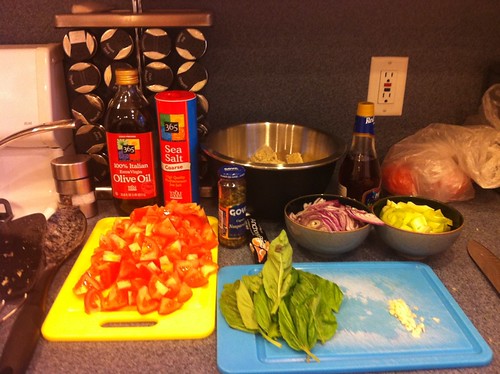
While the peppers were roasting, I gathered the rest of my ingredients for my mise en place. Aside from the peppers, I needed some cubed bread, a nice amount of tomatoes (cut to about the same size as your cubes of bread), capers, sliced red onion, celery, and some basil. I also got some red wine vinegar, olive oil, garlic and salt and pepper out for the dressing. The recipe also calls for anchovies, but I couldn't find them at the grocery store this time around, so I just put some anchovy paste into the dressing to mimic the flavor...I didn't really want to eat anchovy fillets anyway.

IMG_0411

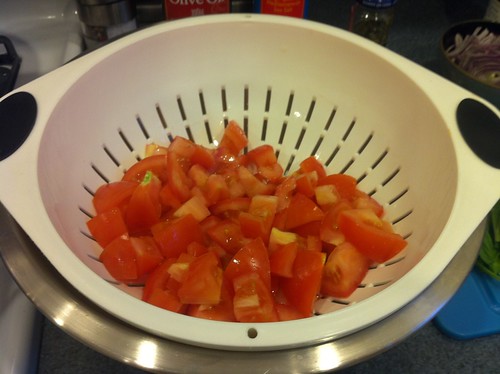
Once you've cut up the tomatoes, place them in a colander, resting over another bowl. Pour a nice amount of sea salt over the tomatoes and toss. Don't be stingy. The salt is going to draw the liquid out of the tomatoes and it will start to drip through into the bowl underneath pretty quickly. Let the tomatoes sit for about 20 minutes so you can be sure to get the most amount of juice out of it. These juices will be used for the dressing later! You'll see! :)
IMG_0413

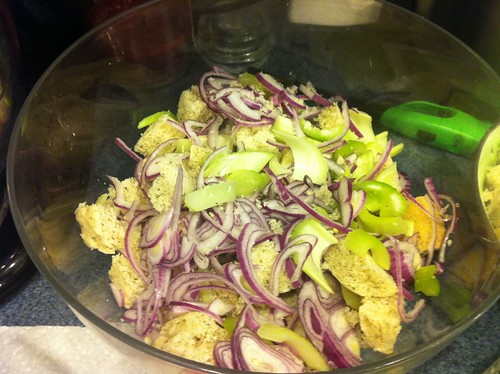
Meanwhile, cube your bread, slice your celery, thinly slice your red onions (giant pieces of raw red onion is not something anybody wants to pop in their mouth), and tear up those basil leaves. Toss this all together.

IMG_0416

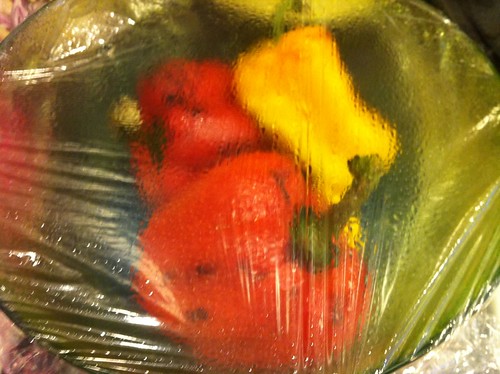
The peppers are probably done now...so here's what you do next. Take those peppers out of the oven and place them in a heat-resistant bowl and cover it with saran wrap. While the peppers steam, the skin pulls away from the meat of the pepper and you'll be able to just peel the skin right off!

IMG_0415

Once you've peeled the peppers (please be careful, they are HOT, and they stay hot for awhile!) you can kind of just rip the meat in to ribbons. You can add the ribbons of roasted pepper to the mixture we've already got going on, and then turn your attention back to those salted tomatoes. In the bowl that's collecting the liquid, we're going to add the capers, some anchovy paste (since I opted not to use anchovy fillets), red wine vinegar, a couple healthy glugs of olive oil and a crushed clove of garlic. Taste the mixture before you season - anchovy paste and capers are both rather salty so you might not need more. I definitely added some pepper though.

IMG_0414

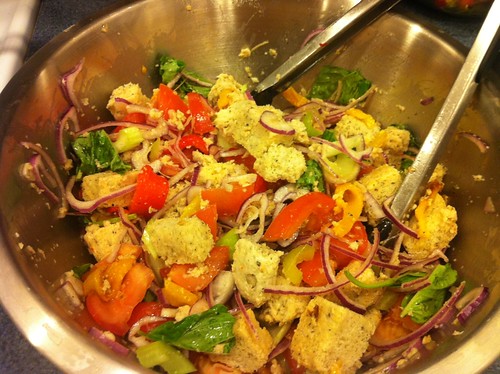
Pour the tomatoes in to the salad, and then the dressing. Toss for a minute but don't overtoss because the bread is going to start getting soft. You should let the salad sit for about 10 minutes before serving so that the bread starts to soak up the dressing. However, if you are going to bring this to someone's house, keep the tomatoes and dressing separate until you get to your serving location. Otherwise, you'll have a soggy salad by the time people go to eat it.

IMG_0421

Cool, refreshing and delicious!

And on another note : I have to make a plug for my yoga teacher/friend, Victoria! She's in a competition to be featured in an episode of Yoga Journal, and I promised her I would use every means possible to get her votes! Yoga means so much to her, and you can read her story on her page at Yoga Journal! Give her a rating to vote for her and help her win her dreams! Vote for Victoria here!

Tuesday, March 29, 2011

Zuppa's on!

Tonight, I was in the kitchen for quite awhile, but it was well worth it! I made what Jamie Oliver calls "La Mia Ribollita Preferita," his favorite ribollita. This is a Tuscan soup whose name literally means "reboiled." According to Wikipedia, Italians used to make this soup by reheating leftover minestrone soup from a previous meal.

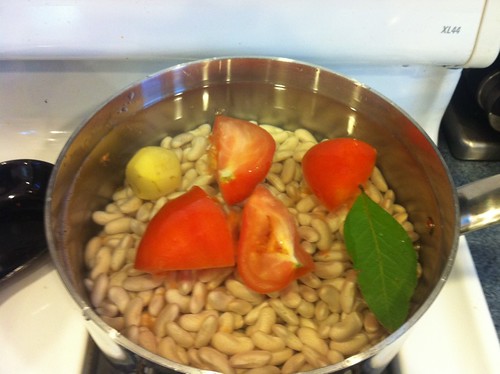
The cannellini beans, which I bought dried, needed to soak in a bowl of water overnight. Before I went to sleep yesterday, I placed my dried beans in a bowl, filled it with water and covered it with some saran wrap. When I got home from work today, the first thing I did was place those beans on the stove in a large pot with some water, a squished tomato, a bay leaf and a small, peeled potato. Dried beans need to cook for about an hour, whereas fresh ones only need about 25 minutes, so I knew I had an hour of simmering ahead of me.

IMG_0409

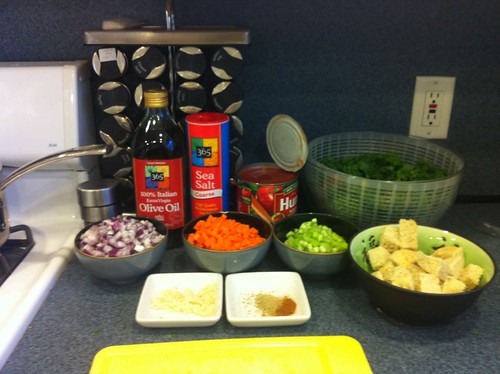
Then I got my mise en place together!

IMG_0410

While my beans were cooking, I finely chopped 2 red onions, 2 carrots, 3 stalks of celery and 3 garlic cloves. I placed them all in a pot with some olive oil, a pinch of ground fennel seeds and a little bit of dried red chili, and cooked them on a medium heat, for about 20 minutes. I allowed the mire poix to sweat, without browning. Meanwhile, I cubed some bread and thinly sliced a beautiful bunch of kale.

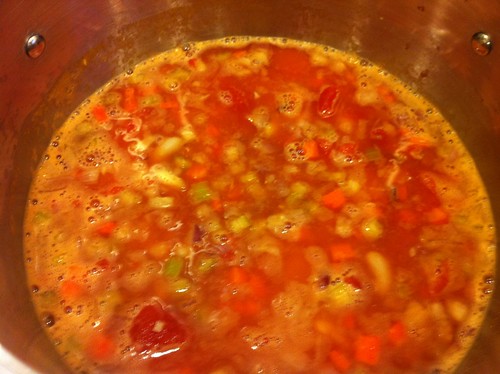
Once the 20 minutes had passed, I added a can of plum tomatoes and allowed it to simmer for a few more minutes. Once it had simmered, I added the beans from the other pot, after removing the tomato, bay leaf and potato. You want to reserve the cooking liquid to actually make the soup (but I found that if you don't have enough, it works to add some hot water from the sink as well - just make sure you season).

IMG_0417

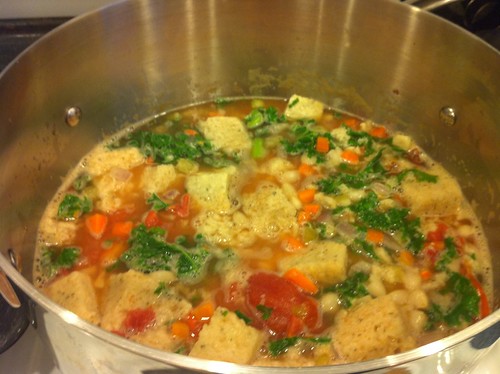
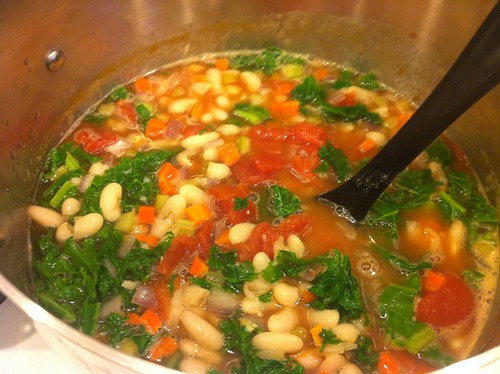
Once the mixture came back to a boil, I added my sliced kale and it immediately started to wilt into the soup. Doesn't it look bright and delicious!?

IMG_0418

I softened some cubed semi-stale bread with some of the cooking liquid and then added that to the soup as well. I made this loaf of French Herb bread this weekend, so it wasn't exactly crunchy-stale but it worked for this situation. The bread really thickens up the soup and gives it this fantastic texture!

IMG_0419

I continued cooking the soup for another 30 minutes, adding a little more water to loosen it up a bit along the way. It was nice and thick, and the recipe called for 4 big glugs of extra virgin olive oil to top it all off. This gave the soup a lovely sheen and a great silky texture. So comforting on a cold day like this one!

IMG_0422

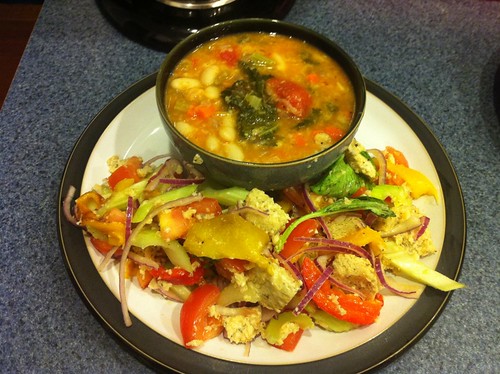
I served the soup with a great panzanella salad, but more on that tomorrow - I figured I'd split this evening's cooking into two posts for two reasons. One, I was racing around the kitchen this evening - these two recipes were pretty labor intensive, and two, tomorrow's my late night at the gym so we'll be eating leftovers for sure!

Buona notte il amichi miei!