Showing posts with label basil. Show all posts

Monday, July 11, 2011

Pesto ... as Promised!

I opted to use the bunch of basil I received in my delivery first, because basil spoils quite quickly, and I didn't want it to go to waste. The best way to use a large amount of basil is to make pesto sauce. What's pesto sauce, you may ask...well, I'm about to show you. It is probably one of the easiest sauces to throw together!

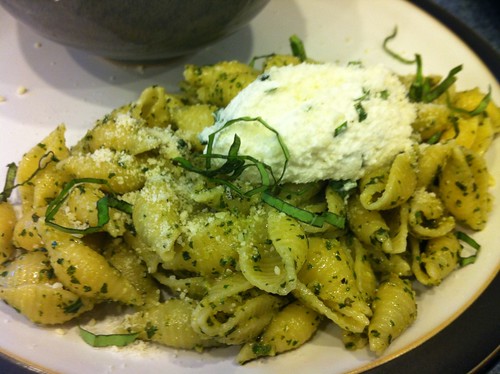
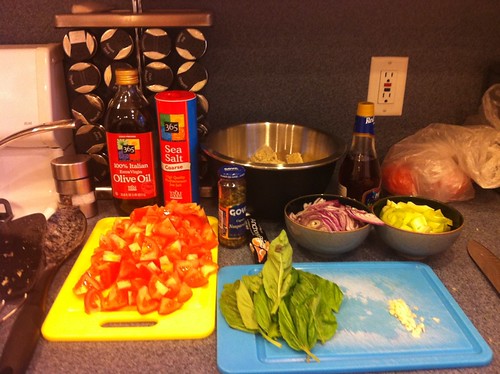
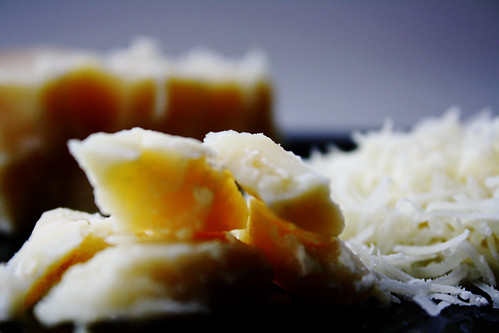
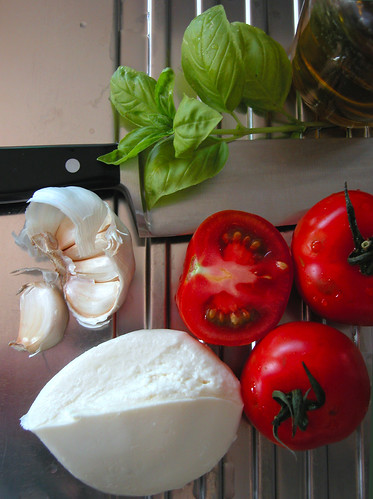
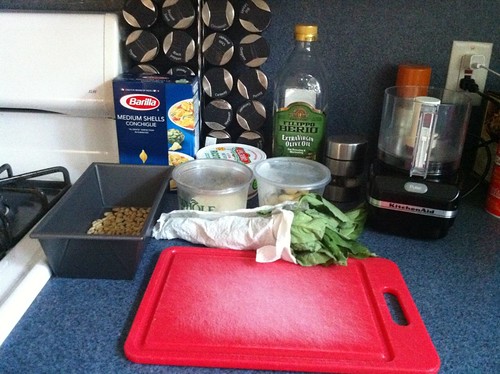
Pesto goes great with any pasta, but I prefer it with a shape that has a larger surface area to catch the sauce. I decided to go with a box of medium shells that I had in my pantry (I told you I was going to start using stuff up!). You'll also need some grated Parmesan, pine nuts, salt and pepper, garlic and olive oil, in addition to the basil. I decided to add some ricotta to the top of my dish, as a garnish, as well, so I saved a few basil leaves to mix in with that as well.

IMG_0802


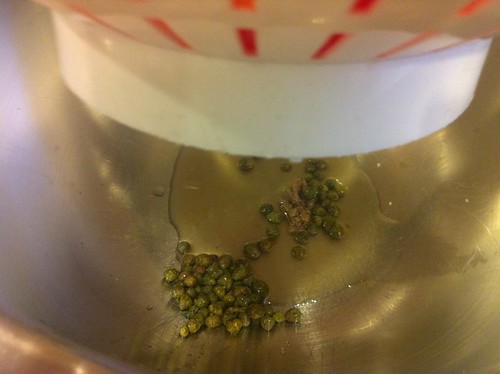
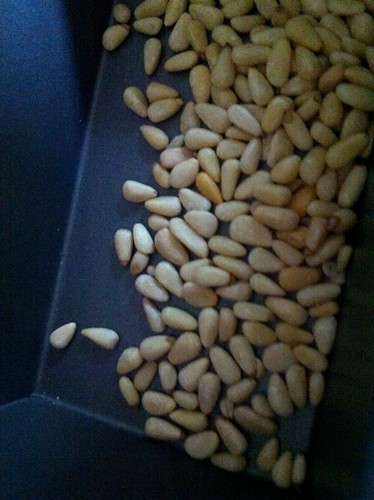
The first thing that you need to do to prepare your pesto sauce is toast the pine nuts. When I say toast, I mean, get some heat on them...they burn VERY quickly so throw them under the broiler for a minute or two tops, but keep a close eye on them. All you need is a little heat to bring out the flavor of the nut.

IMG_0803


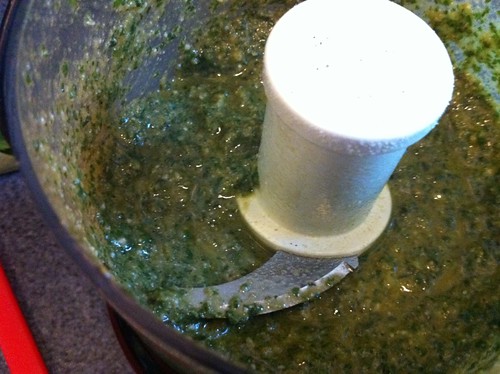
In a food processor, chop up a clove of garlic (or a little less than a clove if you don't want it to be very garlicky) and the pine nuts until they are all chopped up. Add about 3 handfuls of basil and chop it all up. Add the Parmesan and then start pouring olive oil, little bits at a time until you have a thick, chunky consistency.

IMG_0804


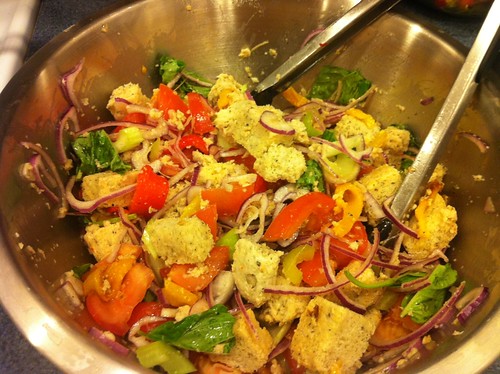
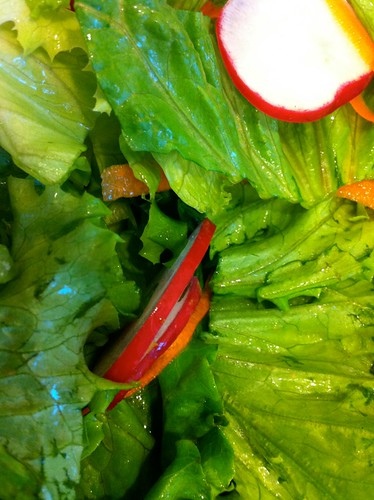
While the shells were cooking, I took half a head of lettuce and mixed it with some shaved carrots, sliced radishes, and lemon-tarragon vinaigrette, as a side dish to the pasta. I also mixed a few tablespoons of ricotta with some salt, pepper, and basil ribbons.

IMG_0805


Once the pasta was drained, and put back in the pot, I added the pesto and tossed it all together. Reserve a little bit of the pasta water before draining, in case you need to thin your sauce a bit. In this case, I didn't need to, but depending on the consistency of your pesto, it could be an option for you, and the starchy water is the perfect antidote. I plated the salad alongside the pasta and added a nice quenelle (a dollop shaped with two tablespoons) of ricotta mixture to the top of each plate. I sprinkled it with Parmesan and a few extra basil ribbons. VOILA!

IMG_0806

Sunday, July 10, 2011

Farm Fresh Produce in the House!

The CSA share from Harvest Delivery arrived this evening! I thoroughly enjoyed unpacking the box full of goodies, since I had no idea what would be arriving in the delivery! The gentleman who delivered this wonderful package was named Ed, and he was very friendly and sunny! He told me a bit more about the CSA shares and how their deliveries work. They have a very cool (no pun intended - ha!) system that involves an insulated cool box that stores your deliveries until you arrive home from work and unlock the box to retrieve your fresh produce.

IMG_0799

Look at all that beautiful fresh produce that I was lucky enough to receive! So, let's take a short inventory, shall we? We have two bunches of crispy, bright radishes and a giant bunch of fresh beets, with the greens attached! Radish greens and beet greens can be used in recipes separate from their root counterparts too, so I'm going to try and make the most of these bunches! We've also got some summer squashes, and some cute little cucumbers. The bunch of scallions are enormous - I've never seen scallions that big! We have a carton of deliciously sweet blueberries, and a half-dozen farm fresh eggs as well!

IMG_0800

There are two huge heads of different lettuces that will make us salads for a week and a half! We've got a gorgeous bouquet of swiss chard, as well as a giant bunch of basil!  Since basil goes bad fairly quickly, I think I might use that first and make some pesto sauce for a pasta dish for tomorrow night's dinner. There's also a bag of delicious, peppery arugula which I can't wait to eat! I had to try a leaf, just to TASTE it ... and OH...so good! Lastly, I got two little heads of a strongly flavored green, but I'm not completely sure what it is - I think it's baby bok choy.

IMG_0801


So, let's see, so far, I'm thinkin' pesto sauce...which isn't exactly the most creative use of basil, but when you have a lot of it, and want to use it all before it goes bad, it's the best way to go! I'm also thinking of some sort of curry, using those summer squash, since I also took a little trip to Penzey's Spices today. I picked up quite a few Indian spices, even though they weren't on my list of refills. Sometimes you see things, and you just think..."yes, I will be able to use that for something in the very near future." We'll be having lots of salads to use those two giant heads of lettuce, and I love the crunch of crispy radishes sliced in salads as well! I think I'll stop by the farmer's market booth that sells locally-made goat cheese, for a nice big salad full of greens, feta and some roasted beets as well! And I think...maybe a pasta carbonara with the addition of some wilted swiss chard. Sound good!?

Join me as I work my way through this CSA share...I love a new adventure and this one is exciting! Next up: I'll teach you how to make pesto sauce!

Wednesday, March 30, 2011

Panzanella

As promised, I'm going to tell you all about making panzanella salad today. Panzanella is a traditional Florentine salad, based on two ingredients: tomatoes and bread. "Bread!?" you say! I know, bread in a salad is a pretty foreign concept, but trust me on this one. This makes for a lovely summer salad, and is pretty simple to prepare for a BBQ or gathering. I know it's not summer yet (trust me, I know!) but I needed something refreshing and cool to complement the ribollita that I wrote about yesterday.

For Jamie Oliver's version of panzanella, I needed to roast 4 red and yellow peppers. So, the first thing I did was preheat the broiler and place the peppers in to blacken the skin. You want to keep an eye on them and turn them a few times so they get blackened equally on all sides.

IMG_0412

While the peppers were roasting, I gathered the rest of my ingredients for my mise en place. Aside from the peppers, I needed some cubed bread, a nice amount of tomatoes (cut to about the same size as your cubes of bread), capers, sliced red onion, celery, and some basil. I also got some red wine vinegar, olive oil, garlic and salt and pepper out for the dressing. The recipe also calls for anchovies, but I couldn't find them at the grocery store this time around, so I just put some anchovy paste into the dressing to mimic the flavor...I didn't really want to eat anchovy fillets anyway.

IMG_0411

Once you've cut up the tomatoes, place them in a colander, resting over another bowl. Pour a nice amount of sea salt over the tomatoes and toss. Don't be stingy. The salt is going to draw the liquid out of the tomatoes and it will start to drip through into the bowl underneath pretty quickly. Let the tomatoes sit for about 20 minutes so you can be sure to get the most amount of juice out of it. These juices will be used for the dressing later! You'll see! :)

IMG_0413

Meanwhile, cube your bread, slice your celery, thinly slice your red onions (giant pieces of raw red onion is not something anybody wants to pop in their mouth), and tear up those basil leaves. Toss this all together.

IMG_0416

The peppers are probably done now...so here's what you do next. Take those peppers out of the oven and place them in a heat-resistant bowl and cover it with saran wrap. While the peppers steam, the skin pulls away from the meat of the pepper and you'll be able to just peel the skin right off!

IMG_0415

Once you've peeled the peppers (please be careful, they are HOT, and they stay hot for awhile!) you can kind of just rip the meat in to ribbons. You can add the ribbons of roasted pepper to the mixture we've already got going on, and then turn your attention back to those salted tomatoes. In the bowl that's collecting the liquid, we're going to add the capers, some anchovy paste (since I opted not to use anchovy fillets), red wine vinegar, a couple healthy glugs of olive oil and a crushed clove of garlic. Taste the mixture before you season - anchovy paste and capers are both rather salty so you might not need more. I definitely added some pepper though.

IMG_0414

Pour the tomatoes in to the salad, and then the dressing. Toss for a minute but don't overtoss because the bread is going to start getting soft. You should let the salad sit for about 10 minutes before serving so that the bread starts to soak up the dressing. However, if you are going to bring this to someone's house, keep the tomatoes and dressing separate until you get to your serving location. Otherwise, you'll have a soggy salad by the time people go to eat it.

IMG_0421

Cool, refreshing and delicious!

And on another note : I have to make a plug for my yoga teacher/friend, Victoria! She's in a competition to be featured in an episode of Yoga Journal, and I promised her I would use every means possible to get her votes! Yoga means so much to her, and you can read her story on her page at Yoga Journal! Give her a rating to vote for her and help her win her dreams! Vote for Victoria here!

Wednesday, March 9, 2011

Now That's-a Spicy Italian Sauce!

A while back, I wrote a post about The Advantages of a Homemade Bolognese, and when I wrote it, my intent was to intermittently touch on different sauces that you can use in your menu planning for easy and quick meals. For some reason, I had arrabbiata sauce stuck in my head today, so I thought I would share this spicy sauce with you in a post!

RedChiliFlakesFLICKR-02
From Flickr - by AntTree

Traditionally, this sauce is served with penne, as the tubular shape is great for picking up the chunks of tomatoes in the sauce! It's a very simple sauce of only four, sometimes five ingredients. The original version includes garlic, tomatoes, red chili flakes and olive oil. Some people add basil to this mix but the majority of Italian chefs won't do this. When the dish is served, it is usually sprinkled with some parsley, and in my case, Parmigiano Reggiano.

Big Cheese
From Flickr - by kellinasf

The great thing about this sauce is that you have control over how spicy you want it. The red chili flakes are HOT, so if you don't like a ton of spice, use a little bit...and if you love the heat, pile it on! My tip to you is start off slow, and keep tasting your sauce as it simmers! You can always add, but you can never take away!

Monday, February 7, 2011

Joey's Scallops with Jasmine Rice Risotto

So, I've started cooking from my new menu, and the first meal I chose to make is Joey's Scallops with Jasmine Rice Risotto, from Top Chef: The Quickfire Cookbook. Joey was part of Season 3, and during Episode 4, he participated in a Quickfire Challenge that asked him to create an appetizer to pair with a Bombay Sapphire cocktail for Bombay Mixologist, Jamie Walker. The recipe included in the cookbook has been adapted for main course servings, and was reproduced here, as well.

Now this recipe doesn't call for that many ingredients, and while they are a bit more exotic than you may be used to, this dish is SUPER-easy, so don't get overwhelmed.

What you'll need:

1 cup jasmine rice
2 cups coconut milk
8 shiitake mushrooms, stemmed and sliced
1 mango, peeled, pitted, and diced
1 tablespoon thinly sliced fresh mint, plus more for garnishing
1 tablespoon thinly sliced fresh basil, plus more for garnishing
8 sea scallops
salt
cayenne pepper
1 teaspoon peanut oil, for frying

And of course, here's a look at my mise en place:


Did you take a look at those GORGEOUS scallops? So let's get going with the first step, shall we? In a medium dry saucepan over medium heat, lightly toast the rice. Add the coconut milk, stir, and cover. Bring to a slow boil, then reduce heat to medium-low. Cook the rice until creamy, about 15 minutes.


Remove from heat, then stir in the mushrooms, mango, the 1 tablespoon of mint, and the 1 tablespoon of basil.


I recommend waiting until the risotto is complete, before starting the scallops. They only take 2 minutes per side, and I will warn you, overcooked scallops are TERRIBLE, and you shouldn't eat them. You want to JUST cook them through, no more than that (and I will admit now that I threw away a LOT of scallops before perfecting it, but if you follow the times on the recipe, you should make out okay!)

Season the scallops with salt and cayenne pepper. In a large saute pan over medium-high heat, heat the peanut oil. Add the scallops and sear for 1 1/2 to 2 minutes per side.


To serve, place several spoonfuls of rice on each plate and top with scallops. Garnish with mint and basil.


Mmmm, this sure was delicious! And I know you guys can do it too! So, give it a try, and let me know how it goes...and if it doesn't go so great the first time, try again. Perfecting a cooked scallop takes some practice, but oh, it's SO worth it!

Tuesday, February 1, 2011

TOP 5 : Fresh Herbs That Work in Almost Every Situation

There are a lot of herbs and spices out there, and sometimes, it can be overwhelming to look at a recipe and see all sorts of ingredients you don't have, or better yet, haven't heard OF! However, I want to provide you with a list of five fresh herbs that you can save you in a pinch.

Parsley
Parsley

1. Parsley : I buy parsley every time I do a big grocery shopping. It keeps well for a long time in the fridge, it's cheap, and it makes for the best garnish. I chop parsley in copious amounts, and use it generously. Did you know that parsley can also freshen your breath after a meal? That's why you usually find it in large sprigs on a dinner plate! I prefer the flat-leaf variety as it can be more widely used. Parsley can even be made into a pesto (usually made with basil). Check out the recipe for Fettuccine with Walnut-Parsley Pesto.

2. Basil : Basil is a perfect addition to any Italian meal, goes great with tomatoes and mozzarella, as well as sprinkled on top of pasta dishes. It also adds a lovely flavor to marinara sauce. Basil tends to go bad quickly, so if you buy it, use it! However, I've found that I can lengthen the life of basil by buying a plant, keeping it in the window, and watering it generously. The plant will continue to grow, giving you new leaves every so often, and draw out the time between basil purchases. If you find yourself with a large bunch of basil, and no use, make a pesto sauce (with basil, this time) and save it for a quick weekday dinner, tossed with some penne. A great lunch time use for basil is my favorite sandwich : Proscuitto, Mozzarella, Tomato and Basil.

spaghetti alla checca
Mmm...Basil with Tomatoes and Mozzarella

3. Chervil : This one is a bit harder to find, but if I find it, I buy it, and in the summer months, I usually try to grow it in a pot on my windowsill. It's a very light herb that makes for a lovely garnish, and tastes great in salads as well. It is related to parsley, but much lighter in flavor, and plays an integral part in the French herb mixture, fines herbes. A recipe I love, and use all the time, uses many different herbs, mixed with greens, and a maple shallot dressing for an extremely flavorful salad. It can be found in Barbara Lynch's, Stir.

4. Chives : Chives also make for a wonderful garnish, and have quite a bit more bite than the other herbs listed here. As part of the onion family, they add a lovely zest to a dish, and I rarely make scrambled eggs without them. Because this is a year-round herb, it's always readily available, and if you are plating a dish that seems to be missing a pop of color, add chives - you can't go wrong.

Mixed Herb Bouquet
Mixed Herbs

5. Cilantro : Also known as coriander, as well as Chinese parsley, this herb is widely used in many cuisines. It's a very common garnish in asian cuisines, and it also plays a very important role in most salsas, guacamoles, and other Mexican sauces. I know, I'm sure some of you are saying that you don't like cilantro, it tastes like soap, etc...I admit that it is definitely an herb that you either love or hate. After reading an article about the strong feelings that people have towards cilantro, I found this: "Dr. Wysocki contends dislike of cilantro stems from its odor, not its taste. His hypothesis is that those who don't like it are unable to detect chemicals in the leaf that are pleasing to those who like the herb."  Hope that helps to explain your love or hate of this lovely herb!


Well, that's five! I hope that this post shed some light on the many herbs out there. I'll leave you with this: The best way to keep your herbs freshest the longest is to keep the stems in water. I put my herbs in a large vase or bowl, stems in water, covered with a plastic grocery bag. Then, when I need some herbs, I just pluck some off the bunch and put the rest back in the fridge. Another way to do it is to wash your herbs, and wrap them in a damp paper towel. Store them in ziploc bags in the refrigerator.

The snow is piling up out there, and I have a feeling I might have some extra time on my hands to do some cooking tomorrow. When you're stuck in the house, what better way to pass the time then with something you can enjoy when it's finished!

Until tomorrow...

Monday, January 10, 2011

To chiffonade, or not to chiffonade...there really is no question.

Basil Cutting

Basil is a very delicate herb. It's important to treat it with care when you are chopping it. It came to my attention that I did not address this in yesterday's post, even though chopped basil was necessary for the recipe. It's a pretty important skill to have if you are going to cook on a regular basis so I've taken the liberty of making a video to show you how to properly chop basil leaves.

The reason that the edges of basil turn darker when you cut them is that the knife is damaging the leaf where it slices. The more you pound on the leaves with your blade, the more damaged it gets, and the less flavorful. Basil is one of the best flavors in a meal, and you don't want to jeopardize that flavor by brutalizing the leaves. 

For this reason, we take a bunch of basil leaves and pile them on top of each other, larger leaves at the bottom of the pile, smaller ones at the top. Once the pile is completed, we are going to roll the leaves into a cigar like shape. Hold the cigar with your left hand while you take the knife in your right (unless you are left-handed...in which case, reverse this). Start slicing in a determined fashion, one slice taking a small row of basil off of the cigar. Once you get to the stems, stop slicing (you don't really want the stems to find their way into your dish if you can help it). You'll have a nice pile of basil ribbons which you can then use in whatever you are cooking. Only one leaf (the outside of the cigar) was damaged this way and you preserve the majority of flavor from the basil. This technique is called a chiffonade. You can use it for any leafy green or herb, but I tend to find it most helpful when cutting basil. If the recipe calls for a smaller cut than this, you can then take those ribbons and cut them in small squares, but I tend to leave them in ribbons for aesthetic appeal.

And now, for the main event:


I hope that this sheds some light on the delicate art of basil chopping. If you have any questions, leave me a comment and I promise to clear up any confusion!

Until tomorrow, my budding chefs!