Showing posts with label quenelle. Show all posts

Monday, March 5, 2012

Little Puffs of Magic

Tonight, I decided to try something new, something along the lines of savory baking, and I think I'm in love! These little puffs of magic that I created are Thyme Gougeres, and they are fluffy, light and delicious...and best of all, really easy to make!

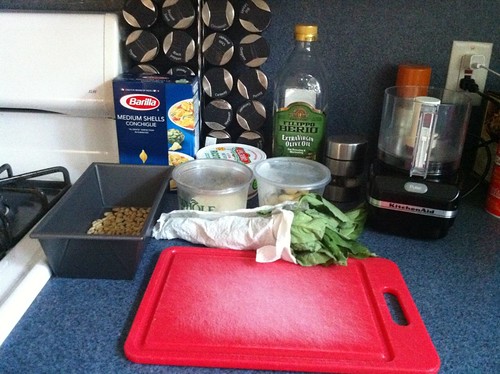
I started off by reading the entire recipe because I wanted to make sure that everything was done according to instructions. I decided to set up my mise en place first, so that I could just add each thing as necessary without having to scramble. Butter, flour, salt, cayenne pepper, grated Gruyere, grated Asiago, and some thyme leaves, along with some eggs, and we were ready to go!


Okay, the first step was to boil a cup of water, with the 1/4 cup of butter. Once boiling, I poured the salt, cayenne pepper and flour into the pot and stirred vigorously until it all turned into a ball. It was kind of like a very large amount of roux, made very quickly!

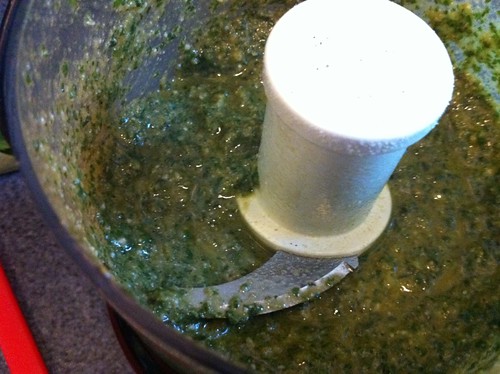
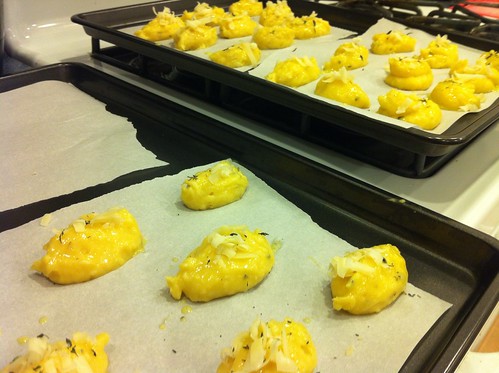
From here, it was transferred to the standmixer, and stirred with the paddle attachment, with the grated cheeses, and then, one egg at a time, waiting until each was incorporated to add another. The recipe calls for a pastry bag, but I don't have one of those, so I decided to use another skill I have instead. Making a quenelle with two spoons, transferring a small amount of dough back and forth until it stays in a nice oval shape works just as well as putting all the dough into a pastry bag and piping it back out. 
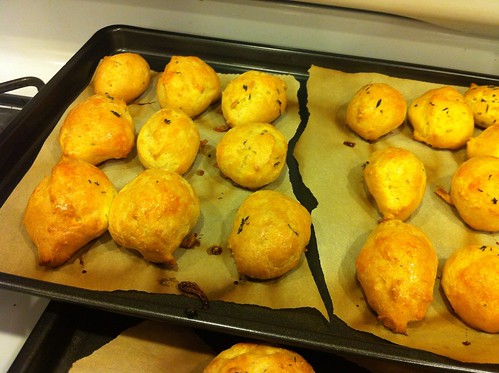
So I made my quenelles, one after the other, until all the dough was gone and my baking sheets were full! I brushed some egg on each quenelle, sprinkled the last of the grated gouda, and thyme leaves on top, and into a 400 degree oven they went, for 25 minutes. 


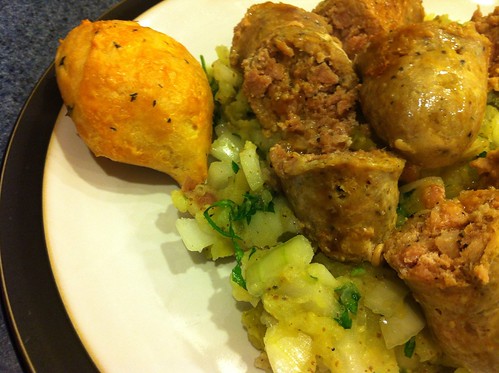
While the gougeres were cooking, I worked on the main course: Sausage with Smashed Potatoes and Cornichons. It was perfect timing...it took about 25 minutes to make dinner, and 25 minutes to cook the gougeres, so everything came together at the same time. While dinner was delicious, the star of this meal were certainly the Thyme Gougeres! 


They were easy to make, delicious to eat, and the perfect tidbit to throw in a basket for entertaining. In fact, the recipe even says that you can make them in advance, and freeze them to reheat later! I might just be keeping a batch of these on hand all the time!

Tuesday, October 4, 2011

What's a Brunoise, anyway!?

A brunoise, according to Wikipedia, is "a culinary knife cut in which the food item is first julienned and then turned a quarter turn and diced again, producing cubes of a side length of about 3mm or less on each side." Now that we have the defining out of the way, brunoise is the main knife skill needed for tonight's recipe. This is the first meal I'm making from my new cookbook, The Boston Chef's Table: The Best in Contemporary Cuisine, which is a very cool compilation of recipes from restaurants in and around the city of Boston. Ironically, I chose a dish from a restaurant I've never been to before, but it sounded interesting. Coriander Bistro is located in Sharon, MA, and run by Chef-Owner, Kevin Crawley. His Boneless Chicken Brunoise, is approachable, and simple to make. I was pleasantly surprised by the ease of instructions, and even happier with the outcome!

The recipe is laid out very methodically, listing ingredients that need to be prepared, followed by the steps in cooking that portion of the meal, before moving on to another list of ingredients and instructions. The first step is the brunoise, and the step that took the longest to prep. I had to use the specific knife cut to get a 1/4 cup of each of the following: carrots, celery, onions, shallot, zucchini, red pepper and leeks. Once all of my vegetables were cut, I lightly sauteed them in a pan with some olive oil. When they had been heated through, and the onions were translucent, they were removed from the heat and set aside.

IMG_1023

The second step was to create a quenelle, or a sort of dumpling using pureed chicken mixed with egg whites and cream. This was an easy step! I cut a chicken breast into large chunks and put it into the small bowl of my food processor, along with an egg white, chopped shallot, some freshly grated nutmeg, salt, and pepper. After a few pulses to blend the mixture, I poured some cream in as it pulsed, until I had a paste-like consistency. This got set aside, right next to my brunoise.

IMG_1024

Now for the main part of this process...the CHICKEN! I placed 4 chicken breasts in between two sheets of plastic wrap before pounding them out so that they were an even thickness. Once ready, I placed them in a 13"x9" baking dish and began to spoon and spread the quenelle on top of each chicken breast. On top of that, I spooned the brunoise. Everything got drizzled with a bit of olive oil, and then I poured some white wine and chicken broth into the pan, before placing it in a 350 degree oven for 12-15 minutes. Mine took a few minutes longer than that, actually...but start conservatively and put it back in the oven if you have to. There's nothing worse than overcooked chicken!

IMG_1025

While the chicken cooked, I had to make the sauce that the chicken would rest on. This was simple! I added a cup of red wine to a saucepan along with a bay leaf, a thyme spring, some salt and pepper and some veal demi-glace. You can buy the Veal Demi-glace at specialty shops, and if you can't find it there, it's sold on Amazon.com, as well! All I had to do was allow it to simmer until it had reduced by half, and was thick, with a lovely sheen. 

IMG_1026

It was time to plate, and it hadn't even been an hour! I swiped a nice amount of the red wine sauce on to each plate in a pretty design and then placed a chicken breast, topped with the quenelle and brunoise, on top of the sauce. Yummy!

IMG_1027

Now, I was supposed to serve tonight's meal with a dessert, making it a menu. However, I couldn't find heavy cream at the store this evening, and I knew that I couldn't make a maple custard with light cream. I'm going to save it for another evening, when I can make it using the correct ingredients! Be on the lookout for a separate post on that one! 

Monday, July 11, 2011

Pesto ... as Promised!

I opted to use the bunch of basil I received in my delivery first, because basil spoils quite quickly, and I didn't want it to go to waste. The best way to use a large amount of basil is to make pesto sauce. What's pesto sauce, you may ask...well, I'm about to show you. It is probably one of the easiest sauces to throw together!

Pesto goes great with any pasta, but I prefer it with a shape that has a larger surface area to catch the sauce. I decided to go with a box of medium shells that I had in my pantry (I told you I was going to start using stuff up!). You'll also need some grated Parmesan, pine nuts, salt and pepper, garlic and olive oil, in addition to the basil. I decided to add some ricotta to the top of my dish, as a garnish, as well, so I saved a few basil leaves to mix in with that as well.

IMG_0802


The first thing that you need to do to prepare your pesto sauce is toast the pine nuts. When I say toast, I mean, get some heat on them...they burn VERY quickly so throw them under the broiler for a minute or two tops, but keep a close eye on them. All you need is a little heat to bring out the flavor of the nut.

IMG_0803


In a food processor, chop up a clove of garlic (or a little less than a clove if you don't want it to be very garlicky) and the pine nuts until they are all chopped up. Add about 3 handfuls of basil and chop it all up. Add the Parmesan and then start pouring olive oil, little bits at a time until you have a thick, chunky consistency.

IMG_0804


While the shells were cooking, I took half a head of lettuce and mixed it with some shaved carrots, sliced radishes, and lemon-tarragon vinaigrette, as a side dish to the pasta. I also mixed a few tablespoons of ricotta with some salt, pepper, and basil ribbons.

IMG_0805


Once the pasta was drained, and put back in the pot, I added the pesto and tossed it all together. Reserve a little bit of the pasta water before draining, in case you need to thin your sauce a bit. In this case, I didn't need to, but depending on the consistency of your pesto, it could be an option for you, and the starchy water is the perfect antidote. I plated the salad alongside the pasta and added a nice quenelle (a dollop shaped with two tablespoons) of ricotta mixture to the top of each plate. I sprinkled it with Parmesan and a few extra basil ribbons. VOILA!

IMG_0806