Showing posts with label sausage. Show all posts

Friday, July 20, 2012

Lasagna on the Fly!

"On the fly," is a term used in restaurant kitchens, when something needs to be cooked and delivered to a customer ASAP! That's exactly what happened last night! We got home a bit later than usual, and my husband needed to get to a softball game. He also needed to eat before he went, so I flew into the kitchen and whipped up a little something! This was the planned meal of the evening, but I thought I would have more time to prepare it, so I definitely pulled this out of somewhere!

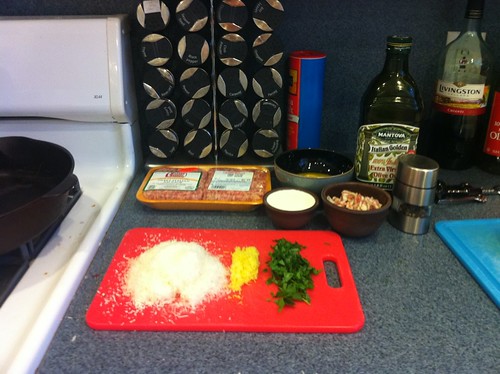
Three things needed to happen before I could assemble the Sausage, Chard, and Lemon LasagnaI had to simmer some lemon slices to soften them, cook the sausage until it was no longer pink, and create a delicious Bechamel sauce. I whizzed around the kitchen (well, as fast as my limping foot could take me) gathering my ingredients in my arms. I was able to do it one or two trips! I got three pots set on the stove and started preheating the oven too!

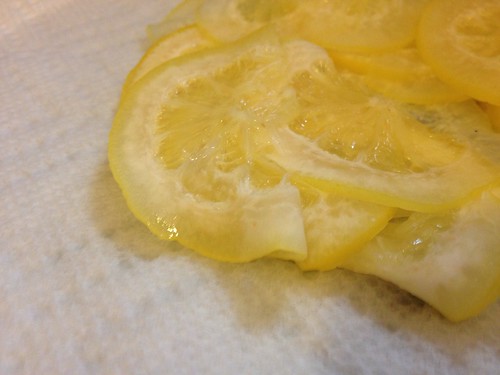
The first pot held a thinly sliced lemon, along with some water that I brought to a boil, and simmered for 7 minutes. This softened the lemons, bringing out the flavor and also making the entire thing (including the rind) edible and flavorful. Once the 7 minutes had passed, I took them out of the water and left them to dry on a paper towel. We'll be using those later!

Untitled

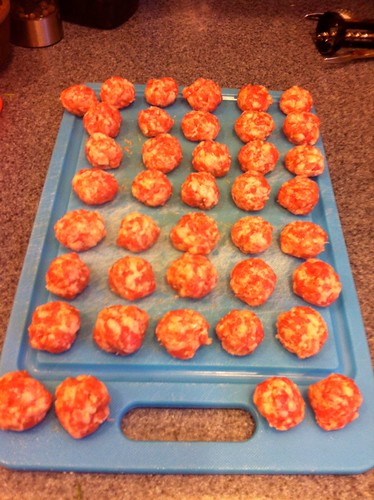
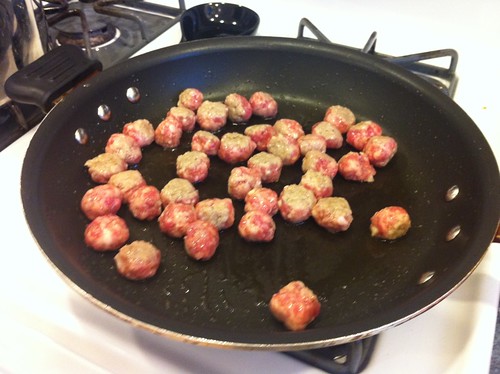
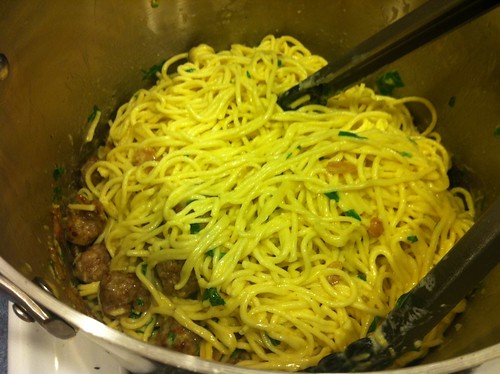
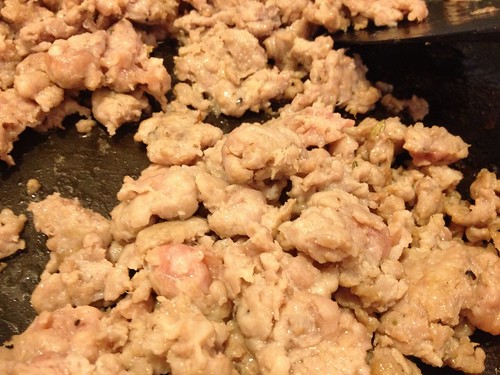
Meanwhile, I also placed some sweet Italian sausages into a non-stick skillet, peeled of their casings. I used a wooden spoon to break up the sausages, letting them crumble and brown in the pan. I was able to let that sit and cook, while I worked on the Bechamel sauce, which required a lot of stirring and attention.

Untitled

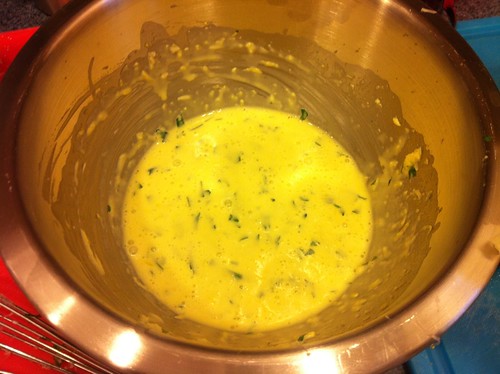
Now, for the Bechamel sauce, which I have to say, came out really well! I melted three tablespoons of butter in a pan, and added a quarter of a cup of flour. This combination creates a roux, which thickens liquids over heat. After cooking the butter and flour mixture for a minute or two, I added the three cups of whole milk and brought it all to a boil. As it began to boil, it began to thicken, which meant it was time to remove it from the heat, and add the Parmensan cheese. As the cheese melted into the roux and milk, the sauce became silky and thick, and delicious! I seasoned it with some salt and pepper, and stirred in my chopped Swiss Chard that I got at a local farmer's market this past weekend.

Untitled

Now, it was time to assemble the lasagna and put it in the oven. Where are the noodles, you ask? Well, this recipe called for Barilla's No-Bake Lasagna Noodles, so I decided to go with that direction, rather than making my own this time around. I spread some sauce on the bottom of the pan, added two noodles, half of the sausage and a cup of sauce. I repeated the procedure and then finished it off with two noodles, the rest of the sauce and the lemon slices. I have to say that this is the first lasagna recipe that has made the perfect amount of sauce. I usually double the sauce portion of any recipe because I never seem to have enough, but this was perfect!

Untitled

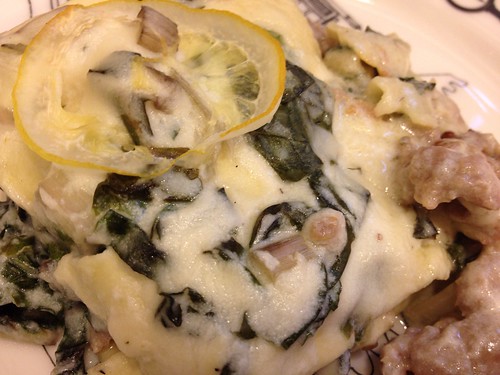
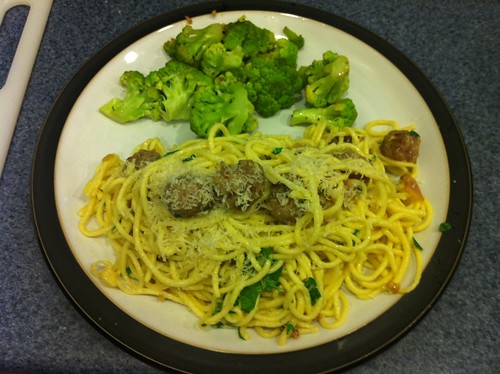
After 27 minutes in the oven, at 350 degrees, the lasagna was ready! And I was just under the gun, too! We finished eating and then, Matt was off to his softball game! Clean-up wasn't too bad either! Since there were so few ingredients, the majority of the clean-up were the three pots I used to prep everything. The lasagna pan went straight into the fridge - I'm looking forward to those leftovers!

Untitled

Monday, March 5, 2012

Little Puffs of Magic

Tonight, I decided to try something new, something along the lines of savory baking, and I think I'm in love! These little puffs of magic that I created are Thyme Gougeres, and they are fluffy, light and delicious...and best of all, really easy to make!

I started off by reading the entire recipe because I wanted to make sure that everything was done according to instructions. I decided to set up my mise en place first, so that I could just add each thing as necessary without having to scramble. Butter, flour, salt, cayenne pepper, grated Gruyere, grated Asiago, and some thyme leaves, along with some eggs, and we were ready to go!


Okay, the first step was to boil a cup of water, with the 1/4 cup of butter. Once boiling, I poured the salt, cayenne pepper and flour into the pot and stirred vigorously until it all turned into a ball. It was kind of like a very large amount of roux, made very quickly!

From here, it was transferred to the standmixer, and stirred with the paddle attachment, with the grated cheeses, and then, one egg at a time, waiting until each was incorporated to add another. The recipe calls for a pastry bag, but I don't have one of those, so I decided to use another skill I have instead. Making a quenelle with two spoons, transferring a small amount of dough back and forth until it stays in a nice oval shape works just as well as putting all the dough into a pastry bag and piping it back out. 
So I made my quenelles, one after the other, until all the dough was gone and my baking sheets were full! I brushed some egg on each quenelle, sprinkled the last of the grated gouda, and thyme leaves on top, and into a 400 degree oven they went, for 25 minutes. 


While the gougeres were cooking, I worked on the main course: Sausage with Smashed Potatoes and Cornichons. It was perfect timing...it took about 25 minutes to make dinner, and 25 minutes to cook the gougeres, so everything came together at the same time. While dinner was delicious, the star of this meal were certainly the Thyme Gougeres! 


They were easy to make, delicious to eat, and the perfect tidbit to throw in a basket for entertaining. In fact, the recipe even says that you can make them in advance, and freeze them to reheat later! I might just be keeping a batch of these on hand all the time!

Tuesday, September 6, 2011

Truffle-Scented

La Tourangelle is a wonderful company that makes a line of sophisticated, gourmet oils. I have numerous bottles in my pantry, including walnut and hazelnut oil, both wonderful for making seasonal salad dressings. However, my favorite in their collection has to be the Black Truffle Oil. Even better, our friends at FoodSherpa are going to be offering a special deal on this wonderful oil on September 14th! Keep your eye on their site for the sale!

IMG_0974


I decided to get creative again this evening, and yet again, not a cookbook cracked. The second recipe in my would-be cookbook? Hmm...it's all coming together, isn't it? I decided that I liked the idea of concocting some sweet potato gnocchi, and incorporating the truffle oil into the recipe. To make truffle-scented sweet potato gnocchi, I slowly added the oil at different steps of the process to build on the flavor without becoming overbearing. While cooking the potatoes, I added a bit to the water. When I mixed the dough for the gnocchi, I added a bit more oil. I've made gnocchi before, so I won't go into detail, but I had to use more flour than I normally do because the consistency of a sweet potato is a bit less starchy. The dough became a bit goopy until I worked extra flour in, but it all came together. Like any dough, you just keep adding flour if its sticky, and water if its dry until you get the right consistency. If you don't want to make your own gnocchi, I happened to see sweet potato gnocchi for sale in the refrigerated section at Whole Foods the other day!

IMG_0972


Once the gnocchi was made, I boiled some water to cook it. While I was waiting for the "watched pot," I  added a stick of butter to a large saute pan, and a few sprigs of sage. I was going to make a sage butter to saute my gnocchi in once they were boiled. After the butter was melted, and had simmered for a few minutes, the aroma became very sage-y. At this point, I added some sliced sausage to the pan and allowed it to fry a bit in the butter. I had pre-cooked the sausages separately, pulled them off the heat before they were fully cooked, and allowed them to rest and cook the rest of the way. That way, they were still really nice and moist when I sliced them and added them back to the heat. I pulled the sage sprigs out at this point.

Once the gnocchi was all boiled, I added it to the sage butter and sausage and allowed all the flavors to meld and heat together. I poured just a dash more truffle oil in the pan and threw a large handful of arugula on top, as well as some chopped sage. After tossing things together, the arugula quickly began to wilt and I seasoned the meal with salt and pepper. Right before serving, toss the dish with a good heaping spoonful of Parmigiano-Reggiano. Plate and add a touch more Parmigiano (because you can never have too much!)

IMG_0973


To recap, all you'll need is some salt and pepper, sage sprigs, a stick of butter, a handful of arugula, Parmigiano-Reggiano, a couple of nice quality sausage links, sweet potato gnocchi (truffle-scented, if you make it from scratch) and of course, TRUFFLE OIL! The oil really took this dish from delicious to decadent. Each ingredient added it's own bit of flavor to the dish and everything melded together really nicely. The sage added an earthiness, the arugula added some peppery bite, the sausage added some heartiness and the oil, well...the oil added decadence. I can't stress this enough...Definitely...try this at home!

Monday, September 5, 2011

Made-Up Mussels

Wow, this weekend was jam-packed with fun! Today, our last day of the long weekend, was spent in the beautiful weather of early September in Massachusetts. The leaves are beginning to change color, but the sun still beats down and makes for pretty warm days. We decided to get take-out omelets from a local establishment and enjoy them in a park near our home. We even brought Oia's breakfast too...and she sat by the bench, enjoying the weather and a nice outdoor meal with us.

Once we were fed, we drove to meet friends for a hike with them and their dogs. Six miles later, the puppies were exhausted, we were on our last legs, and ready for a nice cool drink! By the time we got home this evening, I wasn't in the mood to make anything elaborate, but I did have a bag of mussels that I really needed to use! I scanned my fridge for what I could make and I came up with a pretty delicious recipe...and I made it up...I didn't crack a single cookbook tonight! This might be the first recipe in what could be MY cookbook! :)

Okay, so, I took the bag of mussels out, discarded the ones that didn't close when tapped, and debearded the rest so they were ready to steam. I minced two garlic cloves and sauteed them in a tablespoon of butter until fragrant, and then added the leftover sausage mixture from those stuffed olives I made yesterday! That was just some sausage, taken out of its casing, with some salt, minced garlic and red pepper flakes. Once the sausage was cooked, I poured in about a cup of white wine and allowed it to come to a boil. Right before I added the mussels, I added a second pat of butter so that as the mussels steamed, the sauce thickened a bit and got a nice sheen to it. After about 5 minutes (or when all your mussels are fully opened), throw in a big handful of baby arugula and allow it to wilt slightly.

IMG_0966


I served it over some spinach fettuccine. Just scoop the mussels, along with the broth, over the top of the plain pasta and it will seep throughout the plate to coat the noodles. It was a garlicky plate of goodness, and the red pepper flakes from the sausage mixture went a long way to add a nice kick to the flavors! Dinner in 15 minutes? Totally doable!

Tuesday, June 14, 2011

Tailgating in the Kitchen

Hello, my fellow culinary creators! It's been a few days, and for that, I apologize. June is going to be a very busy month for us...we've got three weddings in the next three weekends, and then other plans as well! But the good thing about all these events is that I get to experience lots of different epicurean treats, and then, share them with all of you!

Tonight, Oia graduated from Puppy Training, and we are proudly displaying her diploma on our refrigerator...the same refrigerator that I pulled dinner out of tonight! I went for a meal that I took from a magazine that a friend purchased for me at the check-out last summer. It's an entire magazine of tailgating recipes, meant for parking lots and fields, with outdoor grills and beer pong tables...there's nothing better than tailgating before a football game or outdoor concert in the thick of the summer. I use this magazine mostly for camping, BBQs and, well, tailgating...but once in awhile I like to bring the tailgating indoors. It's been a rainy few days, it's gotten much chillier and in order to continue the thought that summer MUST be on its way, I decided to do a little indoor grilling. I opted for the Sausage, Grape, and Gorgonzola Dolce Sandwiches and the Chopped Vegetable and Couscous Salad with Black Olive Vinaigrette.

I got my 2-burner grill pan out, and set it to heating while I prepped all the veggies for the couscous salad. I sliced some eggplant and zucchini, peeled a few carrots, quartered a head of radicchio and trimmed some scallions. I pulled all the other ingredients out of the fridge and lined them up as well. (You can click on the links above for a full ingredient list and instructions).

IMG_0710


As I grilled the veggies in batches, I mixed up the vinaigrette for the salad with red wine vinegar, dijon mustard, black olives, olive oil and some black pepper. Check out this emulsion!

IMG_0711


Once all of the veggies were grilled to perfection, I transferred them to a platter to cool while I assembled the sandwiches for my panini grill.

IMG_0714


I split the sausages almost in half, like the recipe describes, and placed them on the hot grill to cook.

IMG_0712


While the sausages cooked, I made my couscous by boiling some water and allowing the couscous to soak in it for 5 minutes, covered. I also chopped all of my cooled, grilled veggies for the salad and placed them into a large bowl. I stirred in the mixed herbs, lemon juice, salt, pepper, couscous, and vinaigrette. Because this salad can be served at room temperature, it can certainly be made in advance but I liked the heat that the veggies added to the mix right after it was made. It's a beauty though, isn't it?

IMG_0717


And now, to assemble the sandwiches. I took the cooked sausages off of the grill. The recipe calls for baguettes, but I had some hot dog buns to use so I settled for those this time around. I didn't want to waste what I already had lying around. I placed some gorgonzola dolce on each side of the bun (the buns were small, and definitely would not have held the whole sausage so I split them up into two smaller sandwiches). Into the cheese, I pressed a few slices of red grapes so that they would stay fixed in place. On top of all this, I laid the sausages and then grilled them open-face on the panini grill.

IMG_0718


A baguette definitely would have soaked up the melted cheese a little better and made for a sturdier sandwich, but the flavors were incredible together. Everything really popped, and the red grapes added a nice burst of freshness when you crunched down on one. The flavors of these two dishes melded very well together as well. The couscous salad recipe made a very large amount of food, so it's a great one for parties, that's for sure. The sandwich recipe can be altered to accomodate any amount of people...and it was very simple to put together - a great tailgating option!

IMG_0719

Monday, March 28, 2011

Buon Appetito!

Tonight, I made some fresh spaghetti for a lovely dish from Jamie's Italy, Spaghetti alla Carbonara di Salsiccia. Well, the recipe calls for linguine...but I wanted to use my pasta press instead of the rollers, so that's what I did! :) This also gives me a perfect opportunity to talk to you about carbonara sauce, since it's one of my favorites! It is an egg-based sauce that usually incorporates Parmigiano or Pecorino cheese, as well as some parsley and some sort of pork product, usually bacon or pancetta. It's totally simple, and is an extremely easy week-night meal. You tack on a bit more time if you make fresh pasta, but you know what I say - it's always worth it to make fresh pasta!

Tonight, I started by making my pasta dough so that it could rest while I got my mise en place together. I set it aside for the necessary 30 minutes.

IMG_0401

This is another recipe with very few ingredients so my mise en place was done very quickly. All you'll need is some extra virgin olive oil, some heavy cream, grated Parmesan, lemon zest, salt and pepper, some chopped parsley, chopped pancetta, 4 Italian sausages and 4 egg yolks.

IMG_0402

While my dough was still resting, I moved on to the first step of the recipe - making the little sausage meatballs. I slit the skin on the sausage and slipped the meat out so that I had a pile of loose sausage meat. I rolled little pieces into meatballs, about the size of large marbles. I picked the perfect surface to work on, huh?

IMG_0403


My dough was ready at this point to start running through my pasta press so I stuffed some in to start pressing while I started the next step. I put some olive oil in a large pan and heated it until the oil was warm. I poured my mini sausage meatballs into the pan and allowed them to fry on all sides until nice and golden.

IMG_0404

Once the sausage was golden on all sides, I poured in my chopped pancetta and allowed the mixture to continue cooking until the pancetta started to become crispy and golden as well.

IMG_0405

Meanwhile, my pasta dough had been fully turned into spaghetti noodles so I put a pot of salted water on to boil. While I was waiting for my "watched pot," I mixed the egg yolks, heavy cream, half of the parmesan, the lemon zest and the parsley together with a whisk. It turns into a lovely bright yellow mixture.

IMG_0406

Once the pasta is finished cooking (8-12 minutes for boxed pasta; 3-4 minutes for fresh pasta), drain it in a colander, reserving just a little bit of the cooking liquid in case you need to thin your sauce a bit. Pour a little olive oil into the bottom of the pot that you cooked the pasta in, and then pour the pasta back in from the colander. At this point, pour the sausage and pancetta mixture into the pasta (try and avoid pouring the grease from the pan in if you can) and then pour the egg mixture on top. Quickly toss your pasta with some tongs so that the carbonara sauce coats all the noodles but doesn't scramble. The heat from the pasta will cook the egg gently so that it turns into a rich, gooey coating for the spaghetti. Be careful to continue tossing until all the noodles are well coated and there is no extra sauce cooking on the bottom of the pan...you'll have scrambled eggs if you're not watching what you are doing!

IMG_0407

Once you've plated the pasta, sprinkle it with some of the leftover grated Parmesan. You can serve with a side salad, or a steamed veggie. Tonight, I chose to use Broccoflower. It just looked so bright and spring-y at the grocery store - I had to buy some!

IMG_0408

That was DE-LISH-OUS!