Showing posts with label spicy. Show all posts

Sunday, May 15, 2011

Spicy Braised Korean Pork

Tonight's recipe comes from the Top Chef Cookbook, from a group challenge to create a dish using the flavors of either Korea or Vietnam. I opted to make brown rice, instead of the sticky rice ... I used up the rest of my sticky rice stash the other day! Instead of the Kim Chee, which takes 4 days to make, I purchased some marinated bok choy from H-Mart, our local Asian market. I'm pretty busy these days, and the idea of a 4-day process just wasn't striking my fancy. I found that you can view this specific recipe from the Amazon preview, so check it out here.

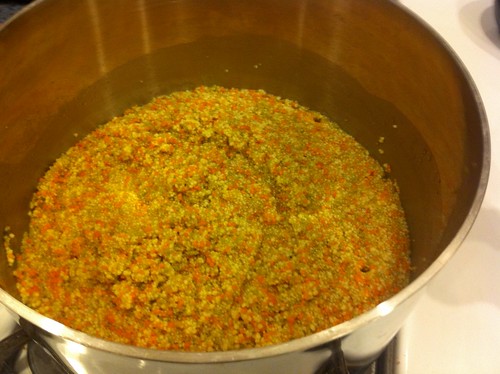
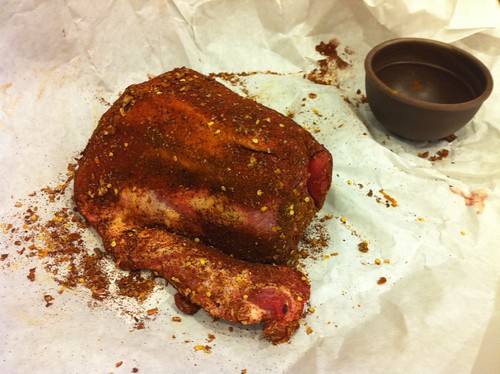
Because the pork shoulder needed to brown by itself for about 20 minutes on the stove, I prepped that before gathering the rest of my mise en place. I used a 4-pound pork shoulder, as opposed to a 6-pound one. There's only two of us, and we like leftovers, but eating pork for the next two weeks isn't very appealing. I rubbed the pork with 1 tablespoon red pepper flakes, 2 tablespoons paprika, 2 tablespoons curry powder, 2 tablespoons minced garlic, 1 tablespoon salt, and 1 teaspoon black pepper. In the process, I ran out of paprika and curry powder! Looks like a spice shopping spree is in order!

IMG_0641


I placed this in a large, ovenproof pot with some heated vegetable oil, and allowed it to brown on all sides, for about 20 minutes total. Meanwhile, I gathered everything else!

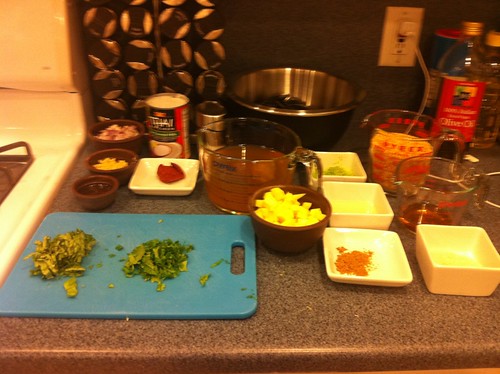
2 Bosc pears, peeled, cored and diced
1 cup diced carrots
1 cup diced celery
1 cup diced yellow onions
10 garlic cloves
2 tablespoons minced fresh ginger
1 quart apple juice
2 teaspoons rice vinegar


IMG_0643


By the time I'd prepped all of my ingredients, my pork was nice and browned on all sides!

IMG_0642


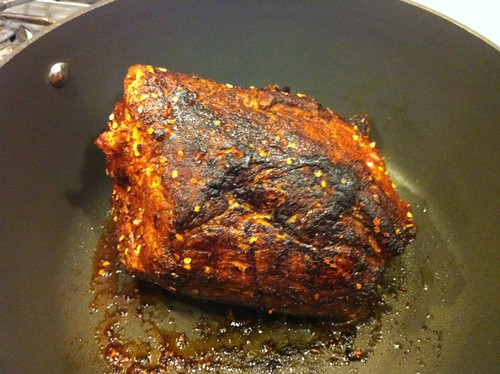
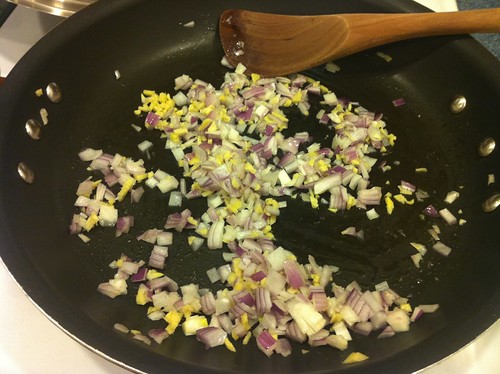
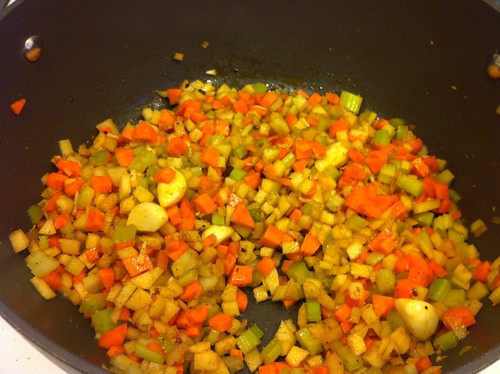
That looks good, huh!? It smelled delicious! I removed the pork from the pot and added the pears, carrots, celery, yellow onions, garlic cloves and ginger. I sauteed the mixture until softened, about 10 minutes.

IMG_0644


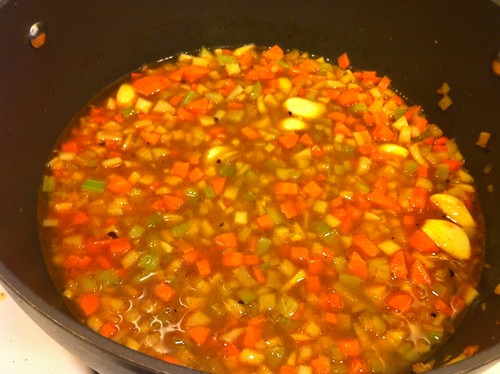
After those 10 minutes, I added the apple juice and brought it to a boil over a medium-high heat.

IMG_0645


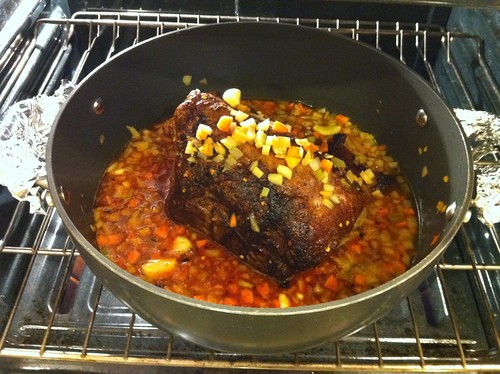
I added the pork to the pot, turned it over a few times to coat and transferred it to a 350-degree oven, to cook for about 3 hours, turning every half hour or so.

IMG_0646


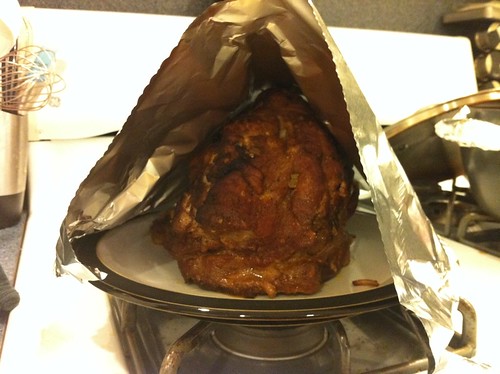
Cut to three hours later, a few loads of laundry, and some good ol' puppy playtime, and the pork is ready! Remove the pot from the oven, and transfer the pork to a plate to rest, tented with aluminum foil.

IMG_0647


Meanwhile, put the potted veggies and apple juice mixture back to the stove, and bring it to a boil. Allow it to boil until thickened, for 15 minutes, while the pork rests. After the time has passed, season the mixture with rice vinegar, salt and pepper.

IMG_0648


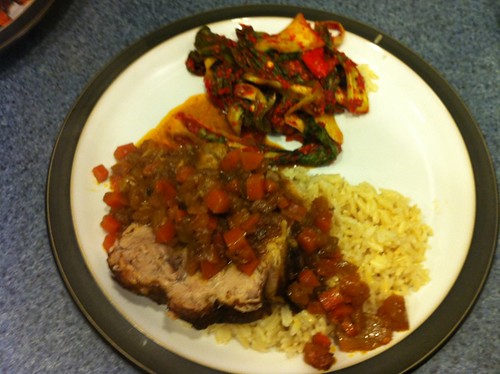
To plate, I put some seasoned bok choy on each plate, and a nice mound of brown rice. I placed a thick slice of pork on each mound of rice and then topped it with some of the sauce. The pork was done PERFECTLY, and the spices were fantastic. This was a really hearty Sunday dinner...one for the books, people. One for the books!

IMG_0649

Wednesday, April 20, 2011

Spicy Coconut Curry Steamed Mussels with Mango Couscous

I started the current menu off with a bang tonight, steaming up some mussels in a curry sauce with some delicious couscous! This recipe is from the Top Chef cookbook, and the dish was made by Betty, in Season 2. While the cooking time in this recipe is pretty much under 10 minutes...total...the prep time was a bit more intense...but still, dinner was ready in about 1/2 an hour, so hooray for that!

I gathered some mussels, vegetable oil, ginger, red onion, red curry paste, coconut milk, vegetable stock, limes, ground coriander, salt, black pepper, instant couscous, mango, cognac, sugar, basil, and cilantro, and set up my mise en place, ready to cook for 10 minutes! :) Be forewarned - a lot goes on in the next 10 minutes!

IMG_0534
I'm not sure how I didn't notice how awful this picture came out! Sorry!

First things first, I got out a large skillet and added a tablespoon of vegetable oil. Once heated, I added some minced ginger, and a minced red onion and let them cook for about 3 minutes.

IMG_0536

I added the curry paste and stirred everything around until the ginger and onion was well coated in the paste. I poured in 1 cup of the vegetable stock and the coconut milk and raised the heat to bring the mixture to a boil.

IMG_0538

Meanwhile, I poured two more cups of vegetable stock into another saucepan, and set that to boil as well. With the stock, I poured in some ground coriander, salt and pepper.

IMG_0537


Once both pots are boiling, I let the curry mixture reduce for about five minutes. At this point, I added the mussels to the curry mixture, along with the lime zest.

IMG_0540

Once the mussels were in, I covered that pot (for 6 minutes), removed the boiling stock from the heat, and poured the couscous in. I stirred that all up and then covered it to sit for 5 minutes.

IMG_0541


The last step was to make the topping sauce, which consisted of some sugar, the lime juice, and some cognac. While the couscous was sitting and the mussels were steaming, I boiled these three ingredients together in yet another saucepan.

IMG_0542


For me, it took about 6 minutes for the mussels to open, but it could take up to 8 minutes, depending on your mussels, so keep an eye on 'em and don't take 'em out too soon...or too late, for that matter! :) Also, stir the diced mango into your couscous at this point.

IMG_0543


Plate your dish by scooping some couscous onto the plate. Top it with some mussels, a few ladlefuls of curry sauce, and the cognac reduction. Sprinkle some chopped basil and cilantro on top and voila...a deliciously spicy meal for a Wednesday evening!

IMG_0544

Wednesday, March 9, 2011

Now That's-a Spicy Italian Sauce!

A while back, I wrote a post about The Advantages of a Homemade Bolognese, and when I wrote it, my intent was to intermittently touch on different sauces that you can use in your menu planning for easy and quick meals. For some reason, I had arrabbiata sauce stuck in my head today, so I thought I would share this spicy sauce with you in a post!

RedChiliFlakesFLICKR-02
From Flickr - by AntTree

Traditionally, this sauce is served with penne, as the tubular shape is great for picking up the chunks of tomatoes in the sauce! It's a very simple sauce of only four, sometimes five ingredients. The original version includes garlic, tomatoes, red chili flakes and olive oil. Some people add basil to this mix but the majority of Italian chefs won't do this. When the dish is served, it is usually sprinkled with some parsley, and in my case, Parmigiano Reggiano.

Big Cheese
From Flickr - by kellinasf

The great thing about this sauce is that you have control over how spicy you want it. The red chili flakes are HOT, so if you don't like a ton of spice, use a little bit...and if you love the heat, pile it on! My tip to you is start off slow, and keep tasting your sauce as it simmers! You can always add, but you can never take away!