Showing posts with label ginger. Show all posts

Sunday, November 27, 2011

So Many Leftovers

Last night, I began to use the massive amounts of leftovers we have from our Thanksgiving Day feast. What I realized is that we have a lot of turkey to use in the next few days! Yikes! We're going to be turkey-ed out before you know it!

I don't really like just "making a plate" of leftovers, since it's like reliving the original meal, which has already been done. I like to be creative with the ingredients, and make something totally new, if possible! Last night, I went a bit mainstream and we had Gobblers for dinner! A Gobbler is a sandwich, made with all the leftovers from Thanksgiving dinner: cranberry sauce as a spread, stuffing as a filler, and turkey slices as the meat. I had made a loaf of Brioche bread on Thanksgiving Day in anticipation of this dish (but also to make the house smell yummy). Brioche is the perfect bread for this type of sandwich because it is dense, and can hold the moistness of the cranberry sauce, as well as the weight of the stuffing and turkey. I enlisted the help of my Breville Panini Grill, in order to heat everything up once the sandwiches were made.

Gobbler

For dinner tonight, I decided to go with a lighter use of the turkey, by making a Vietnamese dish, known as Pho. For all of you who are not familiar with Pho, it's one of the best things for a cold winter's day - a big, steaming bowl of noodles, with broth, veggies, and if you so choose, meat. I'm going to use the turkey in this version of Pho, along with some baby corn, snow peas, water chestnuts, thinly sliced onion  and zucchini. Since I keep most Asian cooking ingredients in the house all the time, I didn't need much at the grocery store, but it's good to keep hoisin sauce, fish sauce, and some ginger on hand for a recipe like this as well. Check out this heartwarming bowl of goodness!

I steeped some cloves, coriander seeds, peppercorns and a cinnamon stick in the chicken broth for a few minutes before adding all the veggies and allowing them to cook. I sliced the turkey into small pieces, and added that as well, allowing everything to heat up together. At the last minute, I added some rice noodles, since they would only take a minute or two to cook, and then I served. This dish is easy in the sense that stir-fry is easy, just add what you have, or what you want to eat, to some broth and let it all simmer together. You could put any veggies in there, and really any kind of meat as well. It was really hearty and warming, and a great use of leftover turkey!

Turkey Pho

How are you using your leftovers? Comment on this post to share your favorite leftover turkey recipes!

Wednesday, August 10, 2011

China In A Day

Well, our journey continues tonight, and we've arrived in China. I decided to make a dish called Beef with Mandarin, and then pair it with some Chinese vegetables and hearty brown rice. It made for a simple weeknight meal that was totally satisfying. I would have expected a bit more citrus flavor from using the mandarin peels that the recipe called for, but it was a bit mild for my taste. I think I might actually add a bit of orange juice if I make this again, just to bring out the flavor some more. Chinese cooking varies across it's vast landscape. In the South, Cantonese cooking involves steaming and stir-frying natural ingredients and incorporates lots of soy sauce, ginger and scallions. Peking cuisine, from the North, has a harsher climate, which results in hot pots, lots of dumplings, and of course, the famous Peking duck. Meanwhile, Szechwan food is bright with chillies and spices. And, in Shanghai, meats and fishes are braised slowly to create very rich dishes.

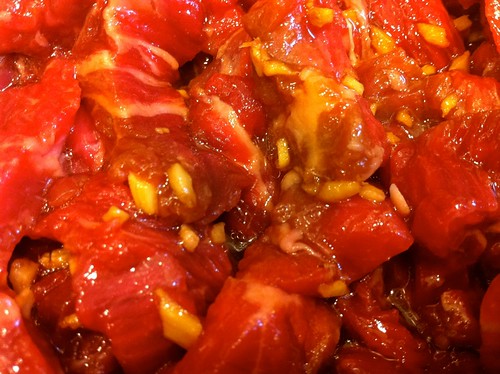
So, I gathered my ingredients and prepared my mise en place for tonight's dinner. I grabbed some rib eye steak, soy sauce, dry sherry, fresh ginger, sesame oil, peanut oil, white pepper, dried mandarin peel, caster sugar, corn starch and beef stock.  I prepped the marinade for the beef first, since it needed to sit and "stew" for 15 minutes before I could continue the process.

IMG_0897


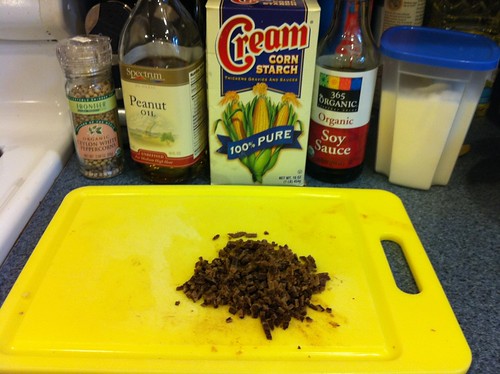
The mandarin peel is a weird little ingredient, let me just tell you. A very nice lady at the local Asian market helped me find it on the shelf on Monday, and I brought them home. I was having trouble interpreting to the shopkeeper and she spoke both Chinese and English. She came to my rescue! I took them out of the bag and well, they were really hard. The recipe calls for them to be finely chopped? I can't get my knife through it...nor could i get it to chop up in a mini food processor. Wait a minute...I missed something on the front of the bag. "Must boil for 10 minutes before using." Ah...that makes a bit of sense. I took care of that next so that I could have all my ingredients together. Check out the difference between the really hard mandarin peel, and the reconstitued one that was much easier to chop!

IMG_0898


My mise en place is now complete!

IMG_0899


I heated some peanut oil in a wok and then added the beef with its marinade. Once all the beef was almost cooked through, with a nice bit of color on it, I added the white pepper, chopped mandarin peel, some soy sauce and caster sugar. In another bowl, I combined the cornstarch with a bit of the beef stock, and once it was incorporated, I added the rest of the broth to the bowl. This acted as the thickening agent for the sauce. After the beef and other ingredients had stir-fried briefly, I added the broth mixture to the wok and stirred until the sauce boiled and thickened. You'll know it when this happens so don't take it off the heat too soon, or you'll have a watery mess.

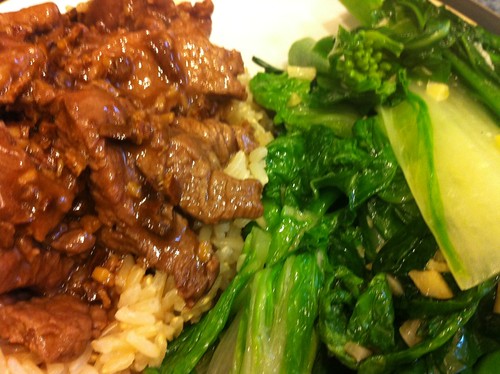
I served this dish over some brown rice, and I was glad that I opted to make the Chinese greens as well. I would have been craving a veggie if I hadn't. As it was, this was a very balanced and hearty meal for a weeknight. It came together rather quickly, and it was quite simple to prepare! I find that when I do make Chinese food at home, it usually comes together quickly, and can be a great quick fix if you keep all the spices and sauces on hand. My pantry is never without soy sauce, oyster sauce, sesame oil or peanut oil...they are staples of Asian cooking...and I do a lot of that! So, next time you crave Chinese take-out, think twice...and give it a whirl for yourself. You'll get a healthier, heartier meal, and I promise you'll be full for longer!

IMG_0901

Thursday, June 30, 2011

Foumami

I've been meaning to visit this kitschy spot since I read about it months ago in my daily ThrillList email. The self-proclaimed Asian sandwich bar has a creative menu of sandwiches and salads using many key Asian ingredients such as ginger, Wasabi, soy sauce and cilantro. While a few of the items seem a bit forced into the constraints of what would be considered "Asian," (Wasabi Caesar Salad, Asian Cobb), the majority of the menu is striking and unique.

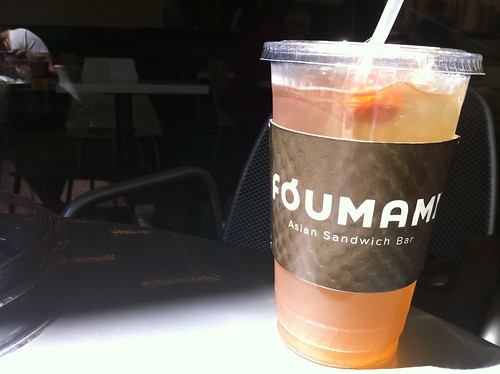
When I glanced at the menu online, in preparation for my visit, I immediately knew that I needed to have an Iced Ginger Tea! I love beverages with ginger in them, and this one was absolutely no exception. The spiced bite of ginger flavor integrated with the sweetness of the tea is a definite winner! It was wonderfully refreshing on this warm day!

IMG_0760

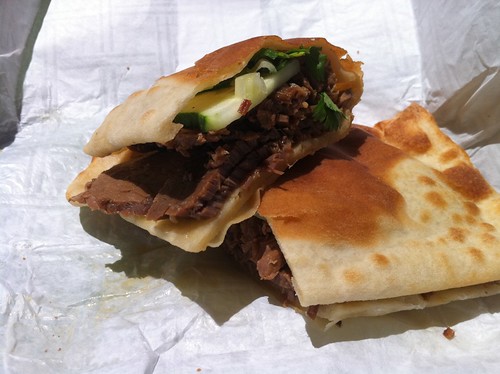
I opted for the Braised Beef Brisket sandwich as my lunch, and as soon as I could pay and step sideways to the pickup window, they had called my name! Now, that's some service! I unwrapped my meal, thinly sliced brisket, cooked to perfection (silky, smooth and falling apart) along with some cucumbers, scallions and cilantro sprigs, all wrapped in a flat bread similar to naan. It wasnt very large but it ended up being a hearty lunch for me and I was satisfied for the afternoon! The sandwiches also come with a pickle and potato chips...but I wished for something a bit more authentic as a side...some Kim Chee, or a small bowl of edamame would have been a really cool touch.

IMG_0761


They offer many soups on their online menu, one or two of which are available each day. There were a few specific flavors that would certainly go back for (Wonton, Hot & Sour, String Bean Noodle), because they sound delicious. Other options include desserts such as shaved ice and cookies.

Foumami is located at 225 Franklin Street, in the Financial District of Boston. Check them out at their website, or call them (617-426-8858) to find out about those soup specials!

Cool fact of the day: In Japanese culture, umami is one of the five basic tastes with sweet, sour, bitter and salty.  In Japanese, it means "pleasant savory taste."

Monday, June 27, 2011

The Sum of All It's Parts

I got home later then I planned today, and I will admit, I did not do a mise en place for tonight's dinner. I prepped as I cooked, I improvised, and I rushed...but dinner turned out pretty darn good, I must say. I cracked A Platter of Figs, and turned to the chapter I had initially added to my current menu. The title of this chapter: Salmon on My Mind. The menu featured in this chapter includes:

Fried Egg Soup
Wild Salmon with Vietnamese Cucumbers
Rose-Scented Strawberries

Unfortunately, I planned this menu awhile ago, and all the strawberries have been eaten...so I didn't make the dessert portion of this chapter. I did, however, manage to make both the soup and the salmon, accompanied by some white rice and the Vietnamese Cucumbers. While the majority of the recipes in this book are extremely labor-intensive, this one took about an hour, total, and that's nothing to complain about!

Each part of this menu went very quickly, and timed out perfectly so that everything finished at the same time. I love it when that happens! So as the title of this post describes, this menu really is the sum of all its parts. The salmon was simply seasoned with salt and pepper and drizzled with a little olive oil. It is supposed to bake in a 350 degree oven for 20-25 minutes, so I pre-heated the oven and put the salmon in. I felt that the preparation of the fish was a bit too simple, but it ended up working so well with all the other flavors. I will never doubt again! :)

IMG_0754

I immediately set my rice-cooker so that it would be cooked at about the time I pulled the salmon out of the oven. Now that the things that take the longest are set to cookin', I had the time to throw together the other two components of this meal.

For the cucumbers, I used mini seedless cucumbers, and I did not peel them the way the recipe suggested. I like the crunch of a cucumber's skin, so I left it on, and tossed them with some fish sauce, julienned ginger, palm sugar, salt and pepper. After 5 minutes of sitting, I mixed in the juice of 2 limes as well as some chopped jalapenos and put it in the fridge until dinnertime.

IMG_0753

At this point, there's about 12 minutes left on the timer for the salmon, so I better get that soup going. I poured some chicken broth into a pot (the author HIGHLY recommends making your own broth, but really...I did not have that kinda time today...so I hope he forgives me). I brought the broth to a simmer and added some thinly sliced garlic cloves, and a few minutes after that, some minced ginger. While the broth was simmering, I fried up a few eggs for the bottom of our soup bowls. It's an interesting concept, and it turned out to be a yummy one, at that. At the last minute of cooking, I added some bok choy ribbons to the pot and allowed them to wilt slightly.

IMG_0756

The cucumbers were garnished with chopped mint and scallions directly before serving, and the soup was also decorated with scallions...a generous handful! I did not follow the directions in these recipes to the letter, by any means, but I think I got the gist of the concept, and produced a delicious (and healthy) meal in about an hour. The meal was hearty, fulfilling and delicious, and while I didn't follow my regular practice in the kitchen, things turned out okay. And the clean-up for this one was totally easy, so score one more point there!

IMG_0757

Tip of the day: Read through an entire recipe before you start preparing it. If you can anticipate what comes next, you can produce a complicated meal with less stress, and in less time than if you really had to go step-by-step through a recipe. 

Wednesday, April 20, 2011

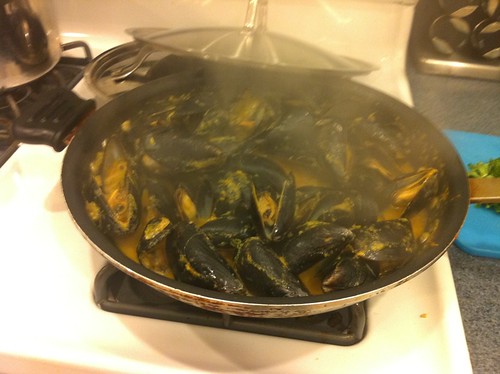
Spicy Coconut Curry Steamed Mussels with Mango Couscous

I started the current menu off with a bang tonight, steaming up some mussels in a curry sauce with some delicious couscous! This recipe is from the Top Chef cookbook, and the dish was made by Betty, in Season 2. While the cooking time in this recipe is pretty much under 10 minutes...total...the prep time was a bit more intense...but still, dinner was ready in about 1/2 an hour, so hooray for that!

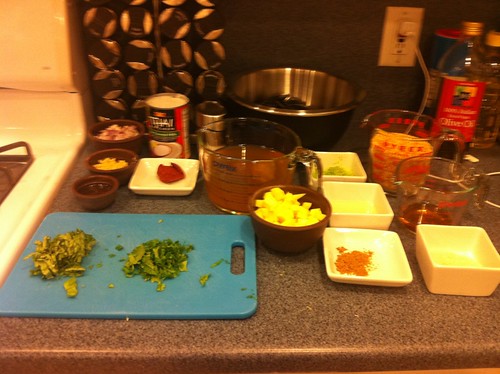
I gathered some mussels, vegetable oil, ginger, red onion, red curry paste, coconut milk, vegetable stock, limes, ground coriander, salt, black pepper, instant couscous, mango, cognac, sugar, basil, and cilantro, and set up my mise en place, ready to cook for 10 minutes! :) Be forewarned - a lot goes on in the next 10 minutes!

IMG_0534
I'm not sure how I didn't notice how awful this picture came out! Sorry!

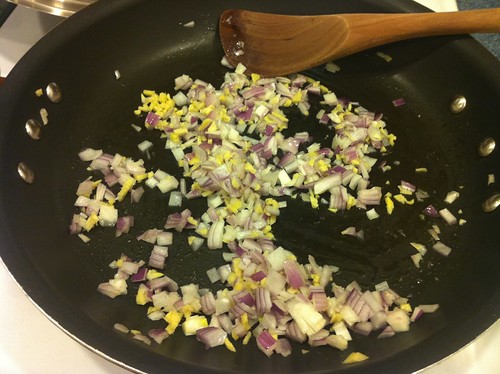
First things first, I got out a large skillet and added a tablespoon of vegetable oil. Once heated, I added some minced ginger, and a minced red onion and let them cook for about 3 minutes.

IMG_0536

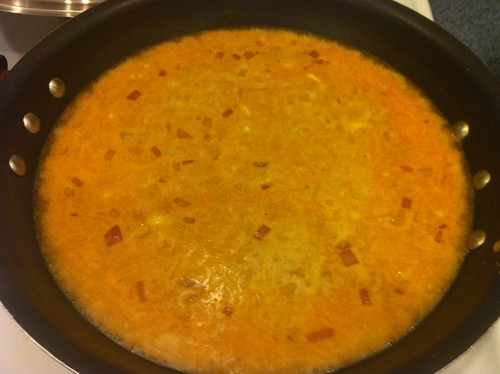
I added the curry paste and stirred everything around until the ginger and onion was well coated in the paste. I poured in 1 cup of the vegetable stock and the coconut milk and raised the heat to bring the mixture to a boil.

IMG_0538

Meanwhile, I poured two more cups of vegetable stock into another saucepan, and set that to boil as well. With the stock, I poured in some ground coriander, salt and pepper.

IMG_0537


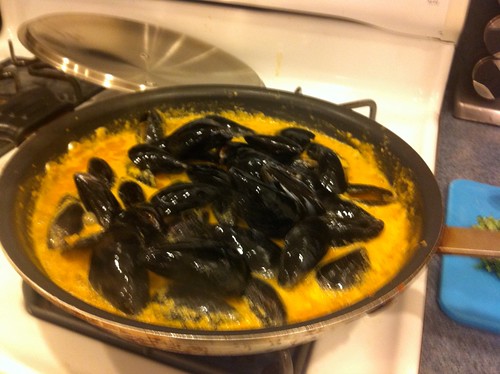
Once both pots are boiling, I let the curry mixture reduce for about five minutes. At this point, I added the mussels to the curry mixture, along with the lime zest.

IMG_0540

Once the mussels were in, I covered that pot (for 6 minutes), removed the boiling stock from the heat, and poured the couscous in. I stirred that all up and then covered it to sit for 5 minutes.

IMG_0541


The last step was to make the topping sauce, which consisted of some sugar, the lime juice, and some cognac. While the couscous was sitting and the mussels were steaming, I boiled these three ingredients together in yet another saucepan.

IMG_0542


For me, it took about 6 minutes for the mussels to open, but it could take up to 8 minutes, depending on your mussels, so keep an eye on 'em and don't take 'em out too soon...or too late, for that matter! :) Also, stir the diced mango into your couscous at this point.

IMG_0543


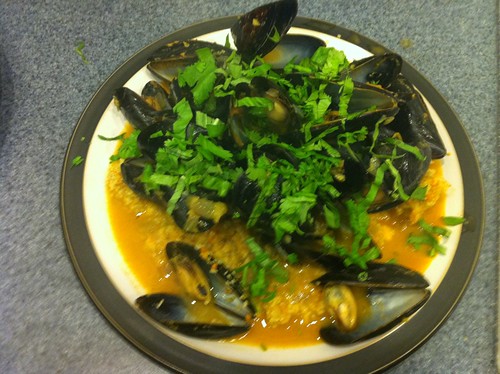
Plate your dish by scooping some couscous onto the plate. Top it with some mussels, a few ladlefuls of curry sauce, and the cognac reduction. Sprinkle some chopped basil and cilantro on top and voila...a deliciously spicy meal for a Wednesday evening!

IMG_0544

Sunday, February 20, 2011

A Successful Attempt at a Korean Favorite

Remember my recent post about all different types of Asian cuisine and their differences? Well, tonight I made an attempt at a Korean favorite of ours, Bibimbap. Traditionally, Bibimbap is a dish served in a warm clay pot, consisting of rice, vegetables, thinly sliced beef and a fried egg, topped with a Korean red chile paste. The recipe I decided to use is a part of The Professional Chef, a textbook from The Culinary Institute of America. I usually use this book as a reference guide, in order to master techniques, but I thought I'd give this recipe a shot, and I'm very glad I did!

bibimbap♡
From Flickr - by Eunmi Han

This particular version of Bibimbap called for some skirt steak to be marinated in some soy sauce, garlic, ginger, green onions, sesame oil, crushed sesame seeds and pepper. The marinade was really tasty and added some great flavor to the dish. Once I'd made the marinade, I put the vegetables together. The recipe called for daikon, radish, carrots and cucumbers all julienned. One of my cucumbers had gone bad in the refrigerator :( and I didn't have any daikon, but I used some jicama instead, and also added some julienned shiitake mushrooms as well. Even though the recipe called for raw vegetables, I threw them in the wok with some peanut oil for a few minutes, just to soften the carrots and take the chill off the rest of the veggies. Everytime I've ever had Bibimbap, the vegetables have been cooked so I altered that part a little bit. I threw them in a stainless steel bowl and topped it with a pot lid so that steam could continue to cook the veggies a little bit while I finished off the rest of the dish.

While my rice cooked in my wonderful rice cooker, I threw the marinated beef into the wok with a bit of vegetable oil. It didn't take more than a few minutes for the small pieces to cook through, and while that was happening, I fried two eggs in a skillet, keeping them "sunny-side up" so that they would be runny when the yolk was broken over the dish. My rice cooker clicked when it was finished and I spooned some sticky rice onto each plate. I topped the rice with my steaming carrots, jicama, radish and shiitake mushrooms. I sprinkled some chiffonade of iceberg lettuce on top of that, and as it started to wilt from the heat, I piled on some beef. Lastly, I laid the fried egg on top of all of this!


For the sauce, the recipe really just called for Korean Red Chile paste but I wanted to thin the paste a bit so I mixed in some fish sauce, some rice wine vinegar and a little bit of sweet rice wine. It did exactly what I wanted it to do, and thinned down to more of a sauce...which was great for dripping over the already delicious concoction.

Normally, this dish is served in a clay dish that stays warm for an extended period, and continues to cook the rice while you eat, making it crispy and crunchy on the sides of the bowl. It adds something special to the dish, but even without those clay dishes, I really think I nailed the authenticity. It was so delicious and reminiscent of our trips to Korean restaurants! It's always a good feeling when you know you can make something that you love to order out - less money spent, more confidence in my culinary achievements! Try making your favorite restaurant dish at home...and share your experiences with us! We're rooting for you!

Also, check out my new and improved Stock Your Kitchen page. I've renovated it so that you can automatically add my recommendations to your Amazon shopping cart, should you be interested in purchasing something that I've mentioned in any of my posts. Hopefully, this will be more convenient!

Wednesday, February 2, 2011

Hug Your Closest Sri Lankan!

HOPE - You Can See The Light. Taken in Sri Lanka Gelioya (Kandy)
Sri Lanka
The other day, I received an invitation to an event on Facebook. The event in question is "Hug a Sri Lankan Day," and it takes place on February 4th. That's FRIDAY! Sri Lanka is located off the southern coast of the Indian sub-continent. It is an island nation. In honor of this day, and my friend Ladali, who is Sri Lankan, I decided to make a fitting dish, complete with how-to instructions, just in time for you to cook dinner on Friday. I chose a Chicken Curry dish, also known as Chicken Dopiaza. The original recipe can be found here. I'm sure that you could make this with other types of meat as well, and for you vegetarians out there, I have a feeling that these flavors would work very nicely with some tofu (you'll have to adjust times a bit, that's all). Now, let's start with what you'll need:

3 tablespoons vegetable oil
8 small onions/shallots, halved
2 bay leaves
8 green cardamom pods
4 cloves
3 dried red chilis
8 black peppercorns
2 big onions, finely chopped
2 garlic cloves, crushed
1 inch piece of fresh root ginger, finely chopped
1 teaspoon ground coriander
1 teaspoon ground cumin
1 teaspoon ground turmeric powder
1 teaspoon chili powder
1/2 teaspoon salt (to taste)
4 tomatoes, skinned and finely chopped (I used canned, diced tomatoes)
1/2 cup water
8 chicken pieces, skinned
plain rice, to serve

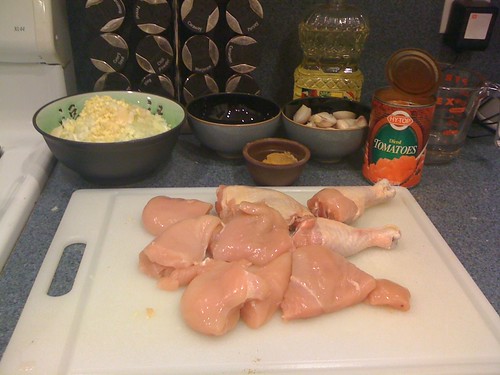
This seems like a lot of ingredients, I know, but it's actually a very simple dish, and it's delicious. I happened to have these spices on hand, but if you don't, you can find them at your local grocery store, or order them online if you have a few days before you plan on cooking this dish. Now, of course, the first step is your mise en place. But, for mine, I combined the ingredients for each step into separate bowls, to make it easier for me. If you want to do it that way, this is what should be in each bowl:

Bowl #1: Shallots
Bowl #2: Bay leaves, cardamom pods, cloves, chilis and peppercorns
Bowl #3: Onions, garlic, and ginger
Bowl #4: Coriander, cumin, turmeric, chili powder and salt
Bowl #5: Tomatoes and water
Bowl #6: Chicken

IMG_0251

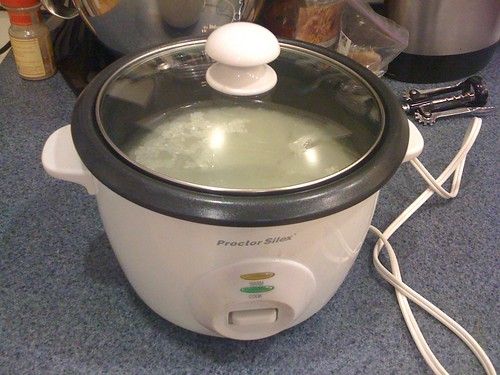
We're ready to begin cooking! Before I start with the main part of this dish, I put the rice and water into the rice cooker since that usually takes about a half an hour to cook. Rice cookers are a fabulous invention. All you have to do is press the cook button, and it turns off when the rice is done. When I cook rice, I always use the ratio, 1:2. If you use a cup of rice, you should pour in 2 cups of water. That goes for any measurement of rice...double it for the water. Then, set it...and let it go!
IMG_0250

Now, on to the main course, right? It's about time! I promise things are going to go quickly from here! I made this dish in a wok, but you can also use pretty much any large pan. Be sure that it's large enough to fit all the things you are going to put in it.

Heat 2 tablespoons of the oil in the wok, or large pan, and fry the halved small onions/shallots until soft (I used shallots). Remove and set aside. Make sure those shallots are really soft, because otherwise, they are going to be a very overwhelming flavor in the finished product. Shallots get sweeter as they cook.
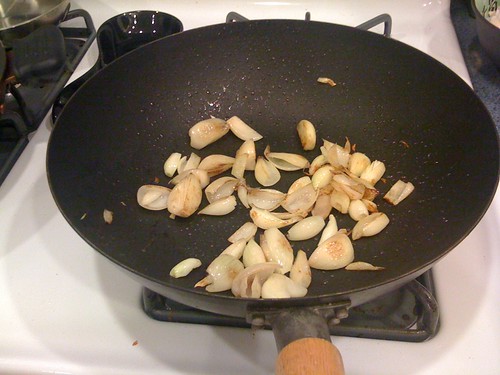
IMG_0252

Add the remaining oil and fry the bay leaves, cardamoms, cloves, chilis and peppercorns for 2 minutes. Be careful here...as the cardamom pods get hot, they can pop. One almost knocked my EYE out!
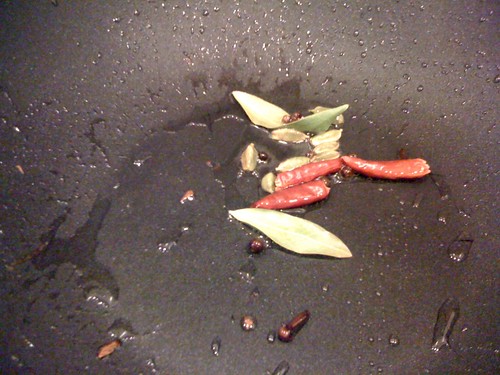
IMG_0254

Add the big onions, garlic, and ginger. Fry for 5 minutes.
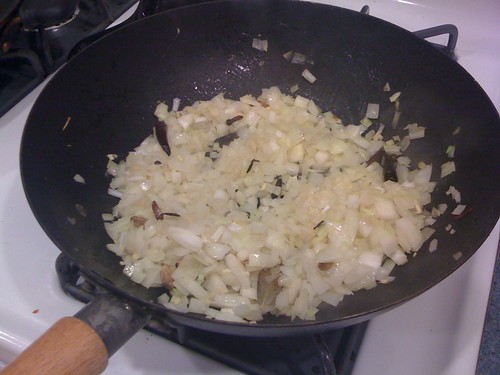
IMG_0255

Add the spices (coriander, cumin, turmeric, and chili powder) and salt and cook for 2 minutes.
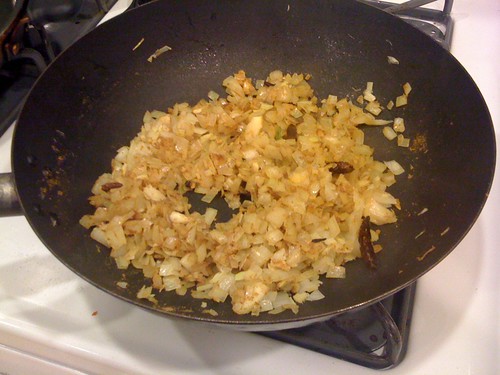
IMG_0258

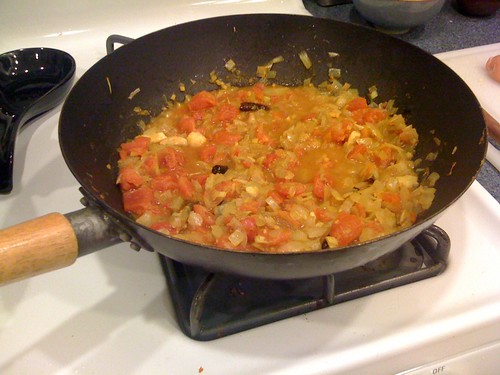
Add the tomatoes and water to the pan and simmer for 5 minutes until the sauce begins to thicken.
IMG_0261

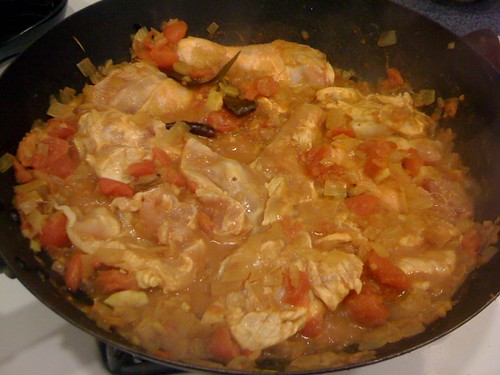
Add the chicken pieces and cook for 15 minutes more. Once I added the chicken and it had begun to cook, I found that the sauce needed a little bit more water because it was evaporating quickly. Don't be afraid to trust your instincts and add something if you feel it needs it.
IMG_0262

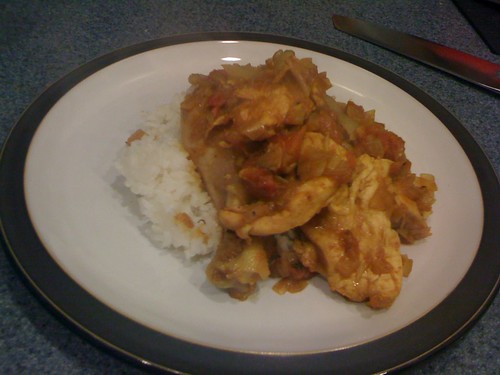
Add the reserved shallots back to the pan, and then cover and cook for another 10 minutes until the chicken is tender. I cut about 4 minutes off this time because I found that my chicken was done, and I didn't want to over cook it. However, it all depends on the size of your pieces, the parts that you choose to use and the temperature of your pan, so you be the judge. Once it looks tender and cooked through, take it off the heat so that the meat doesn't get chewy. Serve over rice.

This was a delicious meal, and I found it to be an educational experience. I have friends from all over the world, and it is always a treat to learn about their cultures and cuisines. It's not every day that you see a Sri Lankan restaurant, or even think about cooking a Sri Lankan meal, so I'm very happy that I took this opportunity to learn about this fascinating cuisine. I will definitely be trying more in the future, and I'll be on the lookout for a restaurant too. I'm intrigued! And a great big thank you goes out to Ladali for pointing me in the right direction for this post. I will be giving her a GREAT BIG HUG on February 4th!
IMG_0265