Showing posts with label the professional chef. Show all posts

Wednesday, April 4, 2012

STOCKin' Up!


I made my own chicken stock this weekend! We're forging ahead in The Professional Chef, to the Stocks, Soups and Sauces section of the book. There are plenty of recipes to try, and many lessons to be learned, but I decided to start simple, with chicken stock. Stock is referred to in French fonds de cuisine, or "the foundations of cooking." I use it every week, and I spend lots of money on cartons of it at the store...but this weekend proved one thing to me - I won't be buying pre-packaged stock anymore!

The recipe called for 8 lbs of chicken bones, but when I went to the store, and asked the meat department for said chicken bones, they said that all of their poultry is packaged already when it is delivered. That's what I get for going to a store without a proper butcher department (next time, I'll try this!). I opted for two packages of bony chicken wings, to substitute as an ingredient for my stock. In the end, I think this made the stock a bit more gelatinous when cooled, but all it needs is a little heat to loosen right back up.

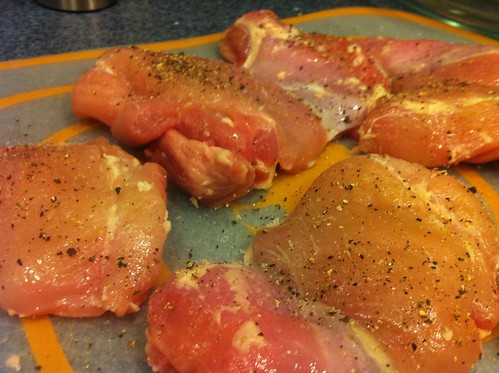
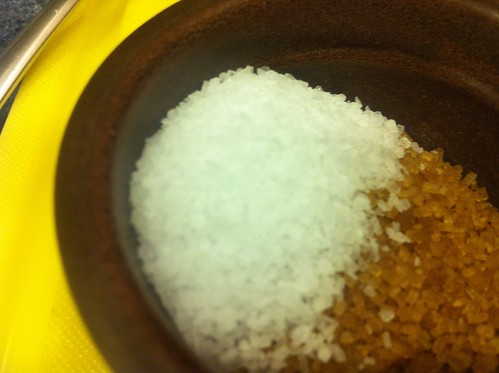
This was going to be a 4-hour process, so I started as soon as my groceries were delivered on Sunday afternoon! (Yes, thank you Peapod!) I put a gallon of water into a nice, big stock pot, and added the chicken wings, which I rinsed before adding them. I salted the mixture and set it to simmer for the next 3 hours.

Untitled

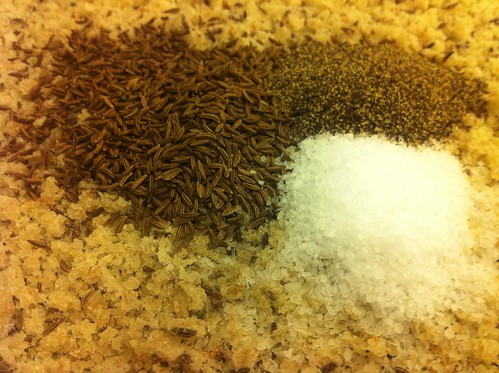
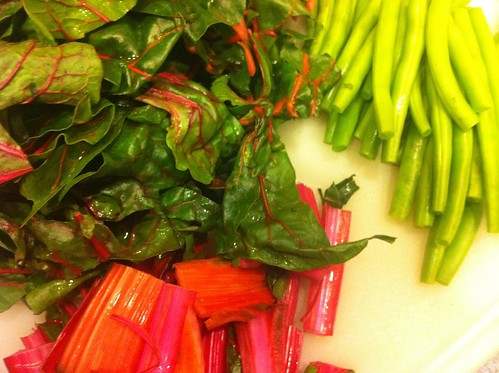
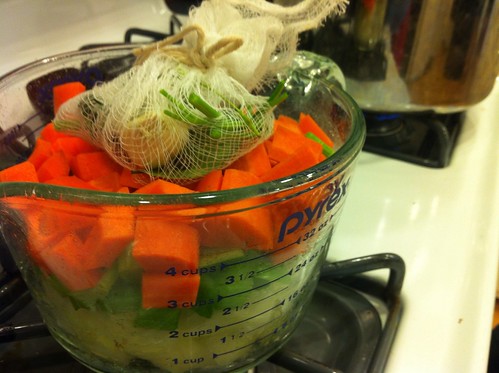
While the stock simmered, I did a few things around the house, started to make dinner, and then set to prepping my mirepoix (onion, carrot and celery). Because of the time that the veggies would be simmering, I cut them to a medium dice, and also pulled together a Sachet d'Epices, a little bouquet of parsley stems, thyme, peppercorns, a bay leaf and a clove of garlic. 

Untitled

After the three hours had expired, I turned off my timer and checked out the stock, so far. It had evaporated quite a bit, so even though the recipe didn't call for it, I added some more water. I don't know if I was supposed to do that, but it tastes REALLY good, so we'll just go with it. I added the beautiful mixture you see above to the simmering liquid and chicken wings, and allowed it to cook for another hour.

Untitled

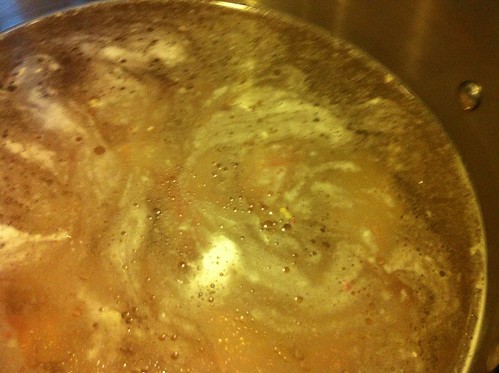
Once the timer went off a second time, it was time to remove the stock from the heat, and give it a good strain in a fine, mesh sieve. All the impurities are left behind and what you have left is a big bowl of delicious, flavorful, homemade stock. 

Untitled

I've already used a cup of it in one of my weekly meals, and it's so good. It adds so much authentic flavor to a dish, it's incredible! I will definitely be making stock on weekends for the coming week, according to my needs. 

While there are other recipes for stocks (Brown Veal Stock, Fish Fumet, Vegetable Stock, Court Bouillon, Dashi, and a Poultry and Meat Stock), I'm not going to use these recipes until recipes further on in the book call for them specifically. There's no point in filling my freezer with unneeded stocks. Because the lessons for stocks, soups and sauces come before the recipes, I think I'll do a bit of reading this weekend and try to move ahead to the recipes, where I can share what I've learned while making some delicious recipes at the same time! Now's the perfect time of year for some heartwarming soups, anyway. We're ready for spring, it's not quite here, and we all need something to warm our bellies!

Sunday, March 18, 2012

Part Four : Chapter Fourteen : Mise en Place for Stocks, Sauces, and Soups


When I started reading tonight's chapter of The Professional Chef, I was hoping it would be a first read before stepping into the kitchen to take things step-by-step and show you lots of pictures. That was not the case since this chapter was more of an introduction to the different types of aromatics, flavorings and thickening agents for soups, stocks and sauces.

Bouquets and Sachets are preparations of aromatics used for flavoring purposes. They are added during the cooking process. A bouquet garni is a tied bundle of thyme, parsley stems, bay leaf, celery and leek. The leek leaves act as the wrapping for the rest of the ingredients. A sachet is usually a bundle of peppercorns, as well as other herbs and spices all tied up in a bag made of cheesecloth. A sachet is very similar to a tea bag in the way it infuses the liquid in which it is submerged.

I've spoken about Mirepoix in the past, the French word for a combination of carrots, celery and onions that acts as the base flavor profile for many stocks, soups and sauces. There are many variations on the basic mirepoix, which we will learn about as we delve into the recipe portion of this part of the textbook.

A roux is a thickening agent that consists of a flour and a fat. Usually, this means lots of butter, melted, and then mixed with the flour, cooking it until it becomes the correct color for the recipe at hand. The basic formula is three parts flour to two parts fat. The colors are divided into four basic groups: white, blond, brown and dark, depending on how long it is cooked. Once roux is created, it is added to another liquid to thicken it.

Clarified butter is made by heating whole butter until it separates and the fat can be skimmed off the top. Many recipes call for this, as opposed to plain melted butter, because it can then be used at a higher temperature. Many rouxs start off with clarified butter. Ghee, which is used in many Asian cuisines, is another type of clarified butter, and can usually be purchased in Asian markets, as well as the Global aisle at the grocery store.

Pure starch slurries have a greater thickening power than other methods we've discussed. Ingredients such as cornstarch and arrowroot have these properties, and they don't require the extended simmering time that a roux would require. The slurry is created by submersing the ingredient of choice into cold water, before adding it to the soup or sauce. This is the quickest way to thicken.

The final page of this chapter discusses Liaisons. A liaison is a mixture of egg yolks and cream that is used to thicken sauces and soups. This mixture does not thicken in the same way that a roux or a slurry would, but adds sheen, body and flavor to the dish, as well as light golden-ivory color. To add a liaison to your dish, you'll want to use a process known as tempering, to avoid curdling the eggs. Tempering involves adding a small amount of the hot liquid to the egg mixture, in order to even the temperature out before pouring it into the main pot. Once the temperate is slowly regulated, it can be incorporated into the dish without risk of curdling. 

In the next chapter, we start to learn about making stocks and I will be applying these lessons to some of the recipes provided for practice. If all goes according to plan, I'll have seen my last carton of store-bought stock, because why buy it, when you can make it yourself!

Wednesday, March 14, 2012

Part Three : Chapter Thirteen : Dry Goods Identification

It's been another hectic week at work, and we've also had after work plans, so I haven't had the opportunity to sit down and write in a few days. I've been using the few meals we've had at home to use up ingredients from the fridge and pantry. It's another one of those "get creative" phases to clean stuff up a bit. I even cleaned the kitchen this weekend! The stove needed a good scrubbing, that's for sure. I decided to take this slow night as an opportunity to read a chapter of my textbook, and get one step closer to the real cooking!


Speaking of cleaning out the pantry, this chapter comes at the perfect time. I've collected quite the assortment of oils, vinegars, spices and rubs and some of them really make me wonder if I'll ever need them for another recipe. That's when it's time to start making stuff up...and concoting! Just like produce and meats though, these dry goods lose quality over time, so on a somewhat regular basis, I go through my stock, and throw anything with a passed expiration date in the trash. Sometimes, it's just better to start with something fresh.

I tend to store my grains and flours in screwtop containers. I rip off a piece of the label and place it at the top of the container so that I know what is in each one, but it's more organized this way because everything is a bit more uniform. It's hard to reseal those bags anyway!

I have quite the collection of spices, and I'm still coming up with ideas on the best way to store them. I have too many to fit in any one spice rack, and I always end up taking all of them off the shelf, just to find the one I'm looking for at the moment. When I come up with a system that works, I promise I'll share it with you!

After 35 pages about flours, wheats, spices, grains and legumes, I'm finally at the end of Part Three. In my next lesson, we'll start in on Part Four : Stocks, Sauces and Soups! I couldn't have come sooner and I will begin to gather the ingredients I will need for the first lesson...and get down to it! Look forward to many more pictures with this next part of the book, because what I learn, I will then share with all of you! Can't wait!!


Wednesday, March 7, 2012

Part 3 : Chapter 12 : Dairy and Egg Purchasing and Identification


I just flipped through the upcoming few chapters and we're really getting into the thick of things soon! I'm very excited to start the cooking practice, and put the background stuff behind us. However, I realize how important it is to have a solid basis of knowledge, so I patiently plug away at Part 3 of The Professional Chef.

In this chapter, we take a closer look at all things dairy. As we all know, this genre of ingredient is highly perishable and must always be stored at correct temperatures, as well as be used within a short amount of time. Did you know that dairy products are very susceptible to flavor transfer? For this reason, they should be stored as far away from items, such as onions, as possible.

This might be my favorite chapter so far, and I'll tell you why. It's all about CHEESE! I love cheese. The chapter mentions something interesting: "Natural cheeses are considered 'living.'" What does that mean, you ask? Well, it means that cheeses tend to continue growing in flavor and texture as they age and ripen. So, in essence, the cheese matures over time. Parmigiano-Reggiano, for instance, is an aged cheese, kept in the dark for months, before being divided and sold to distributors.

After one more section on the identification of dry goods (coming in the next few days), we'll finally be on to some cooking! It looks like we're going to be having a LOT of soups over the next few months, which is exciting. I'm going to fill my freezer with homemade stocks and soups, ready for any weekend lunch, or quick weeknight meal! Join me on this voyage, won't you?

Thursday, March 1, 2012

Part Three : Chapter Eleven : Fruit, Vegetable, and Fresh Herb Identification


Stemming on the end of my last post, wishing for fresh fruits and vegetables, it only seemed fitting that I would open up my copy of The Professional Chef to find that the next chapter on my agenda is the identification of said fruits and vegetables, as well as herbs. There's so many pretty pictures in this chapter, and it definitely made me long for the warmer months, especially since we are experiencing the first snowfall of the season, at least of any substance.

I think I'm probably telling you things you already know here, but in case we've got some amateurs out there, I don't want to gloss over the important stuff. When shopping for fresh produce, they should be free of bruises, mold, brown or soft spots, and any other damage that the items may have incurred during transit. While using produce in its raw form, I would certainly adhere strictly to this rule. However, a small bruise doesn't ruin a piece of produce. If you are making marinara sauce, your tomatoes don't need to be perfect. Keep that in mind when shopping, because those slightly marred items get tossed if they don't sell, which contributes to the massive amount of food waste that this country produces on a yearly basis. If an item is shriveled however, I wouldn't use it, regardless of its purpose.

When I can, I try to purchase organic or sustainably-farmed produce. Not only does this support local farmers and their businesses, but we end up consuming less pesticides and other chemicals used to keep produce fresh longer. Another advantage to locally-grown produce is that the flavors are often superior to that of conventionally-grown and shipped produce.

Now, I've glossed over the specifics, and the pictures labeling different kinds of produce because this post would go on forever, but after about 50 pages of that, I've got a list of things I want to try, and a better feel for identifying things at the grocery store. I will definitely refer to this chapter in the future, when I need a bit of information on a specific fruit or vegetable!

Wednesday, February 29, 2012

Crumbs and Scraps

It's been awhile since last I posted, and I apologize for that. It's been quite hectic around here, both at home and at work. When I finally arrive home at night, I hesitate to look at a computer again - I think I'm starting to show symptoms of internet-glow. I've been working straight through my lunch breaks, and coming home only to find things that need doing around the house. I haven't been food shopping in some time and I'm certainly scraping things together when it comes to dinner, or better yet, calling for takeout!

Last night, I got home late from meeting a friend for drinks and was already starving. I had no patience for a lengthy recipe so I made burgers that I had defrosted from my dwindling collection of meat in the freezer. I used some leftover pita breads, some blue cheese herb mustard, creamy gouda cheese, and some arugula to manage an upscale burger sandwich that I finished on the panini grill for a crispiness that you can't get any other way. Creativity at its finest!

Arugula and garlic
from Flickr - by the_babyladies
Finally, this weekend, I think we have some free time, and I'm going to focus my attentions on a new menu to get us back on track for both cooking, and for health. Takeout isn't the best thing for us, but in a pinch, it is delicious, and always enjoyable. I need to get back in the habits that I had been following so closely though, and the best way to do that is by cooking from scratch.

While it may be snowing outside right now, we are nearing the spring and that means farmers' markets, fresh locally sourced greens and beautiful produce. I can't wait! This is such a strange time of year, it's not winter, it's not spring, it's lighter longer, but we still don't want to hang out with the elements. I can only dream about the days that I can walk down the street and pick out some fresh ingredients that have been recently plucked straight from the ground.

Farmers' Market
from Flickr - by NatalieMaynor

I'll try and post another chapter of The Professional Chef tomorrow, as we are nearing the part of the book where recipes are incorporated into the lessons, and I'm very much looking forward to that!

Until later, then...there's Indian food on it's way!

Tuesday, February 21, 2012

Part Three : Chapter Ten : Fish and Shellfish Identification


Fish and shellfish were once plentiful and affordable, but with increased popularity and more complicated fishing techniques, the prices of these delicious morsels have skyrocketed. Because of the high demand for these ingredients, many countries have passed laws and regulations regarding the times and methods of legal fishing. Each type of fish, and shellfish, must be cooked in a specific fashion and chefs, both professional and home, must know what those methods are to bring out the best flavors. 

When purchasing seafood, the person helping you should be able to answer any questions you may have about the freshness or origin of each item. I make it a rule to avoid fish departments that have any sort of smell emanating from them, as fresh fish should have little to no odor whatsoever. If a fish department smells a bit off, it's best to avoid it altogether as one bad piece could contaminate many more!

While storing fish in the correct temperatures allows it to keep for several days, it's best to use what you purchase within a day or two to assure it's freshness. If the fish takes on a "fishy" smell, or becomes soft, and doesn't respond to light pressure, you should probably avoid using it. If you are going to use frozen fish, be wary of white frost around the edges, as this is an indicator of freezer burn, and proof that the fish was improperly packaged.

Here's something I didn't know: "The more a fish swims, the darker its flesh will be. Darker fleshed fish have a higher oil content and, therefore, a stronger flavor." I found that extremely interesting! Considering the oil content of a fish before cooking is imperative to deciding on the best course of method to take.

In contrast to fish, shellfish are sold live, shucked, as tails, claws, and legs. When purchasing shellfish that is still alive, you want to see movement when choosing your ingredients. If you are looking at clams, mussels and oysters, you want to see tightly closed shells, and if they are open a bit, they should snap shut upon contact. Something else I learned in this chapter: "Do not allow fresh water to come into direct contact with lobsters and crabs, as it will kill them." That's the last time I put my lobsters in the sink and run a little water over them while they are awaiting dinner preparation.

This chapter spurned quite the conversation between my husband and I. We tend to eat a lot of seafood in general, but the way in which we've cared for shellfish has been wrong to date. I'm glad I have a new guide for tending to these delicate ingredients. I won't be icing my mussels, clams and oysters any longer...and now I know that if I'm to submerge lobsters in water before cooking, it should be salt water, or nothing at all! 


Friday, February 10, 2012

Part Three: Chapter Nine : Meat, Poultry, and Game Identification


Apologies for not having written in a few days! It's been a busy week, and on top of that, I've been home sick the past two days with something that's been going around my office! Fever, aches and pains, it's awful, and I haven't been in the mood to do anything but lie on the couch and watch old Lifetime movies - one of my favorite pastimes! 

I did find it in me today to read a chapter of The Professional Chef, though. This is an interesting chapter because it has given me a bit more insight into the different kinds and cuts of meat available to us in the markets. It's useful to know what each of these cuts looks like, and where it comes from! It's important to know what cooking procedures are best for each cut of meat so that you can enjoy it to the fullest.

Because meats have such a short shelf life, it is wise to always cook your purchased meats as soon as possible. When I go for a large food shopping trip and buy multiple cuts of meat for different meals, I tend to immediately freeze what I won't be using right away, preferring to defrost later than risk the chance of spoilage in the refrigerator.

In this chapter, numerous cuts of meat are displayed in large pictures, something that I will definitely refer to in the future. It's good to have a reference so that when a recipe calls for a certain cut, you will be knowledgeable about what you need when you get to the store or butcher. There is also a chart mentioning the common cooking techniques for each cut of meat. This is a fantastic reference for the home chef that might not have this information at an arm's reach, otherwise.

When shopping for meats, you want to look at coloring, marbling, and smell, depending on the cut. Even coloring and lack of scent are preferred...if the meat smells a little funky, it should be avoided. (Hopefully, I'm not telling you something you didn't know before!) That's another reason I recommend freezing it, if you aren't going to use it directly after purchase.

That was a fun chapter to read, with lots of images to help me understand the different cuts of meat out there on the market. While my appetite isn't quite up to par right now, this chapter has encouraged me to start working on next week's menu, feeling confident that when I show up in the meat department, I'll be on my game!

Sunday, January 29, 2012

Part Three : Chapter Eight : Equipment Identification


"Tools, large and small, make it possible for chefs to do their jobs well; in fact, using the right tool for the job is one of the hallmarks of a professional." I couldn't have said it better myself, so I decided to quote The Professional Chef on this one. This chapter, the first in a part called Tools and Ingredients in the Professional Kitchen, focuses on the equipment necessary to help a chef do their job to perfection. On the one hand, it made me quite confident in the way I've stocked my own kitchen, but at the same time, provided me with a nice shopping list for my next trip to Sur La Table!

The first important piece of equipment for any chef is a quality collection of knives, and while I don't have all of the knives they specify, I have a majority of them...even if I really only rely on two specific knives for most of my kitchen duties. I'm partial to the Global Knives. Currently, I have the Santoku, as well as the Chef's Knife, but I'm sure that the future will bring an investment in a few more. I sharpen my knives with a steel. The chapter mentions sharpening knives with a stone, and even has detailed images of how to do this, but I don't have a stone. I have made a note to invest in one in the near future, as the steel is apparently meant only to maintain the sharpness of the blade in between sharpenings. Never put your knives in the dishwasher, as it dulls the blade and can even ruin a knife entirely, even though they are supposed to last a lifetime.

When it comes to hand tools, I was pleased to see that I'm quite up-to-par on this list! I've got whisks, rolling pins, peelers and a kitchen fork. However, one thing I just added to my wishlist is a Palette Knife. Used for turning grilled foods, as well as spreading fillings and glazes, I think this one could be a good addition to my collection.

Measuring equipment is, of course, a very important thing to have in any kitchen. What's important to note is that different equipment should be used for measuring liquids versus dry goods. Measuring Cups with a spout are used for liquids, while these Cups and Spoons will measure your dry goods more accurately. Sieves and strainers are also an important addition. I use this Strainer all the time, for everything from washing vegetables, to scooping gnocchi out of its boiling water. It comes in handy for so many things, and I don't think I could live without it. I certainly use it more than the colanders also suggested to have on hand. Ricers are lumped in with this category as well, and I'm proud to say I have an amazing ricer that I bought at a flea market. It's totally vintage, and works like a charm! They can be pricey so I was happy for the deal...and vintage kitchen gear always has great personality!

Of course the chapter would move on to pots and pans, as well as the larger appliances necessary to everyday cooking. I've moved away from non-stick items, in exchange for a wonderful set of Gordon Ramsay Stainless Steel Cookware. I adore my set and take very good care of it. This chapter mentions that stainless steel cookware is a relatively poor conductor of heat, but I find that they work quite well, and heat my food evenly. I also enjoy using ceramic coated cookware, like my Emile Henry Dutch Oven.

As for appliances, I think I'm all set. And, I think my husband would thoroughly agree, after the addition of an ice cream maker this past holiday season. I've got the stand mixer, as well as all of the attachments, and an awesome food processor, and a blender, and a microwave, and....yes, my counters are pretty covered. But, I use them all, I really do. I think that's the point of this chapter - there may be a ton of things you need to stock a kitchen correctly, but if you care for them, and use them correctly, you'll have them for a lifetime. Now that I'm confident that my kitchen is stocked appropriately, let's start learning about food, shall we!?

Don't forget to go back in the blog and comment on the January giveaway post, for a chance to win a bottle of (M)Mun by MonaVie. Just tell us how you are staying healthy this winter, and you'll be entered! It's as simple as that!

Thursday, January 12, 2012

Part Two : Chapter Six : Asia


Well, I thought the "Americas" chapter was long, but it was nothing compared to the 50-page chapter about all things Asian. I had to split the reading up between two days, but I still found a bit of redundancy in the chapter. All Asian food is definitely not alike, and each country, and region, has very different delicacies that I learned about but many of the areas have a lot of the same agriculture, resulting in repetitive explanations of the uses of, especially, rice and seafood.

Spices, of course, play a huge part in the cuisine of the Asian continent, but each country uses those spices in very different ways. Also, it seems as though the use of chiles did not appear until the Portuguese brought their influences to the continent, in the not-so-distant past. It also seems that each country has their own versions of different dishes, but the main theme seems to carry through each. For example, the practice of cooking one's own food at the table, in steaming pots of broth, is known as Mongolian hotpot in China, Shabu-Shabu in Japan, and Chongol in Korea.

Similarly, India and the Middle East seem to hold quite a few similarities including the use of the tandoor oven. Both cultures tend to cook their breads on the inside walls of the tandoor, with stews and curries cooking in the center. They use lots of rice, meats, nuts and aromatics to stuff larger vegetables and other meats.

The amount of information in this chapter was overwhelming, and I found myself skimming quite a few of the paragraphs, but I wanted to give you a very brief overview of this chapter. I could write for days and not include all the information I just soaked in by reading this chapter, but I talk about Asian cuisine so often in my posts that it would be redundant for me to start telling you everything again.

One thing that I did find interesting as a theme running through this chapter is the attention to detail that is given to meals in the Asian culture. In general, colors, textures and flavors are all taken into consideration before a meal is planned, and ingredients are chosen based on this criteria. Too often, we throw together a meal, not thinking about the aromas we'll smell before we even dig into the food, or how the colors on the plate will affect the way we feeling during the meal.

I know I always enjoy a meal more when it looks pretty!

Monday, January 2, 2012

Reminiscences of Our Travels

Happy New Year, everyone! It's been a hectic holiday season, and I'm pretty happy that it's over now, and things can get back to normal. I used this weekend to do a massive new year's cleaning overhaul, but I still have lots of work to do. Of course, I tackled the kitchen first, and now it is SPARKLING clean, just waiting for this new year's dishes to be cooked! There's quite a bit of stuff in my pantry, fridge and freezer that I really want to use up before I go shopping again, so yet again, we're in for a few days of creativity before I bring in any new ingredients. There's so many things that I have planned for this year, and I can't wait to start in on all of them. At the top of that list is continuing my culinary education through The Professional Chef, and we'll be coming up to recipes very soon. I'm still in the introductory portion of the book though. I have also started a small collection of my own creations that I can hopefully turn into a cookbook in the near future.

Tonight, however, I want to share a great recipe that I made right before the new year. It's called Crispy Chicken with Rye Bread, Mustard, and Sweet and Sour Red Cabbage, and I found it in Cooking in the Moment: A Year of Seasonal Recipes, a great book that I haven't had the opportunity to explore just yet. This is the first recipe I've made from it, and I was happy with the outcome. It had been on my current menu, but the day I was supposed to make it, I just wasn't really feeling it. But the next night, I convinced myself to make it, since I had thought it sounded good when I added it to the menu. The first step involved making my own breadcrumbs with a loaf of rye bread. I put the chunks of rye bread, sans crust, into a mini-food processor, and pulsed until I had an even consistency. I spread them out on a baking sheet, allowing them to dry out for about 2 hours, before using them. I also mixed them with some kosher salt and black pepper, as well as more caraway seeds.


I did some other things around the house while my breadcrumbs were drying out, but when I came back to the kitchen, I brought all my other ingredients together. I mixed some kosher salt and pepper into a couple cups of flour, in preparation for the breading process. I also got out a couple of eggs and lightly beat them. I lined the flour and egg up with the breadcrumbs, and turned to the chicken. I cleaned each thigh of most of the fats, and then sprinkled them with salt and pepper.


Once all of the ingredients for the main part of my meal were gathered, I set them aside so that I could time everything appropriately. I turned to the Sweet and Sour Cabbage recipe, so I grabbed my red cabbage and a red onion, along with some turbinado sugar and some kosher salt. I sliced the cabbage in to small ribbons, cut the onion in half and thinly sliced it, and added it to a pan with some vegetable oil. After adding the salt and sugar, I also added some cider vinegar and red wine vinegar, and allowed it all to steam in a covered pot for about 20 minutes. When the cabbage was ready, it's dark purple hue had turned into a beautiful magenta!


I breaded each chicken thigh by dipping it in flour, then egg, and finally into the rye bread crumbs. Each piece of chicken was then added to a hot pan, with vegetable oil, and I left them to cook until the breading had become crispy and browned, before flipping.

While the chicken was cooking, and the cabbage was simmering, I added some Dijon mustard and chicken stock to a small pot, and brought it to a simmer with a pinch of kosher salt. This made the sauce for the chicken. Everything came together at the same time, and I plated the meal. On the bottom, some sweet and sour red cabbage, topped with a couple of crispy chicken thighs, and finally topped with some of the mustard sauce. As the title of this blog suggests, this meal was quite reminiscent of our recent trip to Germany and the Czech Republic. The cabbage, as well as the caraway flavor in the breadcrumbs really brought me back, and inspired me to start thinking about our next trip. I don't know when it will be, or to where, but I know it will be amazing!


Stay tuned for great things to come in 2012! I am working on some more giveaways, as well as some other special features! 

Friday, December 30, 2011

Part One : Chapter 4 : Food and Kitchen Safety


I'm hoping that this chapter was taught separately, in a classroom rather than a kitchen, and involving no food whatsoever. It's not the most appetizing of chapters, and for the readers' sakes, I'll gloss over some of the details layed out here. I learned about food-borne illnesses and food contamination, as well as pathogens, and danger zones. However, the most important rule I took away from this part of the chapter is that foods must be kept, heated and cooled at the correct temperatures in order to prevent unsavory things from occurring. Ingredients cooked in advance should be cooled slowly, but within a 4-hour period of time, and when reheating foods, they must be reheated in the shortest amount of time possible without compromising the doneness. What I didn't know before I read this chapter is that food CAN actually be reheated more than once, as long as they are handled properly during the process. Here I was thinking, once I heat something up, I can't use it again after that!

Another lesson that I've touched upon in the past is the proper way to thaw something from your freezer. My method of choice is in refrigeration...it's a slow process, but someone's gotta do it! That just means transferring your frozen item to the refrigerator and allowing it to thaw over the next 24-48 hours. If you are in a hurry, you can certainly thaw it under running water, but it's best if the water is under 70 degrees, allowing the item to thaw without shocking it with heat. It's possible to cooking something while it's still frozen, but be sure that it is a small piece - otherwise, it will be overcooked on the outside, and still frozen on the inside. No one wants to cut into a frozen chicken breast!

The final part of this chapter touches on the subject of kitchen safety, including health and hygiene. As we all know, we should wash our hands after working with raw meats, use separate cutting boards for meats, and other ingredients, and keep a generally clean working environment in the kitchen. However, did you know that the chef's jacket is double-breasted, creating a double layer of cloth as protection against steam burns, splashes and spills? That also means that the coat can be rebuttoned on the other side, in order to hide massive spills that could occur. The chef hats are meant to contain hair, but also absorb sweat, something no diner wants dripping into their entree!

My biggest takeaway from this chapter is the way I will organize my refrigerator from now on. The chapter talks about storing things appropriately, meat going on lower shelves to avoid drippage onto innocent vegetables, and keeping things that must be the coldest in the back of the fridge, while leafy greens and herbs can stay towards the front, where they'll be kept cool, but not freezing. I will definitely be taking these ideas to heart as I unpack the next load of groceries that I bring home. A cool veggie is a crisp veggie!

Friday, December 23, 2011

Part One: Chapter Three: The Basics of Nutrition and Food Science


In this chapter, I learned about the basics of nutrition, and how they can be applied to the culinary arts. It is imperative that industry experts impart their knowledge on customers and consumers alike. The knowledge of fats, carbs, proteins, vitamins and minerals can play an integral part in the building of a menu that can offer health benefits to its diners. Portion control is another big factor. 

In the next section of the chapter, I learned about the basics of food science. The effects of heat on starches and sugars, different forms of heated cooking, and even emulsifiers hold a place in this category. All cooking is really science, as the effect of one thing on another causes the outcome of the finalized dish. In baking, this science is even more important, since the exact amounts of diffferent ingredients interact to make either the perfect moist cake, or the dry crumbly one that goes right into the trash! 

_____________________________________

It's been a busy week, full of getting ready for the holidays, and wacky changes in weather that are causing my allergies to act up! Apologies for not writing more this week, but we'll get back on track soon! Congratulations again, to elle.dub, for winning the Share the Health! Popchip giveaway! Happy holidays to all my readers, enjoy the weekend and if you find a particularly fabulous dish, comment and let us know about it!

Sunday, December 18, 2011

Healthy and Fresh

I finally got my act together and planned a menu for the upcoming week. It was a necessary evil, as I just found out we'll be having my in-laws in house for Christmas Eve, as well as Christmas Day, so I had to have a plan! While I was at it, I planned out the rest of the week as well. Be sure to click over to the Current Menu tab to check it out. With all the holiday plans and get-togethers, it's been hard to find time to eat a meal at home. I'm looking forward to a whole week's worth of them!

I really wanted something healthy, and full of fresh ingredients for tonight's dinner, but I had some chicken breasts in the fridge that I needed to use, so I built my meal around that. I opened Tender by Nigel Slater, knowing I'd find exactly what I was looking for, and in fact, I did.

This simple recipe of warm chicken, served over a bed of swiss chard, green beans and tomatoes is as fresh as fresh can be! I didn't open a single jar, or bottle, aside from the olive oil...everything came from the produce department! My first order of business was to get a few pots of water boiling on the stove, and then I set to prepping my ingredients. I purchased rainbow chard, because it's just so pretty, and I separated the leaves from the stems, chopping both in anticipation of cooking. I also trimmed the green beans while the water was beginning to boil.


I finely minced a small shallot, and mixed that with some lemon juice, chopped mint, a pinch of salt and olive oil in a container with a top. I shook it all together until it was emulsified, and set it aside to dress the salad.


As the water in my two pots began to boil, I heated my grill pan and seasoned my chicken breasts. A little salt, a little pepper, and a little chopped rosemary goes a long way! I cooked the chicken quickly, until both sides were golden with wonderful-looking grill marks, but I left it a bit undercooked. Instead, I placed the meat on a plate, and covered it with a bowl to keep the heat in, allowing it to continue cooking as it rested. 


While the chicken rested, I cooked the green beans in one pot, and the chard stems in the other, for about 3 minutes. With 30 seconds left, I added the chard leaves to the pot while I drained the green beans. The beans and the chard (stems and leaves) got tossed in a bowl with the tomatoes, and the dressing I made earlier. At this point, I sliced the chicken breasts into about 4 slices each, and placed them atop the salads, with a bit more dressing. It made for a beautiful plate of healthy, fresh food. Sometimes, it's wonderful to sit down to a summery meal on a cold winter's day, and while I used more wintery vegetables, the resulting dish was bright, light and made me wish for spring!


Now that dinner is done, I can tuck into Chapter 3 of The Professional Chef, and write about that a bit later tonight. 

I also want to remind everyone that there's still time to win a case of Popchips! I've only got one entry so far, and you can't win if you don't enter! Be sure to scroll down to the prior post, entitled Share the Health! and comment in order have a chance at winning! The contest ends on Wednesday night, so be sure to comment ASAP!!