Friday, April 29, 2011

Sweet Potatoes!

Tonight, I made a down-home, rustic dish from Jamie's Kitchen, by Jamie Oliver. I thought it was only fitting to make something from a notably British chef on the day that the Royal Family welcomes their newest Princess! This dish is a roasted chicken, stuffed with fragrant couscous and cooked on a sweet potato stovie.

There's a lot of moving parts in this one, and they all come together to cook for an hour and a half...so once you put everything in the oven, you are free to do what you please while it cooks. It's a very hands-on/very hands-off process, is what it is! :)

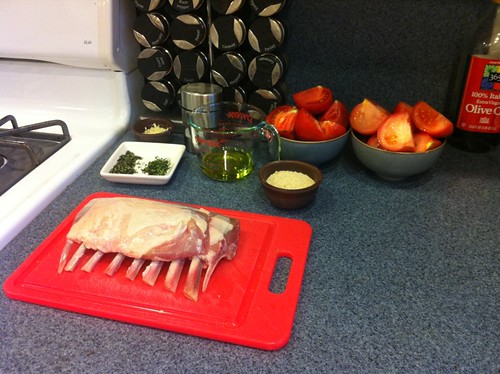
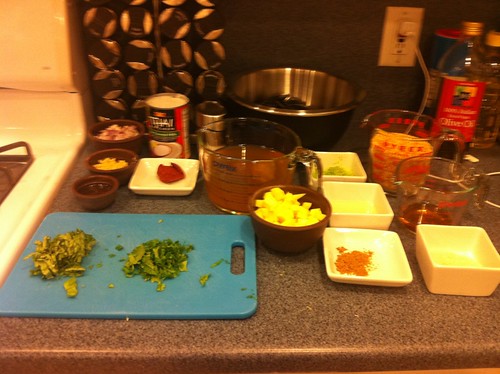
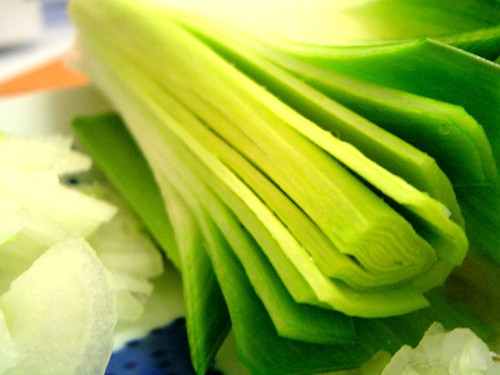
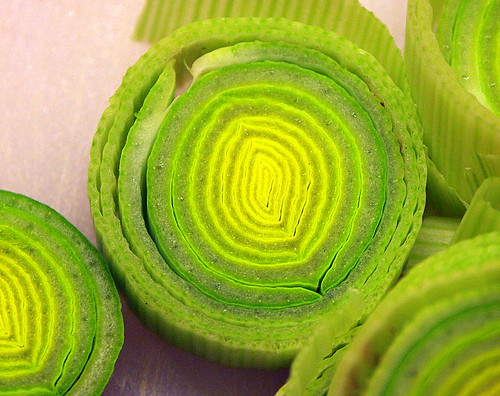
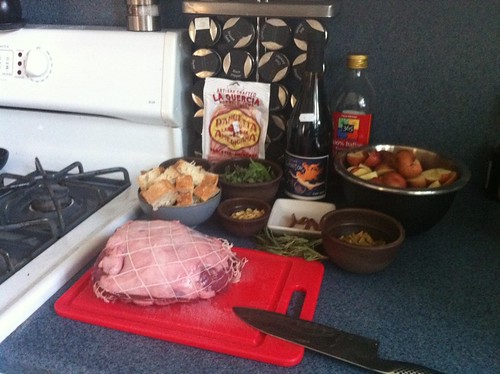
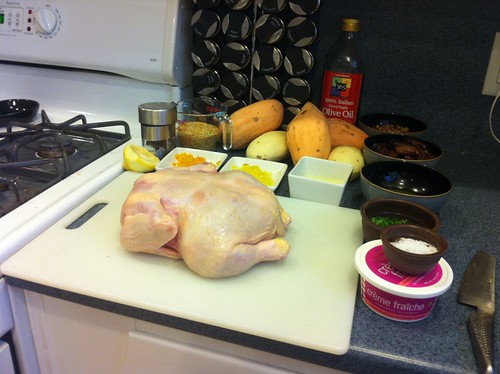
For my mise en place, I gathered some tri-colored couscous (because I think it's prettier than regular), the zest and juice of one orange and one lemon (reserving on lemon half after juicing), some mixed dried fruit, some mixed nuts, chopped mint and parsley, olive oil, potatoes, sweet potatoes, fennel seeds, coriander seeds, ground cinnamon, cumin seeds, cardamom pods, black peppercorns, sea salt, creme fraiche, and of course, a roasting chicken.

IMG_0568


Once your mise en place is in place, I promise that things pick up speed...so let's take it away!

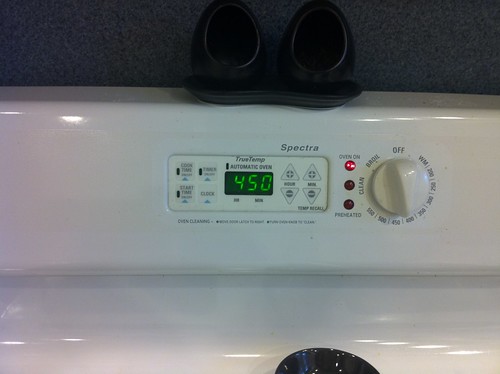
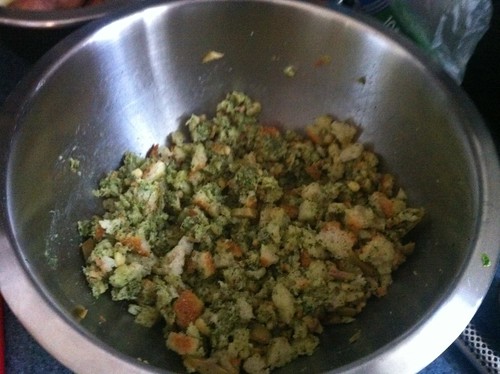
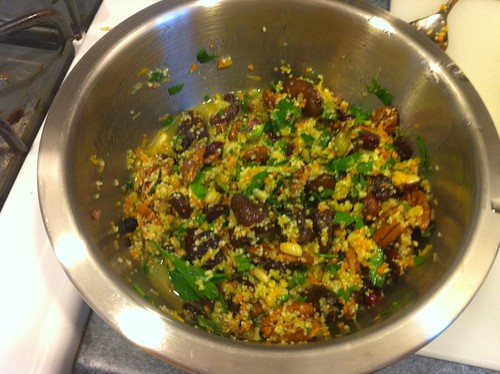
Preheat the oven to 375 degrees. Mix the couscous, zest and juices of both orange and lemon, the dried fruits, mixed nuts and fresh herbs in a bowl and add a few good glugs of olive oil, as well as some warm water, and stir everything together until blended.

IMG_0569


Grate the potatoes (both regular and sweet) into another bowl. I found that using the grating disc on my food processor was MUCH quicker than grating by hand!

IMG_0570


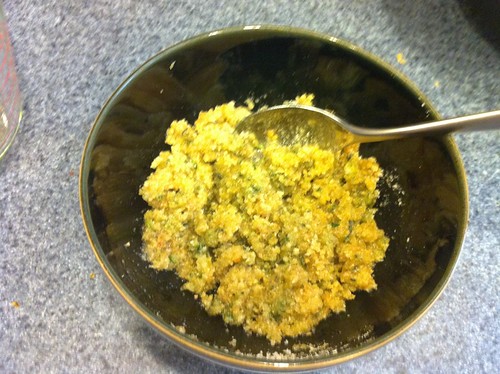
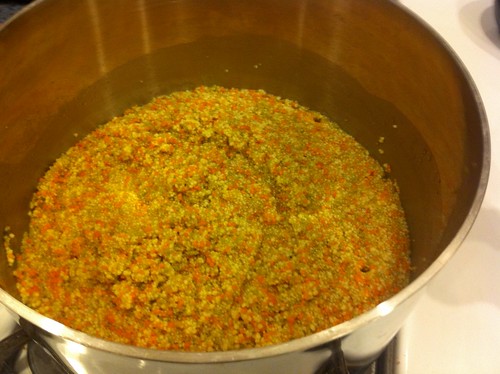
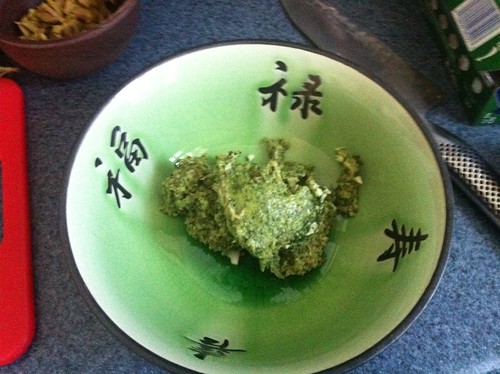
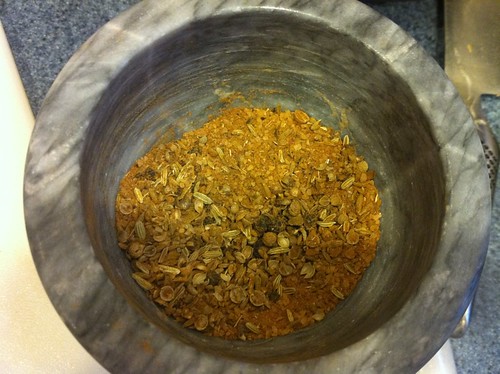
In a mortar and pestle, mix all the spices together into a fine powder.

IMG_0571


Alright, now it's time to get cookin'!

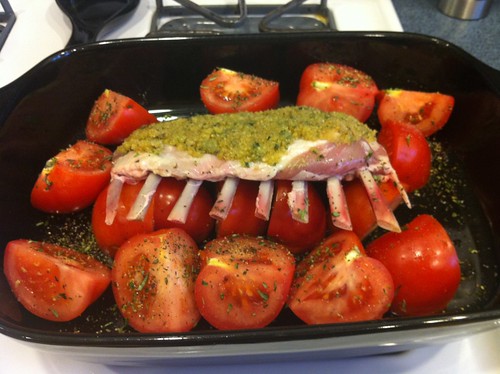
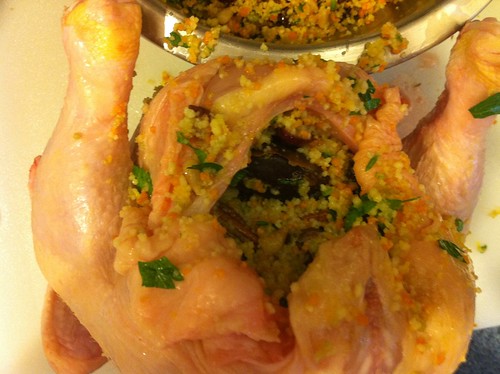
Stuff the chicken with the fragrant couscous and really pack it in there. Once you've gotten as much as you can in there, cap it with that reserved lemon half.

IMG_0572


IMG_0573


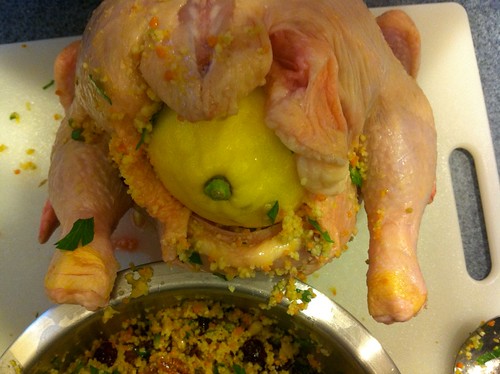
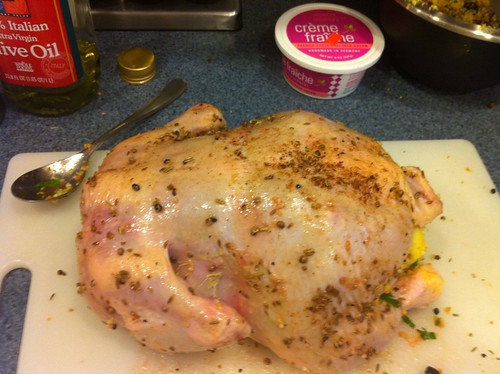
Once the chicken is stuffed, rub some olive oil over the whole chicken and use half of the spice mixture to rub the skin all over.

IMG_0574


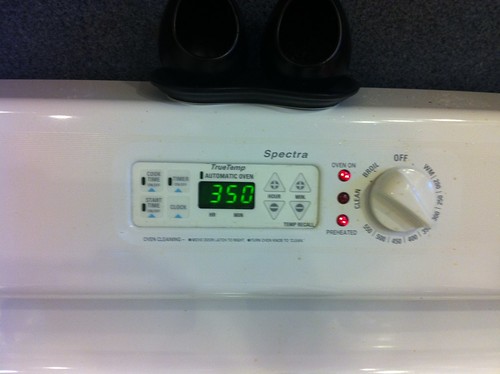
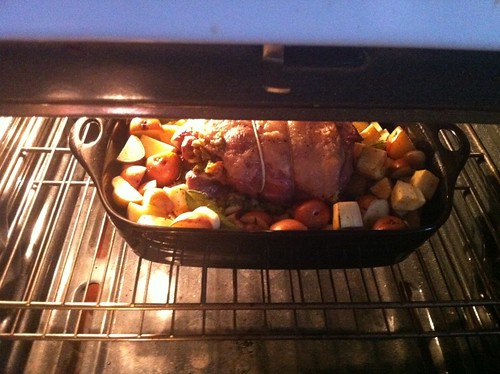
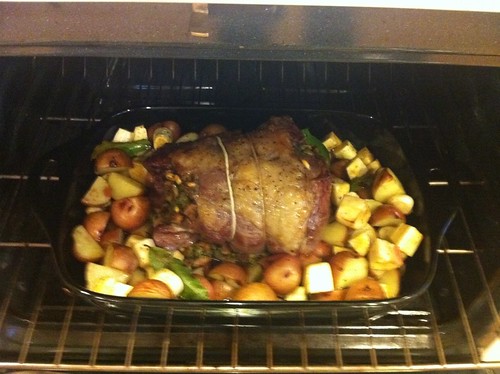
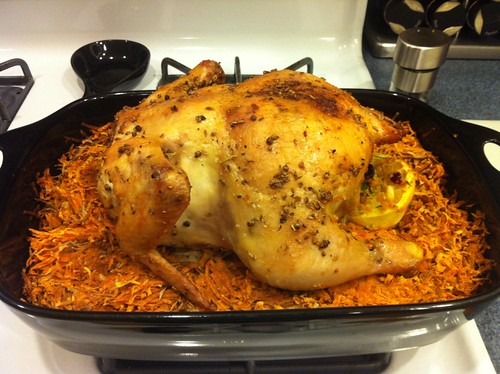
Using a large casserole dish, or roasting pan, spread your grated potatoes across the bottom and really pack them in there. You want to make a sort of potato cake in the pan. Once all of the potatoes have been pressed down in there, like a little bed for our chicken, place it on top and put it in the oven. After a half an hour has passed, turn the temperature down to 325 degrees and cook for another hour.

IMG_0575


The whole house smelled so fragrant while this dish was cooking, just mouth-watering! Once the hour and a half was up, I pulled the pan out of the oven and allowed the chicken to rest for about 5 minutes before serving.

IMG_0576


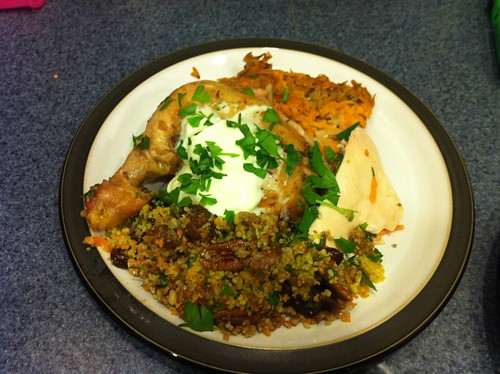
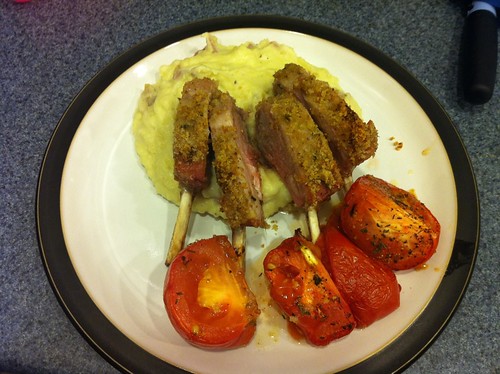
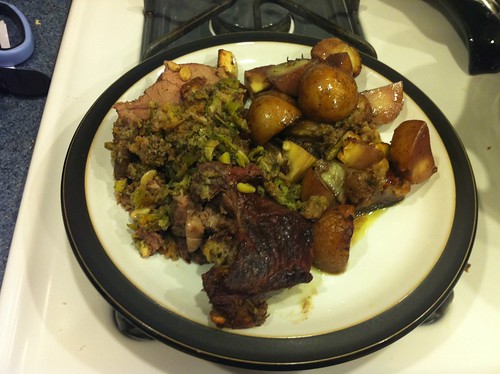
Once the resting was done, I carved the chicken and cut squares of potato "stovie" and plated with some of the stuffed couscous on the side. Topped with a bit of creme fraiche, as well as some sprinkled parsley, this dish was so home-y and heartwarming! And now, to watch the wedding!

IMG_0577

Wednesday, April 27, 2011

Defrosting Done Right

When I go grocery shopping, I usually buy more cuts of meat than I can use before they would go bad in the fridge. For that reason, I freeze some of them right off the bat so that they are preserved until I'm ready to use them. You can freeze any type of meat, even fish and seafood (just not live stuff like clams and mussels). The key to defrosting, however, is doing it gradually, in the fridge, a day or two before you plan on using it.

Frozen Mince
from Flickr - by Mrs. Huvie

I know, there's a defrost button on your microwave, and it's really easy to just pop that chicken breast in there and let it "defrost." However, even on the defrost setting, the microwave will start to cook whatever you had previously frozen...assuring an uneven cook when you actually go to use it in a recipe. The outside will be cooked, the inside will be raw, and then, by the time you are done with your dish, the outside is chewy and overcooked, even if the middle ends up being perfect.

Frozen chicken
from Flickr - by storyofmylife

If you are in a pinch, and you totally forgot to pull your meat out of the freezer in good time to defrost, soak it in some luke warm water (in it's container or wrapping)...or leave it out on the counter for a few hours before cooking. But whatever you do, don't defrost with your microwave. I mean, you want evenly cooked meat, right?

Monday, April 25, 2011

Roasting the Rack

Tonight, I came home to a houseful of chores that needed to be done, so I opted for a meal that I could put in the oven and "forget about." A rack of lamb is a good way to go in that situation because it takes awhile to cook and you don't really need to do much to it while it's roasting. For this occasion, I'm making a Rack of Lamb with Garlic-Herb Crust and Roasted Tomatoes...and at the last minute, I decided to make some whipped potatoes as well. Both recipes came from Stonewall Kitchen Harvest.

For my lamb, I didn't need a ton of ingredients so my mise en place came together rather quickly. Good thing too, because my puppy was hungry and I needed to get her food ready before I started cooking the lamb! I gathered garlic cloves, fresh rosemary, fresh thyme, salt, black pepper, olive oil, breadcrumbs, a rack of lamb and 4 tomatoes.

IMG_0559


At this point, I preheated my oven to 450 degrees Fahrenheit.

IMG_0560


I put my minced garlic cloves, along with half of my rosemary and thyme into a mortar, and used a pestle to mash it up along with some salt and pepper, until I had a chunky paste.

IMG_0561

Once the paste was ready, I put it into a larger bowl, along with the breadcrumbs and olive oil, and then mixed until combined. The result is a granular, crusty type of paste.

IMG_0562


At this point, my oven is preheated so it's time to start a-roastin'! I placed my rack of lamb into a roasting pan and tucked tomato quarters all around and underneath it. You want the bones to be propped up by the tomatoes. I packed the breadcrumb mixture on the top (fatty side) of the lamb, pressing it down so it molded to the shape of the rack. I also sprinkled the exposed tomatoes with the leftover rosemary, thyme and some salt and pepper.

IMG_0563


And into the oven it goes, for 20 minutes. Once those 20 minutes are up (20 minutes that I used to put in a load of laundry, fold some dry laundry, feed the puppy, and even wrap some coins to take to the bank), you want to reduce the oven temperature to 350 degrees.

IMG_0564


...and continue roasting for another 35-40 minutes! I used those 40 minutes to get a second load of laundry in, and "whip up" some whipped potatoes! Once the timer beeps, take your lamb out of the roasting pan and allow it to rest for a few minutes before slicing it into individual chops.

I plated this meal by scooping some whipped potatoes onto each plate, and then placing the lamb chops on top of the potatoes. This was a small rack, so between the two of us, we finished it. I placed roasted tomatoes around the edge of each plate, and presto - a meal I didn't really need to "think about." That's a fancy Monday night dinner with not a lot of work, wouldn't you say!?

IMG_0565

Sunday, April 24, 2011

A Minestrone for Spring

Yesterday, we were in Vermont for a quick visit with Matt's mom, and we woke up to what I can only describe as a snowstorm. There was an inch of snow on the ground, it was coming down in buckets, and it hardly felt like the end of April! We drove back through rain and snow to warmer temperatures here in Boston, and thankfully, today was short-sleeve and flip-flop weather! What a difference 24 hours makes, huh?

Last night, it was so dreary and blah. It was definitely a soup and sandwich kind of evening, so I started cooking early in the afternoon...this soup takes a LOT of prep work, and minimal cooking time.

From Jamie's Kitchen, Jamie Oliver creates a delicious minestrone for the spring season. Using vegetables readily available during this time of year can make a meal seem even more comforting. It just seems...right. I made some basil pesto (for the end of the process), and gathered some chicken stock, diced fennel, sliced asparagus, cauliflower florets, diced zucchini, blanched and diced plum tomatoes, olive oil, sliced garlic cloves, chopped scallions, sliced green beans, shelled fava beans, broken spaghetti noodles, salt, pepper, basil and chives. I left out peas and yellow beans - and i'll tell you why - I couldn't find yellow beans and I was already shelling fava beans, so I chose to just stick with those. Check out the mise en place on this one!

IMG_0554


It took a long time to cut, dice, chop, slice and shell all these veggies! I totally cleared out a nice little alcove in my fridge though - that's a lot of vegetables!

Once we were ready to start cooking, I brought a pot of stock to a boil. Meanwhile, I added about 5 tablespoons of olive oil to a large pot. I heated the oil until warm and then added the sliced garlic cloves, diced fennel, and sliced scallions, and gently fried them without browning for about 15 minutes.

IMG_0555


While that was cooking, I started to gather the ingredients for my sandwich...Chicken and Mango with Cilantro-Pesto, from the Williams Sonoma Panini Cookbook. While I didn't take pictures of the process, I will say that the recipe was quite easy...and delicious! I'll make it again so I can document it for you guys sometime soon.

Once the 15 minutes were up, I added all of my veggies (asparagus, cauliflower, zucchini, fava beans, green beans, tomatoes) along with some broken up spaghetti noodles and my boiling chicken stock. Stir everything together, and depending on how liquid-y you like your soup, add some more stock accordingly. I added an extra cup of stock because it didn't look soup-y enough for my taste, but if you love a REALLY chunky soup, there's no need!

IMG_0556


I brought it all to a boil and allowed it to cook for about 10 minutes more. Meanwhile, I assembled and pressed my panini sandwiches.

When plating, I scooped some soup into each bowl and then topped them with a hefty tablespoon of pesto. I sprinkled some chopped basil and chives on top and then put a panini on each plate. The pesto packs a real punch of flavor into each spoonful of the soup...I'm so happy I've got leftovers for lunches this week! :)

IMG_0557

Friday, April 22, 2011

Horseradish Crust

Last night, I got home a bit late, after my Zumba class, and wanted to make a quick meal. It was like my "friday" since today is a holiday, and I just wanted to sit back and let dinner make itself. This recipe does pretty much that, Beef Tenderloin with Horseradish Crust, from the Stonewall Kitchen Favorites Cookbook. The mise en place is simple, and the hands-on attention is minimal. I gathered a beef tenderloin, olive oil, salt and pepper, horseradish and red wine. That's it!

IMG_0545


While my oven was preheating to 450 degrees, I placed my beef into a roasting pan, coated it with olive oil and seasoned with salt and pepper. At this point, I put the meat in the oven to roast for 10 minutes. Once my timer told me that 10 minutes had passed, I pulled the meat out and packed my horseradish on the top of it. I squeezed most of the liquid out of the horseradish to assure it was pretty dry first, and then just kind of pressed it on top. Back in the oven it goes, for the next 25 minutes (although, I had to put mine in longer because it wasn't cooked - but keep a good eye on it.)

IMG_0547


Once the timer goes off again (or you feel the meat is cooked to your satisfaction), take it out of the oven and allow it to rest for about 4 minutes. Remember, resting means the meat is still cooking inside, so don't overcook it in the oven and then overcook it MORE by resting.

IMG_0548


While the meat was resting, I poured 1/2 a cup of red wine into the pan, and let it sizzle away until it was reduced to a sauce with a beautiful sheen to it.

IMG_0549


Once I sliced the beef, and plated the slices along with some Cardamom Creamed Spinach (also from Stonewall Kitchen Favorites), I poured a few tablespoons of the red wine reduction over the top of the meat. Easy meal - comin' right up!

IMG_0550

Wednesday, April 20, 2011

Spicy Coconut Curry Steamed Mussels with Mango Couscous

I started the current menu off with a bang tonight, steaming up some mussels in a curry sauce with some delicious couscous! This recipe is from the Top Chef cookbook, and the dish was made by Betty, in Season 2. While the cooking time in this recipe is pretty much under 10 minutes...total...the prep time was a bit more intense...but still, dinner was ready in about 1/2 an hour, so hooray for that!

I gathered some mussels, vegetable oil, ginger, red onion, red curry paste, coconut milk, vegetable stock, limes, ground coriander, salt, black pepper, instant couscous, mango, cognac, sugar, basil, and cilantro, and set up my mise en place, ready to cook for 10 minutes! :) Be forewarned - a lot goes on in the next 10 minutes!

IMG_0534
I'm not sure how I didn't notice how awful this picture came out! Sorry!

First things first, I got out a large skillet and added a tablespoon of vegetable oil. Once heated, I added some minced ginger, and a minced red onion and let them cook for about 3 minutes.

IMG_0536

I added the curry paste and stirred everything around until the ginger and onion was well coated in the paste. I poured in 1 cup of the vegetable stock and the coconut milk and raised the heat to bring the mixture to a boil.

IMG_0538

Meanwhile, I poured two more cups of vegetable stock into another saucepan, and set that to boil as well. With the stock, I poured in some ground coriander, salt and pepper.

IMG_0537


Once both pots are boiling, I let the curry mixture reduce for about five minutes. At this point, I added the mussels to the curry mixture, along with the lime zest.

IMG_0540

Once the mussels were in, I covered that pot (for 6 minutes), removed the boiling stock from the heat, and poured the couscous in. I stirred that all up and then covered it to sit for 5 minutes.

IMG_0541


The last step was to make the topping sauce, which consisted of some sugar, the lime juice, and some cognac. While the couscous was sitting and the mussels were steaming, I boiled these three ingredients together in yet another saucepan.

IMG_0542


For me, it took about 6 minutes for the mussels to open, but it could take up to 8 minutes, depending on your mussels, so keep an eye on 'em and don't take 'em out too soon...or too late, for that matter! :) Also, stir the diced mango into your couscous at this point.

IMG_0543


Plate your dish by scooping some couscous onto the plate. Top it with some mussels, a few ladlefuls of curry sauce, and the cognac reduction. Sprinkle some chopped basil and cilantro on top and voila...a deliciously spicy meal for a Wednesday evening!

IMG_0544

Tuesday, April 19, 2011

Spring! It's-a comin'!

I think it's accurate to say that Spring is on it's way...and with Spring comes farmer's markets, and farmer's markets are one of my favorite things! The three seasons out of the year that allow for outdoor markets are a wonderful time of year because ingredients are so fresh, and it's nice to know you're supporting the local economy as well!

Spring in Boston Public Gardens
from Flickr - by BostonRunner

I'm especially looking forward to the Farmer's Market that sets up shop in Dewey Square (right near South Station, in the Financial District of Boston) on Tuesdays and Thursdays. There are so many booths that sell breads, cheeses, local meats, and beautiful fruits and vegetables. Because I work right near the market, I alter the way I grocery shop during these seasons!

It's so convenient to stop by the market on my lunch break and pick up the freshest of the fresh! Now don't get me wrong, I still go to the grocery store, and I definitely still make a menu...but I pick and choose what I buy at the store, saving myself for those enormous heirloom tomatoes, freshly packed bags of salad greens, and locally-made feta cheese.

Farmers' Market
from Flickr - by NatalieMaynor
I'll be sure to keep you all posted on my favorite booths at the markets so that you, too, can stop and check out the goods!

Monday, April 18, 2011

An Entertaining Staple

Whenever I'm having people over, the first thing I do is go to the grocery store. I want to make sure I have things on hand for my guests! I've usually planned out a meal ahead of time anyway, but what about that in-between time, while dinner is cooking, and we're catching up in the living room? That's why the first things I grab when I go to the store are 3 kinds of cheese, and crackers. I get creative with the cheeses I choose, but the cracker...that's where I don't waver.

IMG_0531

34 Degrees Crispbreads are the perfect cracker for entertaining. They come in a ton of flavors that go with all sorts of cheeses and even taste delicious all on their own. Each variety of crispbread is packed with flavor, but has minimal ingredients, making them all-natural! There are six types: Cracked Pepper, Rosemary, Lemon Zest, Natural, Sesame and Whole Grain. The first three in this list are my favorites! The Lemon Zest crispbreads are especially good with a nice, fresh goat cheese, and the Cracked Pepper ones add a lovely bite to a mild Brie.

brunch club: cheese platter
from Flickr - by brunchclub

You can find 34 Degrees Crispbreads at Whole Foods, but you can also find them online at amazon.com. Wow your guests next time you have a dinner party with a cheese platter and some deliciously different crackers...or should I say, crispbreads!

I'm not getting anything to write this blatant plug for a product. However, when I love a product, I want to share it with people! A good product deserves to succeed, and this is one of them!

Sunday, April 17, 2011

My Favorite Kind of Onion

leek
from Flickr - by roboppy
We went grocery shopping today, and I was inspired by an item that I buy every time we go to the grocery store. The leek! It's a part of the onion and garlic family, but it's much more mild than either of those ingredients. Leeks are generally sold in stalks that have a gradient of white (at the bottom) to dark green at the tips of the stalk. Generally, we cut off the dark green portion because the leaves are very tough. Using the light green and white parts of the leek can add a lot of flavor to so many different dishes.

Because of the way a leek is formed, it's easier to clean it once you've cut it in half. Normally, I will slice the leek down the middle, the long way, and then run cold water over each half, pulling the layers of stem apart a little bit in order to get the dirt out. You can also soak the pieces in cold water once it is sliced completely.

Leeks
from Flickr - by mingfoto34
Leeks make for a great side dish if you cut them a bit thicker, and saute them in a bit of butter and salt and pepper. They make a lovely bed for a piece of salmon, and a nice thick sauce for a chicken breast as well. You can use them in place of onions in a risotto, and they make a great addition to a spaghetti carbonara. One of my favorite things to add to an omelette are leeks, too! 

Next time you are at the grocery store, pick up a few leeks...and experiment with using them for all sorts of different meals. I love when I find an ingredient that I seriously can't live without! I guarantee you if you open my fridge, you will always find at least one leek in there...unless I've eaten them already!


Friday, April 15, 2011

A Stuffed Leg of Lamb

First, let me apologize for not writing last night! I made a delicious meal for some wonderful friends, but we were enjoying each other's company so much that I lost track of time...and before I knew it, it was bedtime! I took pictures as I cooked, and I'm ready to tell you all about it today!

For the last recipe on the current menu, and the last meal of my journey to Jamie's Italy, I made a leg of lamb, stuffed with olives, bread, pinenuts and herbs. I took my time with this since we were planning on eating a bit later in the evening, and I had an adorable little puppy curled around my ankles! :) I gathered some garlic, mixed fresh herbs (parsley, mint, thyme and oregano) pancetta, anchovy fillets, rustic bread, pinenuts, green olives, salt and pepper, a leg of lamb, rosemary, olive oil, potatoes (and some turnips I had in the fridge as well), a sprig of bay leaves and a bottle of pinot noir.

IMG_0518

I put a couple of garlic cloves in a food processor to chop them up and then, as they were whirling around in there, I added my mixed greens. Once that was blended, I added pancetta slices and 3 anchovy fillets to the mix. Once that was all blended, I scraped all that into a bowl.

IMG_0519

I added my cubes of rustic bread to the food processor next and chopped them until they were breadcrumbs, with some larger chunks mixed in there. I poured that into a bowl with the herb mixture, sliced green olives, and a handful of pinenuts.

IMG_0520

And there we have it folks - the stuffing! Next, I went to preparing the lamb leg. The recipe calls for a cut of lamb that has the H-Bone and thigh bone tunnel-boned removed. I just went to the grocery store and got a boneless leg of lamb instead, and used some kitchen twine to tie the leg together once I stuffed it. I opened up the leg and then rolled it back around the stuffing. I tied it all together and tucked some rosemary sprigs underneath by the stuffing. I rubbed the outside of the lamb with olive oil, and some salt and pepper. I also tossed some quartered potatoes, and turnips with olive oil, salt, pepper, bay leaves and the rest of the garlic cloves. Once the potatoes and turnips were in the roasting pan, I pushed them to the sides to make room in the center for the lamb, and placed it in a 400 degree oven for an hour and a half.

IMG_0522

According to Jamie, Italians do not eat their lamb rare or pink in the middle like we do, so this will be cooked through, but I promise it is delicious! About a half an hour into the cooking time, douse the dish with a good couple of glugs of red wine. You'll want to do that about every half hour or so, to baste the lamb and add more cooking liquid to the dish.

IMG_0523

Once the timer went off, I pulled my roasting pan out of the oven and lifted the lamb to a cutting board to rest for 15 minutes. When it was time to plate, I cut off the twine, and then thinly sliced the lamb and stuffing. I spooned out some potatoes and turnips and then placed a couple of slices of the lamb on each plate!

IMG_0524

Pour yourself a glass of the same Pinot you used to baste the lamb and you've got yourself a meal!