Wednesday, March 30, 2011

Panzanella

As promised, I'm going to tell you all about making panzanella salad today. Panzanella is a traditional Florentine salad, based on two ingredients: tomatoes and bread. "Bread!?" you say! I know, bread in a salad is a pretty foreign concept, but trust me on this one. This makes for a lovely summer salad, and is pretty simple to prepare for a BBQ or gathering. I know it's not summer yet (trust me, I know!) but I needed something refreshing and cool to complement the ribollita that I wrote about yesterday.

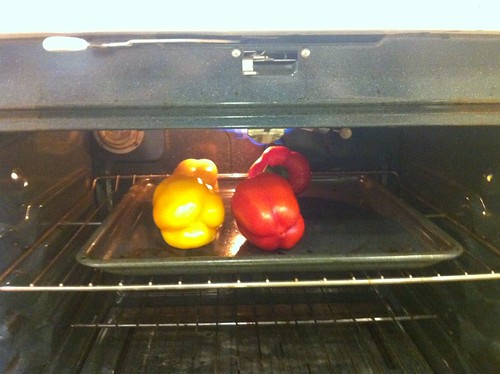
For Jamie Oliver's version of panzanella, I needed to roast 4 red and yellow peppers. So, the first thing I did was preheat the broiler and place the peppers in to blacken the skin. You want to keep an eye on them and turn them a few times so they get blackened equally on all sides.

IMG_0412

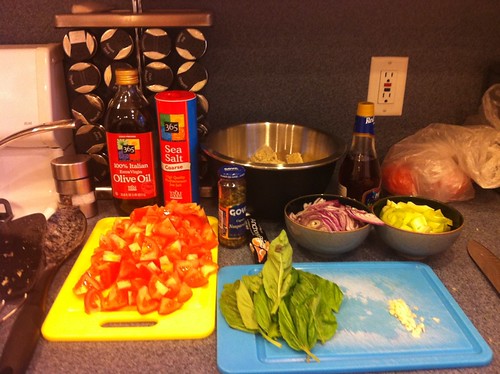
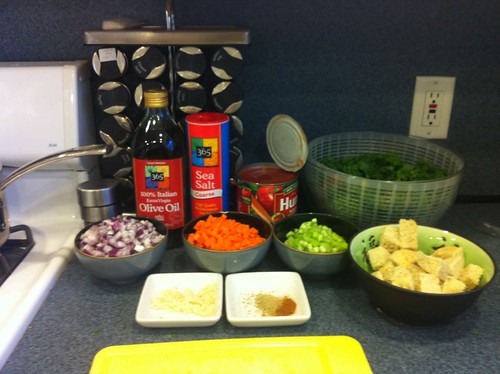
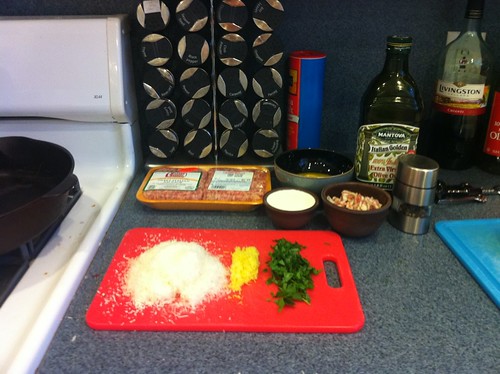
While the peppers were roasting, I gathered the rest of my ingredients for my mise en place. Aside from the peppers, I needed some cubed bread, a nice amount of tomatoes (cut to about the same size as your cubes of bread), capers, sliced red onion, celery, and some basil. I also got some red wine vinegar, olive oil, garlic and salt and pepper out for the dressing. The recipe also calls for anchovies, but I couldn't find them at the grocery store this time around, so I just put some anchovy paste into the dressing to mimic the flavor...I didn't really want to eat anchovy fillets anyway.

IMG_0411

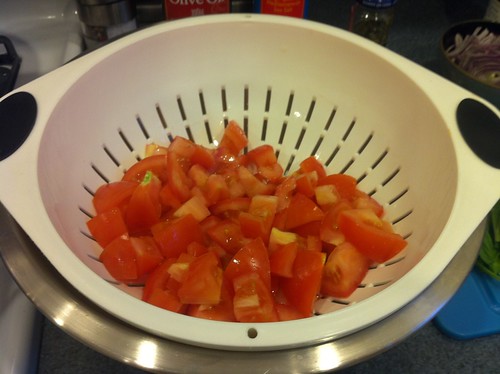
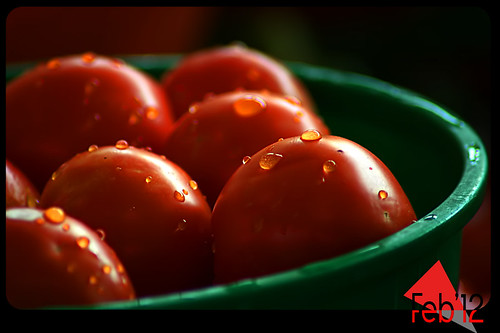
Once you've cut up the tomatoes, place them in a colander, resting over another bowl. Pour a nice amount of sea salt over the tomatoes and toss. Don't be stingy. The salt is going to draw the liquid out of the tomatoes and it will start to drip through into the bowl underneath pretty quickly. Let the tomatoes sit for about 20 minutes so you can be sure to get the most amount of juice out of it. These juices will be used for the dressing later! You'll see! :)

IMG_0413

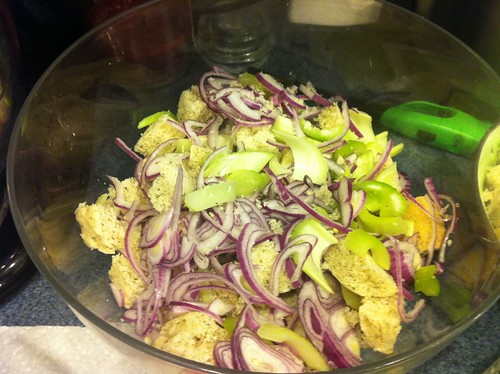
Meanwhile, cube your bread, slice your celery, thinly slice your red onions (giant pieces of raw red onion is not something anybody wants to pop in their mouth), and tear up those basil leaves. Toss this all together.

IMG_0416

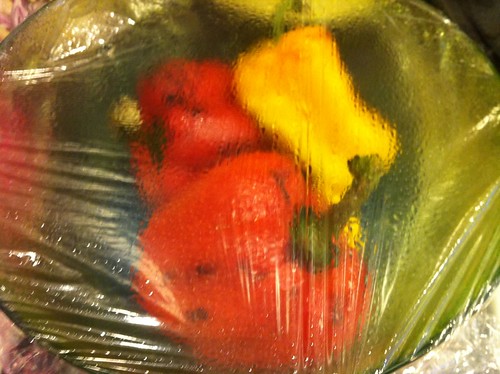
The peppers are probably done now...so here's what you do next. Take those peppers out of the oven and place them in a heat-resistant bowl and cover it with saran wrap. While the peppers steam, the skin pulls away from the meat of the pepper and you'll be able to just peel the skin right off!

IMG_0415

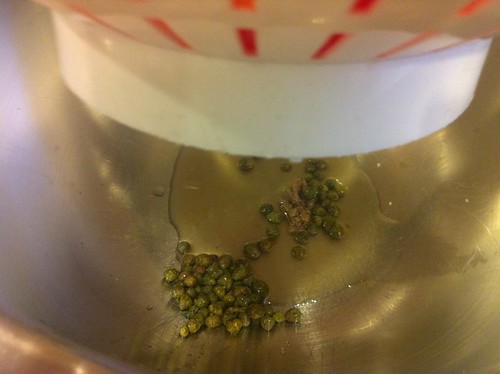
Once you've peeled the peppers (please be careful, they are HOT, and they stay hot for awhile!) you can kind of just rip the meat in to ribbons. You can add the ribbons of roasted pepper to the mixture we've already got going on, and then turn your attention back to those salted tomatoes. In the bowl that's collecting the liquid, we're going to add the capers, some anchovy paste (since I opted not to use anchovy fillets), red wine vinegar, a couple healthy glugs of olive oil and a crushed clove of garlic. Taste the mixture before you season - anchovy paste and capers are both rather salty so you might not need more. I definitely added some pepper though.

IMG_0414

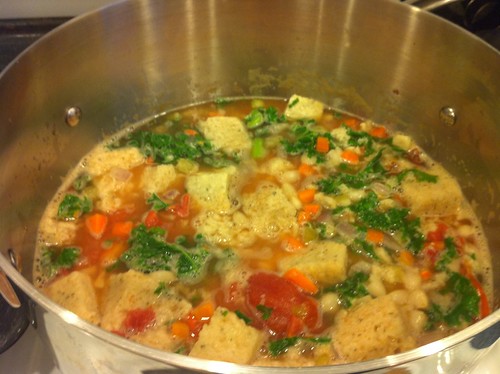
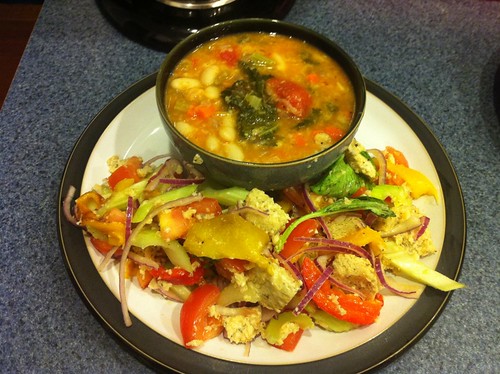
Pour the tomatoes in to the salad, and then the dressing. Toss for a minute but don't overtoss because the bread is going to start getting soft. You should let the salad sit for about 10 minutes before serving so that the bread starts to soak up the dressing. However, if you are going to bring this to someone's house, keep the tomatoes and dressing separate until you get to your serving location. Otherwise, you'll have a soggy salad by the time people go to eat it.

IMG_0421

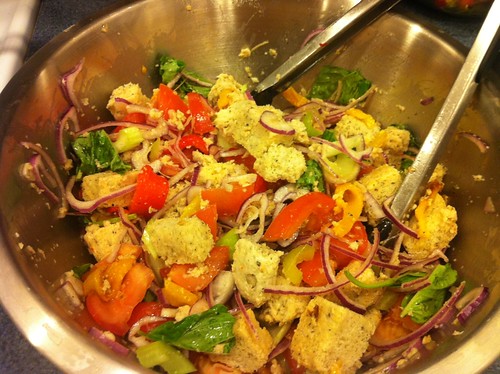
Cool, refreshing and delicious!

And on another note : I have to make a plug for my yoga teacher/friend, Victoria! She's in a competition to be featured in an episode of Yoga Journal, and I promised her I would use every means possible to get her votes! Yoga means so much to her, and you can read her story on her page at Yoga Journal! Give her a rating to vote for her and help her win her dreams! Vote for Victoria here!

Tuesday, March 29, 2011

Zuppa's on!

Tonight, I was in the kitchen for quite awhile, but it was well worth it! I made what Jamie Oliver calls "La Mia Ribollita Preferita," his favorite ribollita. This is a Tuscan soup whose name literally means "reboiled." According to Wikipedia, Italians used to make this soup by reheating leftover minestrone soup from a previous meal.

The cannellini beans, which I bought dried, needed to soak in a bowl of water overnight. Before I went to sleep yesterday, I placed my dried beans in a bowl, filled it with water and covered it with some saran wrap. When I got home from work today, the first thing I did was place those beans on the stove in a large pot with some water, a squished tomato, a bay leaf and a small, peeled potato. Dried beans need to cook for about an hour, whereas fresh ones only need about 25 minutes, so I knew I had an hour of simmering ahead of me.

IMG_0409

Then I got my mise en place together!

IMG_0410

While my beans were cooking, I finely chopped 2 red onions, 2 carrots, 3 stalks of celery and 3 garlic cloves. I placed them all in a pot with some olive oil, a pinch of ground fennel seeds and a little bit of dried red chili, and cooked them on a medium heat, for about 20 minutes. I allowed the mire poix to sweat, without browning. Meanwhile, I cubed some bread and thinly sliced a beautiful bunch of kale.

Once the 20 minutes had passed, I added a can of plum tomatoes and allowed it to simmer for a few more minutes. Once it had simmered, I added the beans from the other pot, after removing the tomato, bay leaf and potato. You want to reserve the cooking liquid to actually make the soup (but I found that if you don't have enough, it works to add some hot water from the sink as well - just make sure you season).

IMG_0417

Once the mixture came back to a boil, I added my sliced kale and it immediately started to wilt into the soup. Doesn't it look bright and delicious!?

IMG_0418

I softened some cubed semi-stale bread with some of the cooking liquid and then added that to the soup as well. I made this loaf of French Herb bread this weekend, so it wasn't exactly crunchy-stale but it worked for this situation. The bread really thickens up the soup and gives it this fantastic texture!

IMG_0419

I continued cooking the soup for another 30 minutes, adding a little more water to loosen it up a bit along the way. It was nice and thick, and the recipe called for 4 big glugs of extra virgin olive oil to top it all off. This gave the soup a lovely sheen and a great silky texture. So comforting on a cold day like this one!

IMG_0422

I served the soup with a great panzanella salad, but more on that tomorrow - I figured I'd split this evening's cooking into two posts for two reasons. One, I was racing around the kitchen this evening - these two recipes were pretty labor intensive, and two, tomorrow's my late night at the gym so we'll be eating leftovers for sure!

Buona notte il amichi miei!

Monday, March 28, 2011

Buon Appetito!

Tonight, I made some fresh spaghetti for a lovely dish from Jamie's Italy, Spaghetti alla Carbonara di Salsiccia. Well, the recipe calls for linguine...but I wanted to use my pasta press instead of the rollers, so that's what I did! :) This also gives me a perfect opportunity to talk to you about carbonara sauce, since it's one of my favorites! It is an egg-based sauce that usually incorporates Parmigiano or Pecorino cheese, as well as some parsley and some sort of pork product, usually bacon or pancetta. It's totally simple, and is an extremely easy week-night meal. You tack on a bit more time if you make fresh pasta, but you know what I say - it's always worth it to make fresh pasta!

Tonight, I started by making my pasta dough so that it could rest while I got my mise en place together. I set it aside for the necessary 30 minutes.

IMG_0401

This is another recipe with very few ingredients so my mise en place was done very quickly. All you'll need is some extra virgin olive oil, some heavy cream, grated Parmesan, lemon zest, salt and pepper, some chopped parsley, chopped pancetta, 4 Italian sausages and 4 egg yolks.

IMG_0402

While my dough was still resting, I moved on to the first step of the recipe - making the little sausage meatballs. I slit the skin on the sausage and slipped the meat out so that I had a pile of loose sausage meat. I rolled little pieces into meatballs, about the size of large marbles. I picked the perfect surface to work on, huh?

IMG_0403


My dough was ready at this point to start running through my pasta press so I stuffed some in to start pressing while I started the next step. I put some olive oil in a large pan and heated it until the oil was warm. I poured my mini sausage meatballs into the pan and allowed them to fry on all sides until nice and golden.

IMG_0404

Once the sausage was golden on all sides, I poured in my chopped pancetta and allowed the mixture to continue cooking until the pancetta started to become crispy and golden as well.

IMG_0405

Meanwhile, my pasta dough had been fully turned into spaghetti noodles so I put a pot of salted water on to boil. While I was waiting for my "watched pot," I mixed the egg yolks, heavy cream, half of the parmesan, the lemon zest and the parsley together with a whisk. It turns into a lovely bright yellow mixture.

IMG_0406

Once the pasta is finished cooking (8-12 minutes for boxed pasta; 3-4 minutes for fresh pasta), drain it in a colander, reserving just a little bit of the cooking liquid in case you need to thin your sauce a bit. Pour a little olive oil into the bottom of the pot that you cooked the pasta in, and then pour the pasta back in from the colander. At this point, pour the sausage and pancetta mixture into the pasta (try and avoid pouring the grease from the pan in if you can) and then pour the egg mixture on top. Quickly toss your pasta with some tongs so that the carbonara sauce coats all the noodles but doesn't scramble. The heat from the pasta will cook the egg gently so that it turns into a rich, gooey coating for the spaghetti. Be careful to continue tossing until all the noodles are well coated and there is no extra sauce cooking on the bottom of the pan...you'll have scrambled eggs if you're not watching what you are doing!

IMG_0407

Once you've plated the pasta, sprinkle it with some of the leftover grated Parmesan. You can serve with a side salad, or a steamed veggie. Tonight, I chose to use Broccoflower. It just looked so bright and spring-y at the grocery store - I had to buy some!

IMG_0408

That was DE-LISH-OUS!

Sunday, March 27, 2011

Worth the Wait

I started cooking dinner around noon today! But don't be fooled by the amount of time it took to make this meal - it's totally simple, I promise! It's actually an extremely hands-off recipe, which makes for a great lazy Sunday in a house that smells too good to eat! :)

Chef Jamie Oliver describes this dish, Peposo (The Famous Hunter's Peppery Beef Stew) as a "powerful old Tuscan dish." This stew can be cooked overnight in a 275 degree oven - for up to 8 hours (like many Italians do) - or, like I did, it can be cooked for 6 hours in a 300 degree oven. My dish actually took more like 4 1/2 since I didn't have as much meat...which was lucky for me because I don't think I could have taken it a second longer. Seriously, the house smelled SO good!

First, let's take a look at my mise en place.

IMG_0394

The only prep work for this was cutting the meat off the bone. The recipe calls for 5 1/2 pounds of beef shin (or shank) but the meat is going to get so flaky and succulent over the next 6 hours that its just easier to cut it off the bone now. There's quite a bit of fat on these pieces but I didn't remove all of it - just the large chunks. The fat flavors the juice that the beef cooks in so you don't want to get rid of all of it. Also, check out the marrow in the middle of the bones - you totally want that in there, too. The marrow holds so much flavor and will fall out of the bones as they cook, adding to the delicious juices as well. When you purchase the beef shin (shank), they will look like this:

IMG_0393

Because the recipe calls for 5 1/2 pounds, I had to buy a few of these packages. I actually think I purchased more like 4 - 4 1/2 pounds since it really is only for the two of us...plus some leftovers. I figured having the exact amount of meat wasn't necessary - the recipe says it serves 10! Aside from the meat, I had 2 bottles worth of Chianti (I just bought a large bottle that is the equivalent of 2 regular bottles), 20 cloves of garlic, 5 rosemary sprigs, 2 bay leaves and loads of salt and pepper.

So, once I had my mise en place in place, I got out a large dish that would just hold all of my ingredients.  You don't want to have a lot of empty space in the pot so make sure you choose wisely. I placed a layer of the pieces of beef in the bottom of the pot and topped it with some of the garlic cloves, a couple of rosemary sprigs, a nice sprinkling of salt, and a bunch of freshly ground pepper (like, a lot of pepper - it IS pepper stew after all). Continue layering like this until you've used up the pieces of beef.

IMG_0395
Second layer
Once all the beef was used up, and I had thrown in all 20 garlic cloves, along with rest of the rosemary, I poured the Chianti into the pot, to the brim. You want everything to be covered in liquid. I didn't end up using the entire amount, but if you do run out of wine, you can finish filling the pot with water. Add the bones and the bay leaves for flavor and bring it to a boil on the stove.

IMG_0396

Once it came to a boil, I covered the pot with a double layer of aluminum foil and put it in my preheated oven. You want to keep all the moisture inside the pot. And then...you find something to do for the next 6 hours! :) I baked a loaf of bread, did some laundry, watched a Law and Order: SVU marathon, cleaned the kitchen, and changed the sheets. All in all, a pretty successful day, I'd say.

With an hour and a half left on the timer, I checked my pot to see how the meat was coming along, and was happy to find that it was pretty much done. I left it in for a little longer while I made my sides. I decided to saute some potatoes and kale to go with this stew, so I sliced up the potatoes and threw them in a cast iron pan with a little butter, salt and pepper. When the potatoes were browned and almost cooked through, I threw the kale on top and tossed until the greens had wilted.

IMG_0398

Once the potatoes and kale were ready, then I turned off the oven and pulled my stew out. The flavors had melded together so well and the marrow had fallen out of the bones. I pulled the bones and bay leaves out of the liquid, along with the rosemary sprig branches.

IMG_0399

And finally, it was time to plate this hearty meal. I broke the meat apart with a fork quickly, and smooshed the garlic cloves up a little bit, and voila, a lovely hearty Italian meal for us and lots of leftovers for the week! I drizzled some of the juices on top just before serving.

IMG_0400

This meal was very comforting and homey. I love enjoying a meal that has made my house smell so good all day because it's like finally eating something for which you've had a craving for a long time. It can also be served as an energizing brunch, scooped over a hearty slice of hot, toasted bruschetta, like it was traditionally given to hunters after a morning spent in the woods. Don't be put off by all the pepper because while I used quite a bit, it wasn't extremely potent after the 4 1/2 hours in the oven. I think I would probably use MORE pepper next time, but you can definitely manage the amount of spice that you'd like in your stew! Happy Sunday!

Thursday, March 24, 2011

Running on Empty

Well, I'm running low on pretty much everything in my kitchen. Tomorrow is grocery shopping day, thank goodness, so everything will be restored soon! I haven't cooked in a few days because of this so I'm jonesin' for some new ingredients. We've either eaten leftovers or ordered out the past few nights so I took the opportunity to update the menu on the site this evening.

fresh chopped herbs
from Flickr - by sparnie808

The current menu is set to commence this weekend, so I'm looking forward to a few weeks of yummy Italian fare. The recipes also make pretty large amounts of food, so I'm going to have some delicious leftovers for lunches while I'm at work the next few weeks. I love coming back from the gym, knowing there's a home-cooked delicious something-or-other, waiting to fill me up after a hard workout. It's very comforting to take a container out of the fridge, heat it up and have a little taste of home while sitting in your cube!

Tomato
from Flickr - by Feb12

I think this menu is timed perfectly for the weird winter/spring weather out there - a little bit refreshing, a little bit comforting and warming. Jamie Oliver's recipes always make for such feel-good, rustic dishes. So, check out the current menu, and I'll see ya back here with something Italian very, very soon!

Wednesday, March 23, 2011

As The Salad Spins

A wonderful addition to any budding chef's kitchen is a salad spinner. Have you ever tried to dry lettuce or spinach leaves after a good washing, only to find yourself with a soggy salad 20 minutes later? That's because your leaves aren't dry!! If you pour dressing on already wet leaves, you not only dilute the dressing that you've painstakingly whisked together, but you weigh down the greens, which makes for a sopping, yucky mess!

IMG_0390

You've got three pieces to this gadget: a bowl, a basket and the spinner top. The bowl can double as a salad bowl, which is great. The basket fits within the bowl, and this is where the lettuce sits. Rinse the leaves in the basket under some cold water (cold water also firms up any wilt-y leaves and brings out the lovely greenness of fresh veggies). Once you place the top on, and the top could either have a push top, or a pull string, you push/pull so that the basket spins on an axis within the bowl. This spins the water droplets off of the greens!

IMG_0389

When you take the top off, you've got a basket full of dried greens in a basket. I usually pour the water out of the bowl, dry it off and pour the dried leaves right back in - who needs to dirty another dish? There you have it, the brilliance that is a salad spinner! Invest in one today and never again have soggy salad ... as long as you don't over-dress!

Tuesday, March 22, 2011

Nobody eat the beef! The beef has gone bad!

Here I am, on my couch, alone on a Tuesday evening. It's just me, my laptop, a Law and Order: SVU rerun and a sushi takeout menu. I know, there's one more thing on my menu, but when I took the steak out of the fridge, I realized that it had frozen and then defrosted into a sickly grayish color that was just about the opposite of appetizing...it's probably not a good idea to eat it. Matt (my husband) is at dinner with some co-workers and I'm on my own here. I tossed the steak because...well, ew. Luckily, it was on super sale, and I had only purchased enough for 2 people exactly, so I only lost about 3 bucks. Maybe I can get to the store to pick up a replacement before the end of the week. Otherwise, we'll just chalk that up to fate and scratch the recipe from the old list, because tonight...tonight is menu-planning night!

Dinner's here!

We've decided that our new grocery shopping day is Friday night. H-Mart is relatively uncrowded on Friday nights - the only time I've ever seen it less than packed! They have a great food court inside, full of wonderful Asian delicacies so we catch dinner there and then do our shopping! I have gym classes on both Wednesday and Thursday nights after work so today's a better time than ever to get this list banged out.

Jamie's Italy
Yesterday I asked you, my lovely faithful readers, what you wanted me to cook over the next few weeks. Alas, only one lonely reader responded. Thank you, Rachel, for suggesting Italian fare. The suggestion of such a vast cuisine couldn't have come at a better time, because today I came home to a delivery: Jamie's Italy by Jamie Oliver! I spoke to Rachel a bit more in depth about what she wanted to learn most about Italian cuisine. She mentioned specifically that she wanted to know how to make lasagna. What a great lesson! But I've decided, because Italian was the only suggestion I received, and because I always get obsessed with new cookbooks, that I will make this menu entirely from Jamie's Italy!

Once we've completed cooking all the recipes I choose for the menu, we'll have a better understanding of some of Italy's greatest dishes, provided of course, with Jamie's special twists. For any of you who decide to purchase the cookbook and follow me through this Italian journey, I'll provide the page numbers of each recipe I choose to use, and of course, how-to pictures!

Who's excited!?

Also, if you are now inspired to send recommendations for menus, I'm always open to them. I'll make a running list and work from it for future menus, so send me your ideas, your questions, and your recommendations!

Monday, March 21, 2011

I've got an idea!

I've got a crazy idea! It's time to make a new menu so we can go food shopping on Friday evening - our new night of choice for this task since the stores are empty! I started browsing through my recipes, preparing to start my list when I thought, wait a minute! Maybe my readers can help!


So, here's what I'm proposing...

  • Is there an ingredient that you would like to learn more about in the coming weeks?
  • Have you seen a cookbook that you'd like to hear more about?
  • Do you have a recipe that you've been dying to try...but you're still just a little intimidated?
  • Interested in learning a specific technique?
I would love to help! Comment on this post to leave me your ideas and I will try to incorporate them into my menu this time around. If it works out well, we'll do this from now on, and if I get too many requests (ooo, I hope that happens!!) then whatever I don't get to this time around will certainly roll over into the next list, I promise. And, I will definitely mention you in my post if it was your suggestion - I'm all about giving credit where credit is due. 


If you feel strange commenting on the post to let me know what you'd like to see on the menu, feel free to shoot me an email, instead. 

Sunday, March 20, 2011

Honey Glazed!

Hello there, readers! I'd like to start off by apologizing for not posting for a few days. It was a pretty hectic weekend and while I did do some dining out and about, none of them were noteworthy enough to mention here, unfortunately. I think the best food I ate this weekend was at my friend Heidi's house, where we celebrated our friend's baby shower, and Heidi hosted...she's such a great entertainer, and a wonderful cook!

Today was a laid back day, and I finally had time to prepare a meal at home again - it's been a few days so it was great to get back into the kitchen! Tonight, we are having Honey-Glazed Pork with Wilted Greens. I got this recipe from Martha Stewart Living Magazine a few years ago and have made it a few times since then. It's a foolproof easy dinner, and it's delicious!

Let's get our mise en place in place. You'll need:

2 teaspoons Dijon mustard
3 1/2 tablespoons red-wine vinegar
4 tablespoons raw honey
1 large garlic clove, finely chopped
1 teaspoon coarsely chopped fresh rosemary
1 tablespoon plus 4 teaspoons olive oil
1 3/4 pounds pork tenderloin
3/4 teaspoon coarse salt
freshly ground pepper
1 large fennel bulb, trimmed and sliced lengthwise into thin strips
1/2 head escarole, cut into 2-inch strips
1/2 pound spinach, washed well


It's a pretty simple prep right off the bat, huh? The first thing I did was preheat my oven to 375 degrees Fahrenheit. In a small bowl, whisk together 1 teaspoon mustard, 2 tablespoons red wine vinegar, 2 tablespoons honey, garlic, rosemary (I ran out of rosemary, so I used some dried thyme - not AS flavorful, but it works) and 2 teaspoons oil.


Once your glaze is made, place your pork tenderloin into a shallow baking dish and pour the glaze on top. Flip the pork a few times to coat all sides really well and then sprinkle the top with a generous amount of salt and pepper. Roast the loin in the oven for 30 - 35 minutes (until the thickest part reaches 155 degrees on a meat thermometer). Spoon the glaze over the pork occasionally as it cooks.


Once you pull the meat out of the oven, you want to let it rest for 5-10 minutes before cutting into it. If you are using a meat thermometer, you want it to read 160 degrees before you cut into it. Check out my post on The Resting Period for more info on this process!


While the pork is resting, make the vinaigrette for your greens by whisking together 2 tablespoons honey, 1 1/2 tablespoons vinegar, and 1 teaspoon mustard. Whisk until the honey is dissolved and then slowly add a tablespoon of olive oil into the mix until it is emulsified well. If you want, you can also whisk in any cooking juices from the dish the pork is in.


Add 2 teaspoons of oil to a large saute pan, along with a splash of water. Add the fennel, escarole and spinach to the pan and cook until the greens are wilted, about 1 1/2 minutes.


Like the other night, this large amount of greens will wilt down to about a third of this size. Once that has happened, add the vinaigrette along with some salt and stir the greens to coat, about 30 seconds. Remove from the heat immediately.


I let my greens sit for an extra minute in the pan and they got a little over-cooked, so once they are done, make sure to plate them immediately so they are removed from the heat. Slice the pork about 1/2 an inch thick and arrange on the plate with the greens. Tah-Dah!

Thursday, March 17, 2011

The Luck o' the Irish

Happy St. Patrick's Day to all of you! I was out celebrating tonight and so I will leave you with this!

Top Ten Biggest Beer Buying Holidays
From Flickr - by BuzzNights

Sláinte! (an Irish drinking toast that means 'health')

Wednesday, March 16, 2011

Bina Osteria

Restaurant Week here in Boston is quickly coming to a close, so I'm going to take full advantage over the next few days! Today for lunch, two of my friends/co-workers and I are going to try Bina Osteria. None of us have been there before today, and we all found the menu to be very inspired.


There were quite a few choices for our first courses...decisions, decisions! My top choices were probably the Little Lamb Meatballs with Goat Cheese Fondue, the Sea Urchin Warmed in Olive Oil, Preserved Lemon and Lardo, or the Warm Mushroom Confit. How do you even begin to decide between such tempting options!?!? Turns out, I didn't have to! We all shared! The sea urchin toasts with lardo were decadent, and I'm glad we shared! The hint of ocean that I got from each bite was very refreshing. As for the lamb meatballs, they came in a delicious tomato sauce which blended so nicely with the bite that the goat cheese flavor offers. Both the meatballs and the mushrooms came in these adorable little warming pots. The mushrooms were very comforting and warm, with a lovely forest-y flavor to them.


For the entree, we had our choice of four different options. Again, we all ordered different things so we got to try almost everything there. The Grilled Shrimp Salad with arugula, citrus, green olives and shaved red onion was very tasty. The shrimp were grilled to perfection and the little pieces of pink grapefruit made my day. I love when unexpected ingredients show up in a dish that would otherwise seem mundane.


As for the Shaved Porchetta Sandwich with grilled red onion, provolone and hot peppers, it was kind of like a different take on a Cubano. There was arugula on the sandwich as well and it offered a great peppery flavor for the pork and mild provolone. The hot peppers were an added bonus! The bread was crispy but not crumbly and was easy to eat. I have a pet peeve about sandwiches that you can't bite into easily. This one was great!


Finally, the Spaghetti with Tomato, Basil and Parmigiano Reggiano - FRESH PASTA! Need I say more!? We asked before ordering and the waitress assured us that all their pasta is made in-house, and was it ever! It was very flavorful and deliciously al dente. It was a nice helping as well, and topped with some fresh Parmigiano. It was an excellent bowl of comfort food on this cold and rainy day.


We had a lovely lunch at Bina Osteria today.We decided to go with the 2-course for our lunch since we had to get back to work. I also had dinner plans this evening, so I didn't want to go overboard on the desserts at all, and I knew I'd be getting one at Radius. This was a lovely break to an otherwise stressful day!